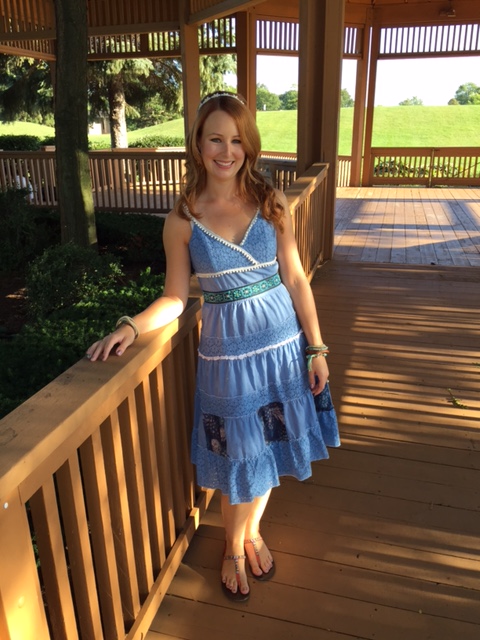
And YOU ARE BEAUTIFUL in this AMAZING dress refashion!
**********************
Now on to the hard part again.
I just don’t even want to type these words, but we have to say “see you later” to the beautiful and talented Marisa from The Refash Stash today. 😦
Marisa has been so much fun to work with and to think she’s only been blogging for three months! I hope you will all go over and subscribe to her site so you can keep up with all of her amazing sewing projects. After all, she does “think outside the stitch”. (I love her tagline!)
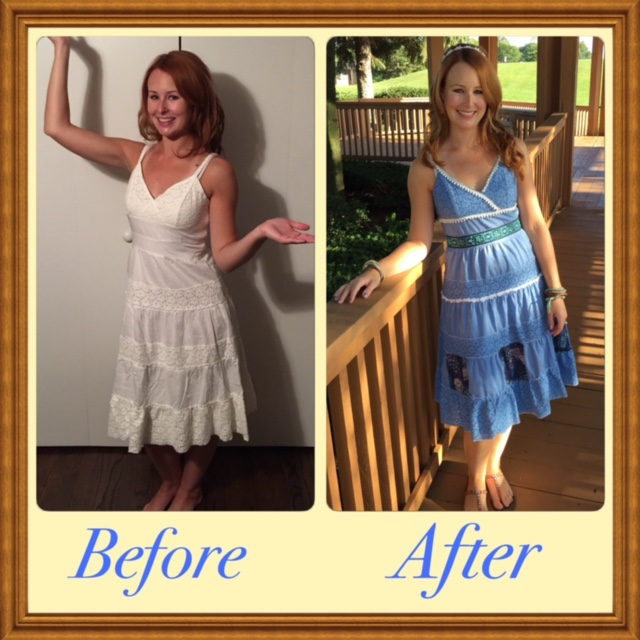
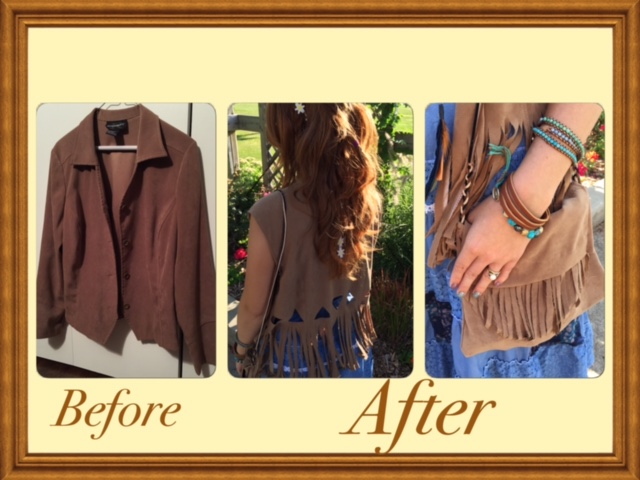
And I also LOVE her Boho Chic Refashion and I know you will, too!
Let’s take a look:
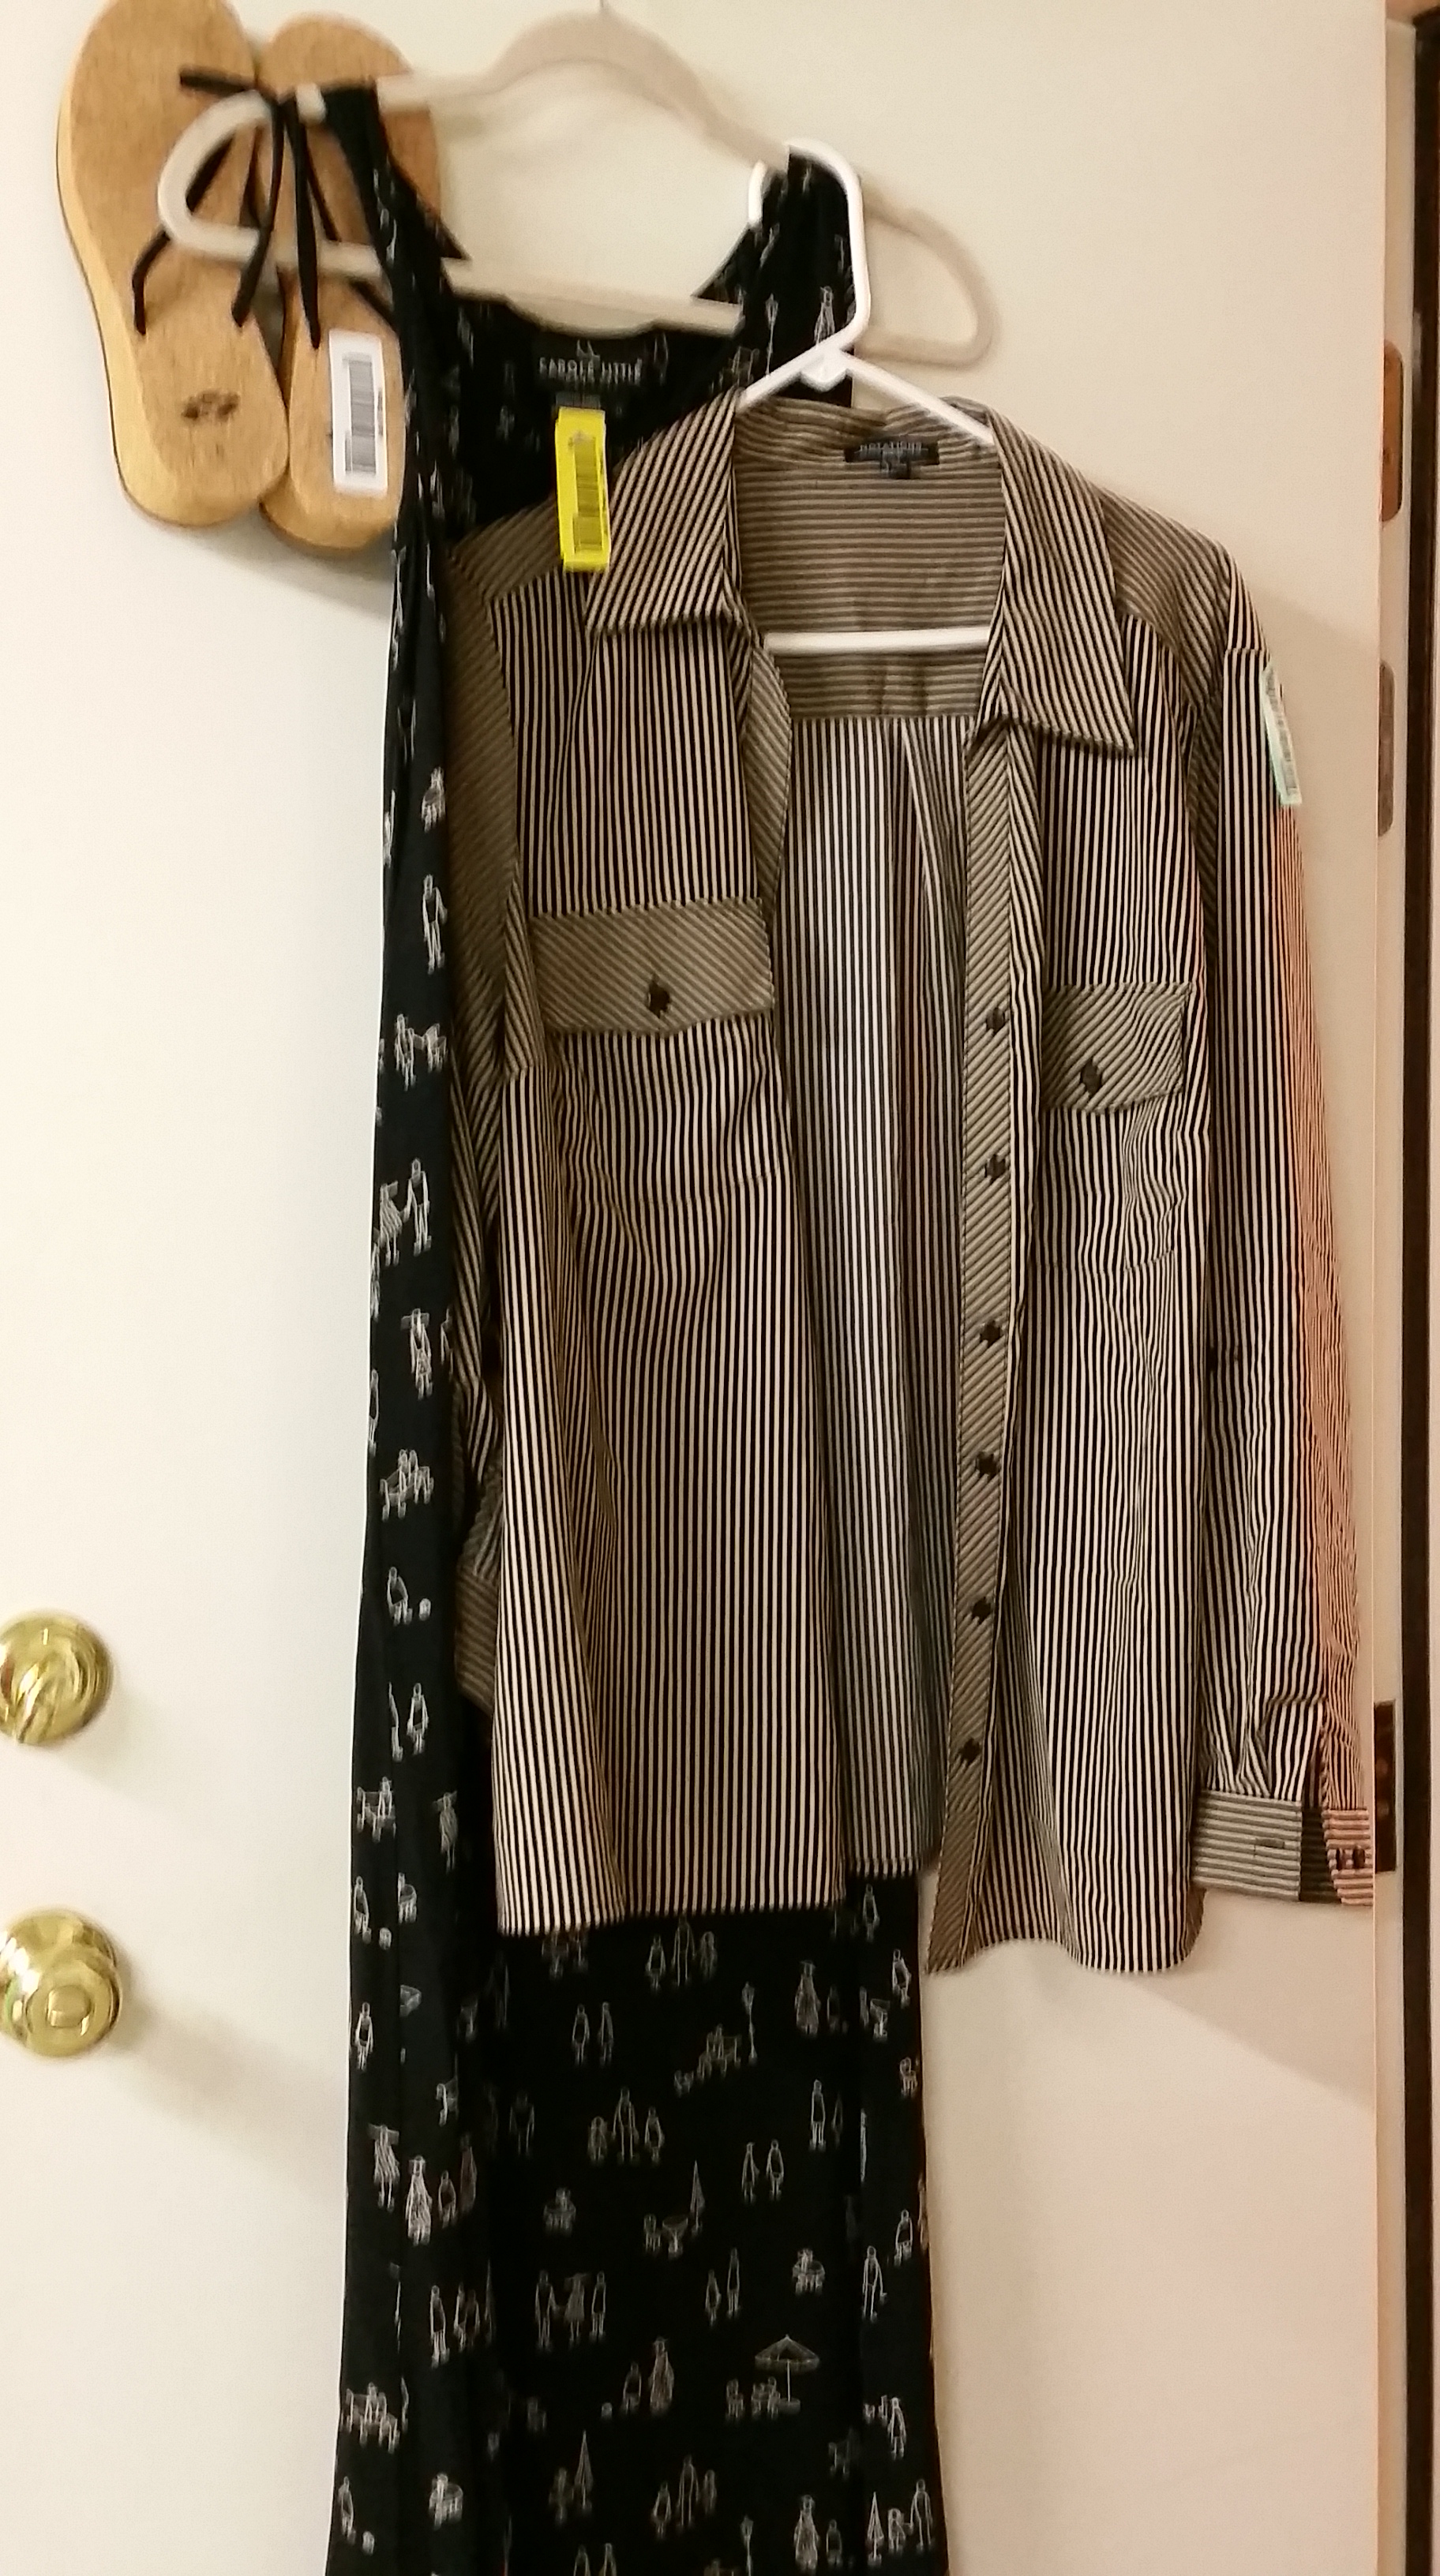
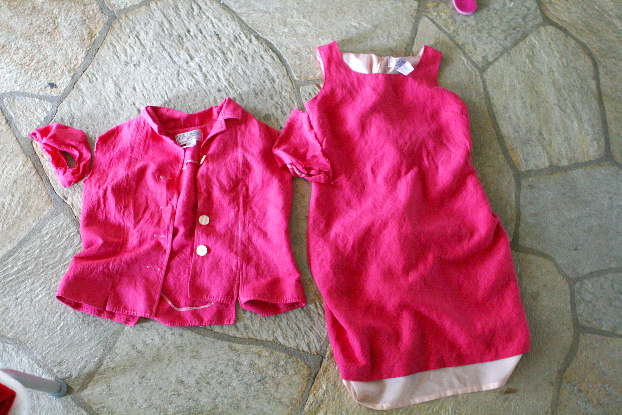
“I started with two plain pieces of clothing. Really not bad as is, but come on this
is a Refashion competition!
First off, what is a Boho chic outfit without a. vest!? I’m going to have to say
nothing!
I dismantled my faux suede blazer…
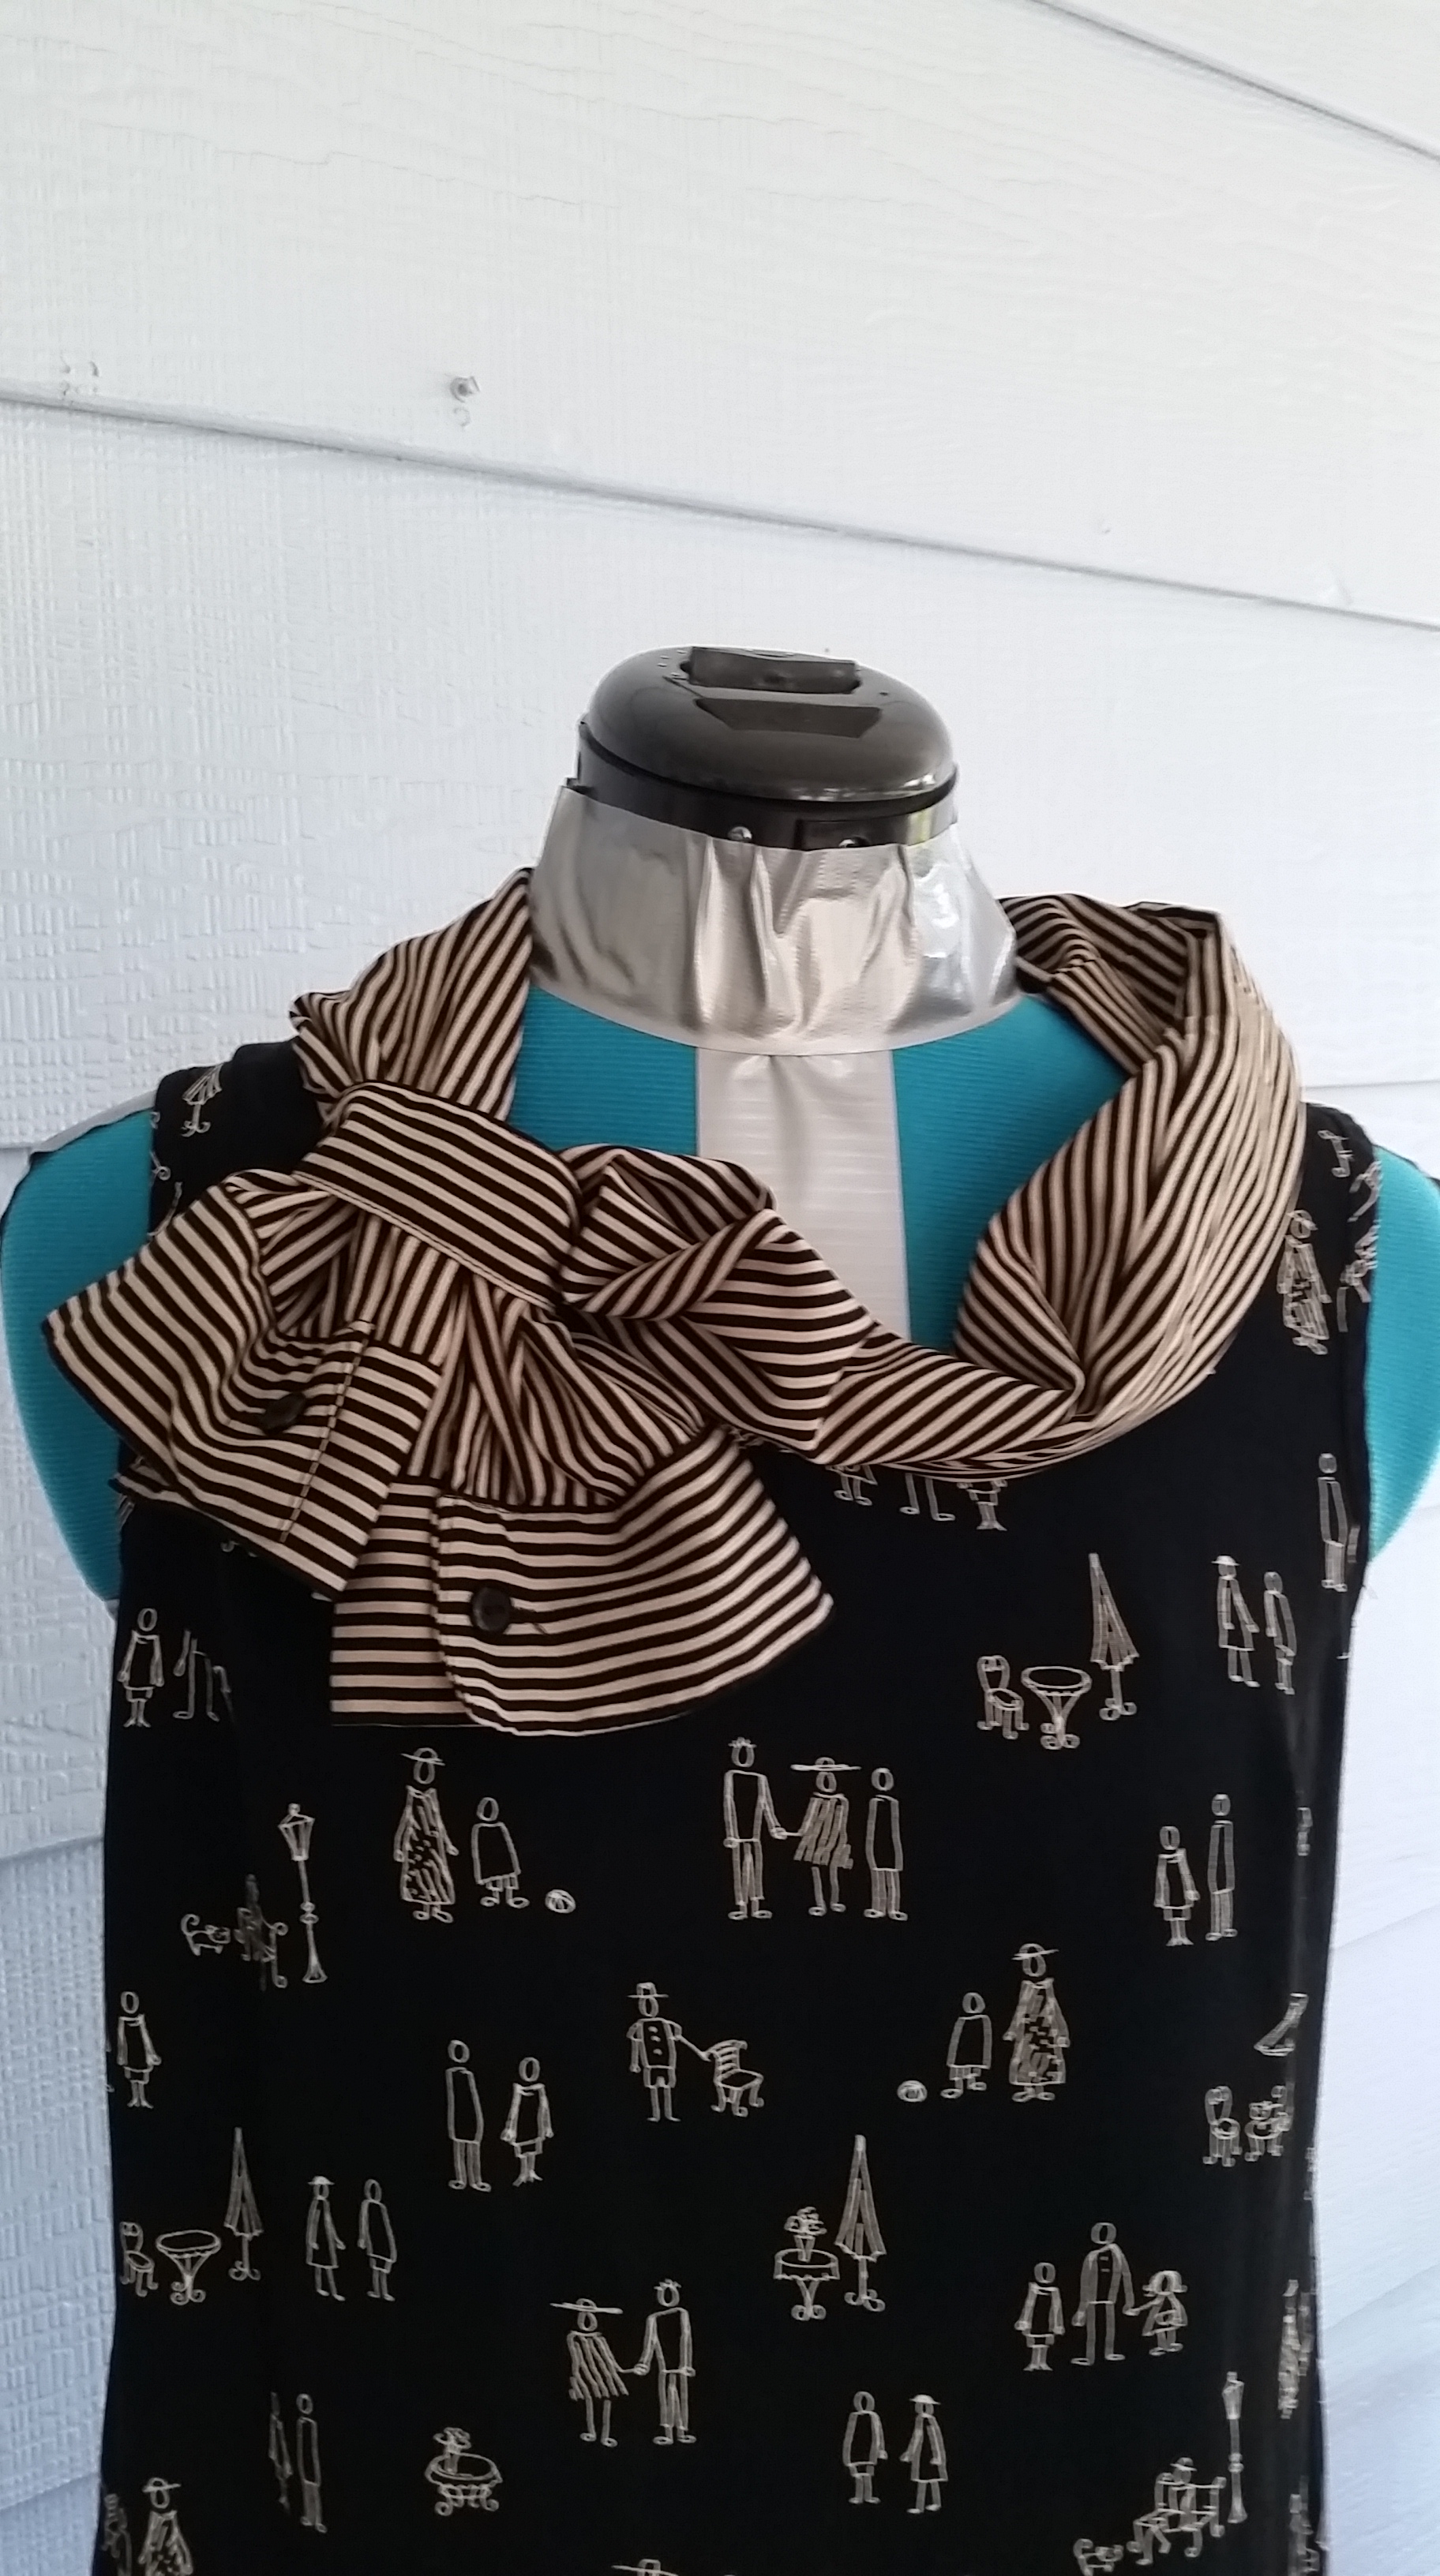
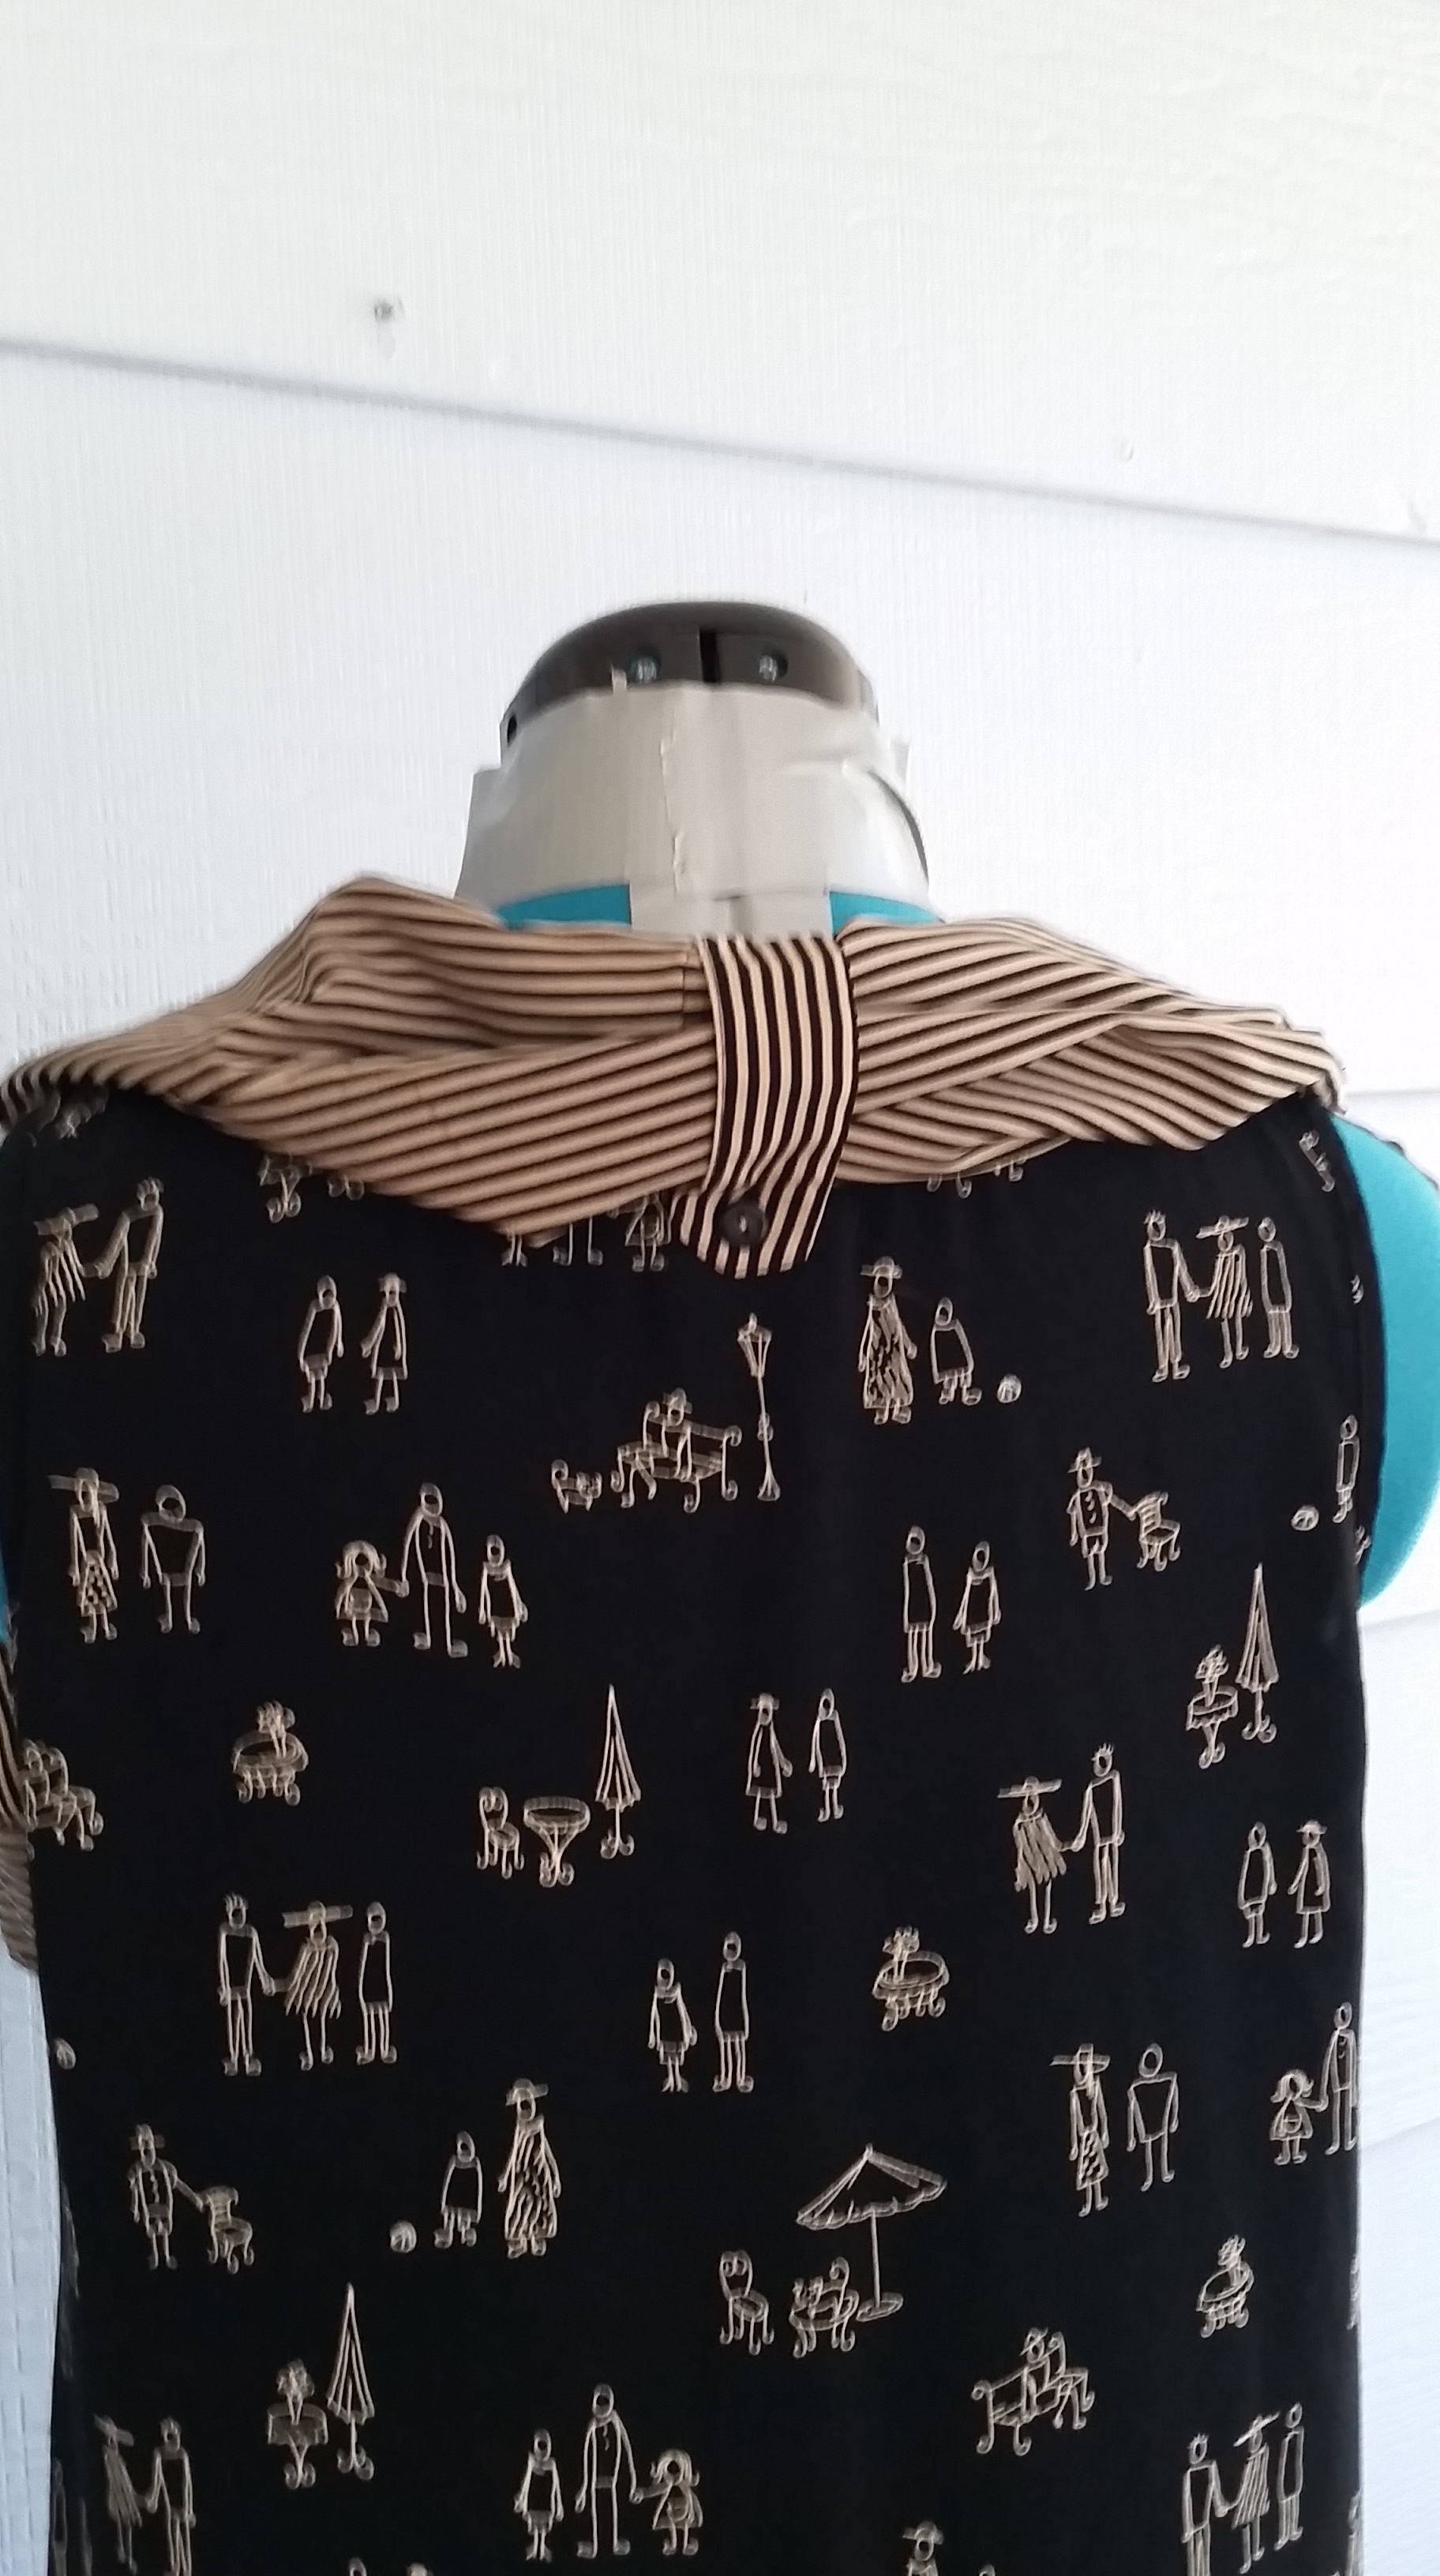
I added some character to my soon to be vest by cutting fringe and making triangle
cutouts.
I used the material from the sleeves and made a purse!
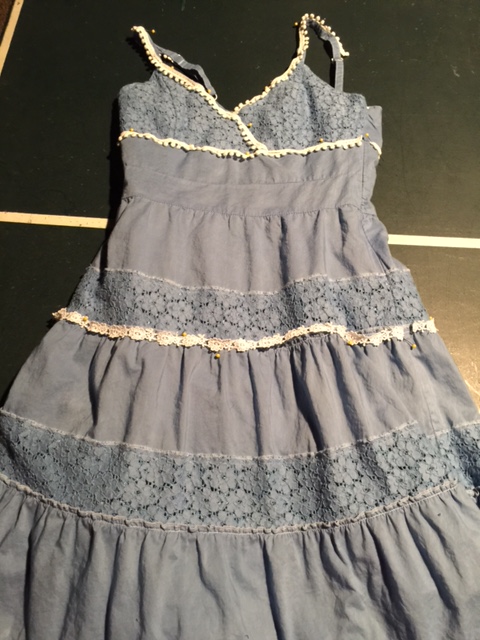
Then I dyed my dress and added some embellishments!”
**********************
Thank you so much, Marisa for being a part of Refashion Runway this season! We have loved all of your creations!
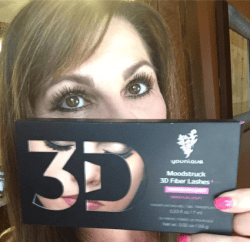
We’d like to thank you by sending you a Younique prize package of 3D mascara, lip gloss, and eyeliner, plus a cosmetic bag.
We interrupt Refashion Runway to bring you this special announcement full of cuteness!
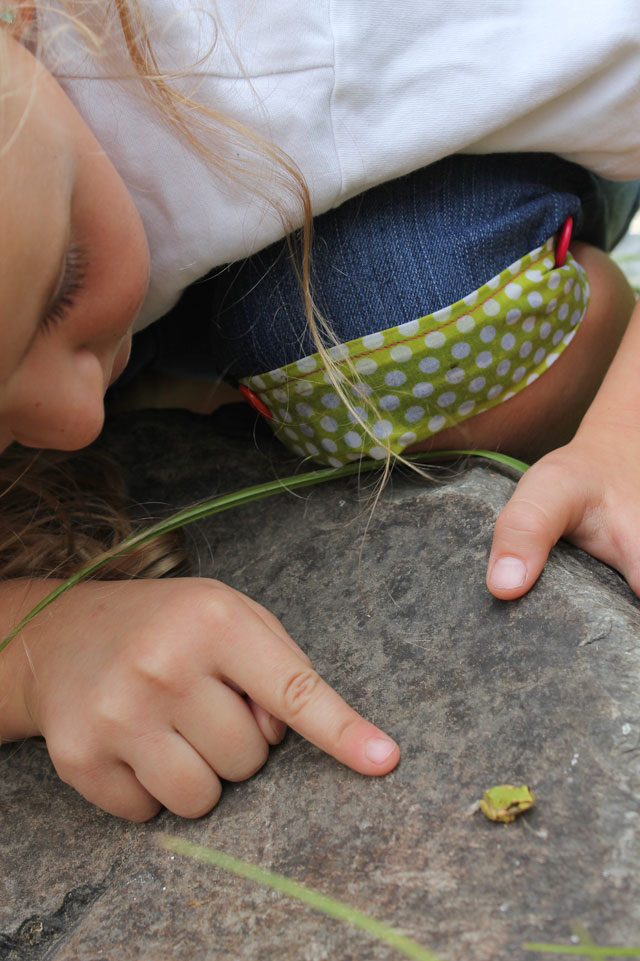
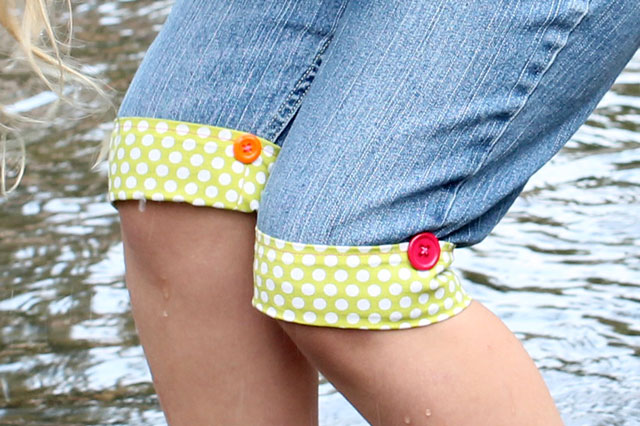
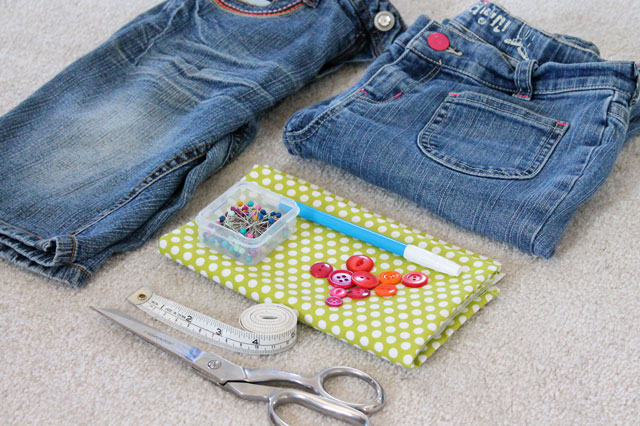
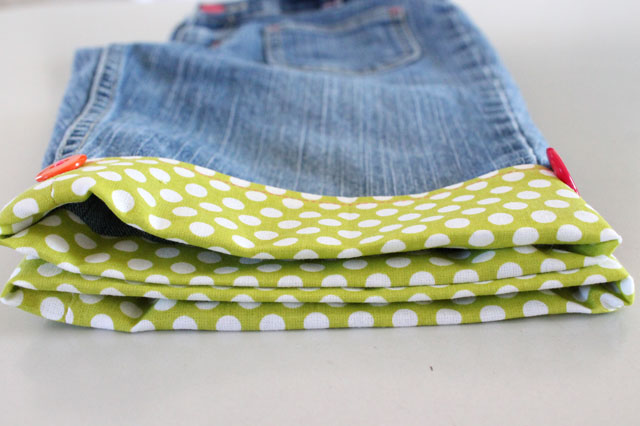
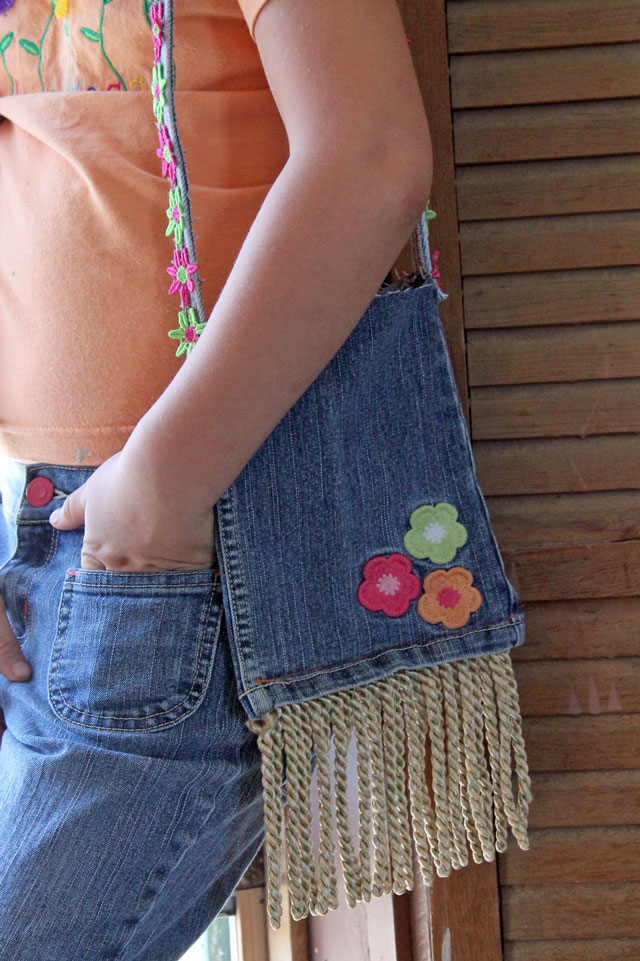
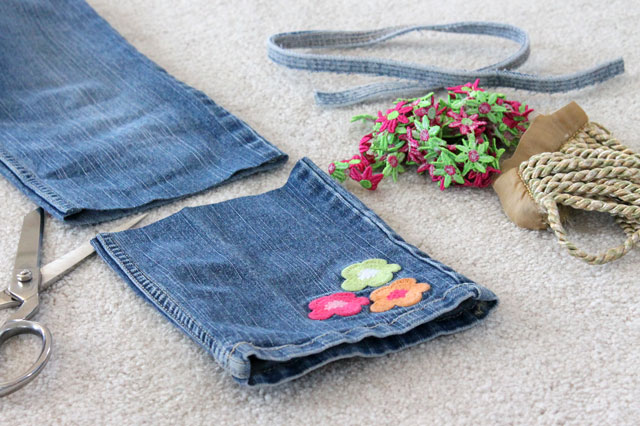
If your child’s growth spurt has resulted in some “high-waters” that are now too short or you have a bunch of pants with holes in the knees, turn them into some cute shorts. You could just cut them off and hem the bottom, or even leave the raw edge and let them fray, but a pop of color with a fabric cuff gives them a whole new look.
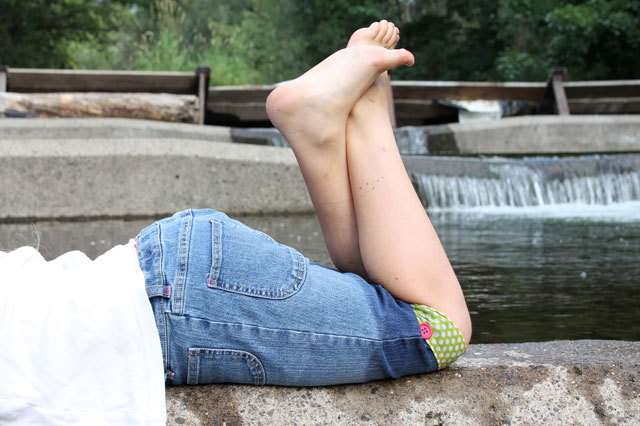
Nothing better than throwing on a cute pair of shorts and a t-shirt and heading out with the whole day ahead of you just see what the day will bring.
Even better when you’re wearing a pair of shorts made from a too small pair of pants.
To see the entire tutorial on how to make these cute DIY shorts,
I had so much fun being a guest on Fox 13 The Place in SLC today. Everyone was so welcoming and nice. Brooke Graham and I got to talk refashioning, sewing, Refashion Runway and The Refashion Handbook.
You know all the fun stuff… 🙂
The studio is beautiful!
If you’d like to see today’s segment, click on one of the pictures or you can click here.
I’m hanging out in Salt Lake City right now because Brooke Graham, one of the hosts of Fox13’s Daily Lifestyle Show, The Place invited me to come to the studio tomorrow morning and talk about The Renegade Seamstress, Refashion Runway and my book, The Refashion Handbook.
I’m. So. Excited.
Kara Muehlmann, from While Camden Sleeps and a contestant on Refashion Runway was a recent guest on the show where she showed how to make an AMAZING beach cover up. (Click here to see how she make it, it’s super cool!) She happened to mention Refashion Runway and it intrigued Brooke enough to find out more about it. Thanks, Kara!
Such creative contestants this week! I can’t wait for you to see all of the skirt and dress refashions. I promise, you are going to love them. Really amazing transformations here. But, before we take a look, I just need to clarify something.
When the weekly challenges are created, I intend for them to be quite open for interpretation. I always hope they will be open enough to allow for the contestants to be as creative as possible. This challenge was no exception.
I didn’t realize at the time but, I worded this challenge in such a way that it could’ve been interpreted in a couple of different ways. I worded it “Maxi Skirt or Dress” so one could’ve interpreted that as being a maxi skirt or a maxi dress. Or, one could’ve interpreted that as a maxi skirt or a regular dress.
So, with that being said, be sure when you vote this week, that you vote for your favorite “Maxi Skirt or Dress” because that is how I worded it. Don’t limit yourself to only maxi. So whether it’s a maxi or a regular dress, pick your favorite one and vote for that one.
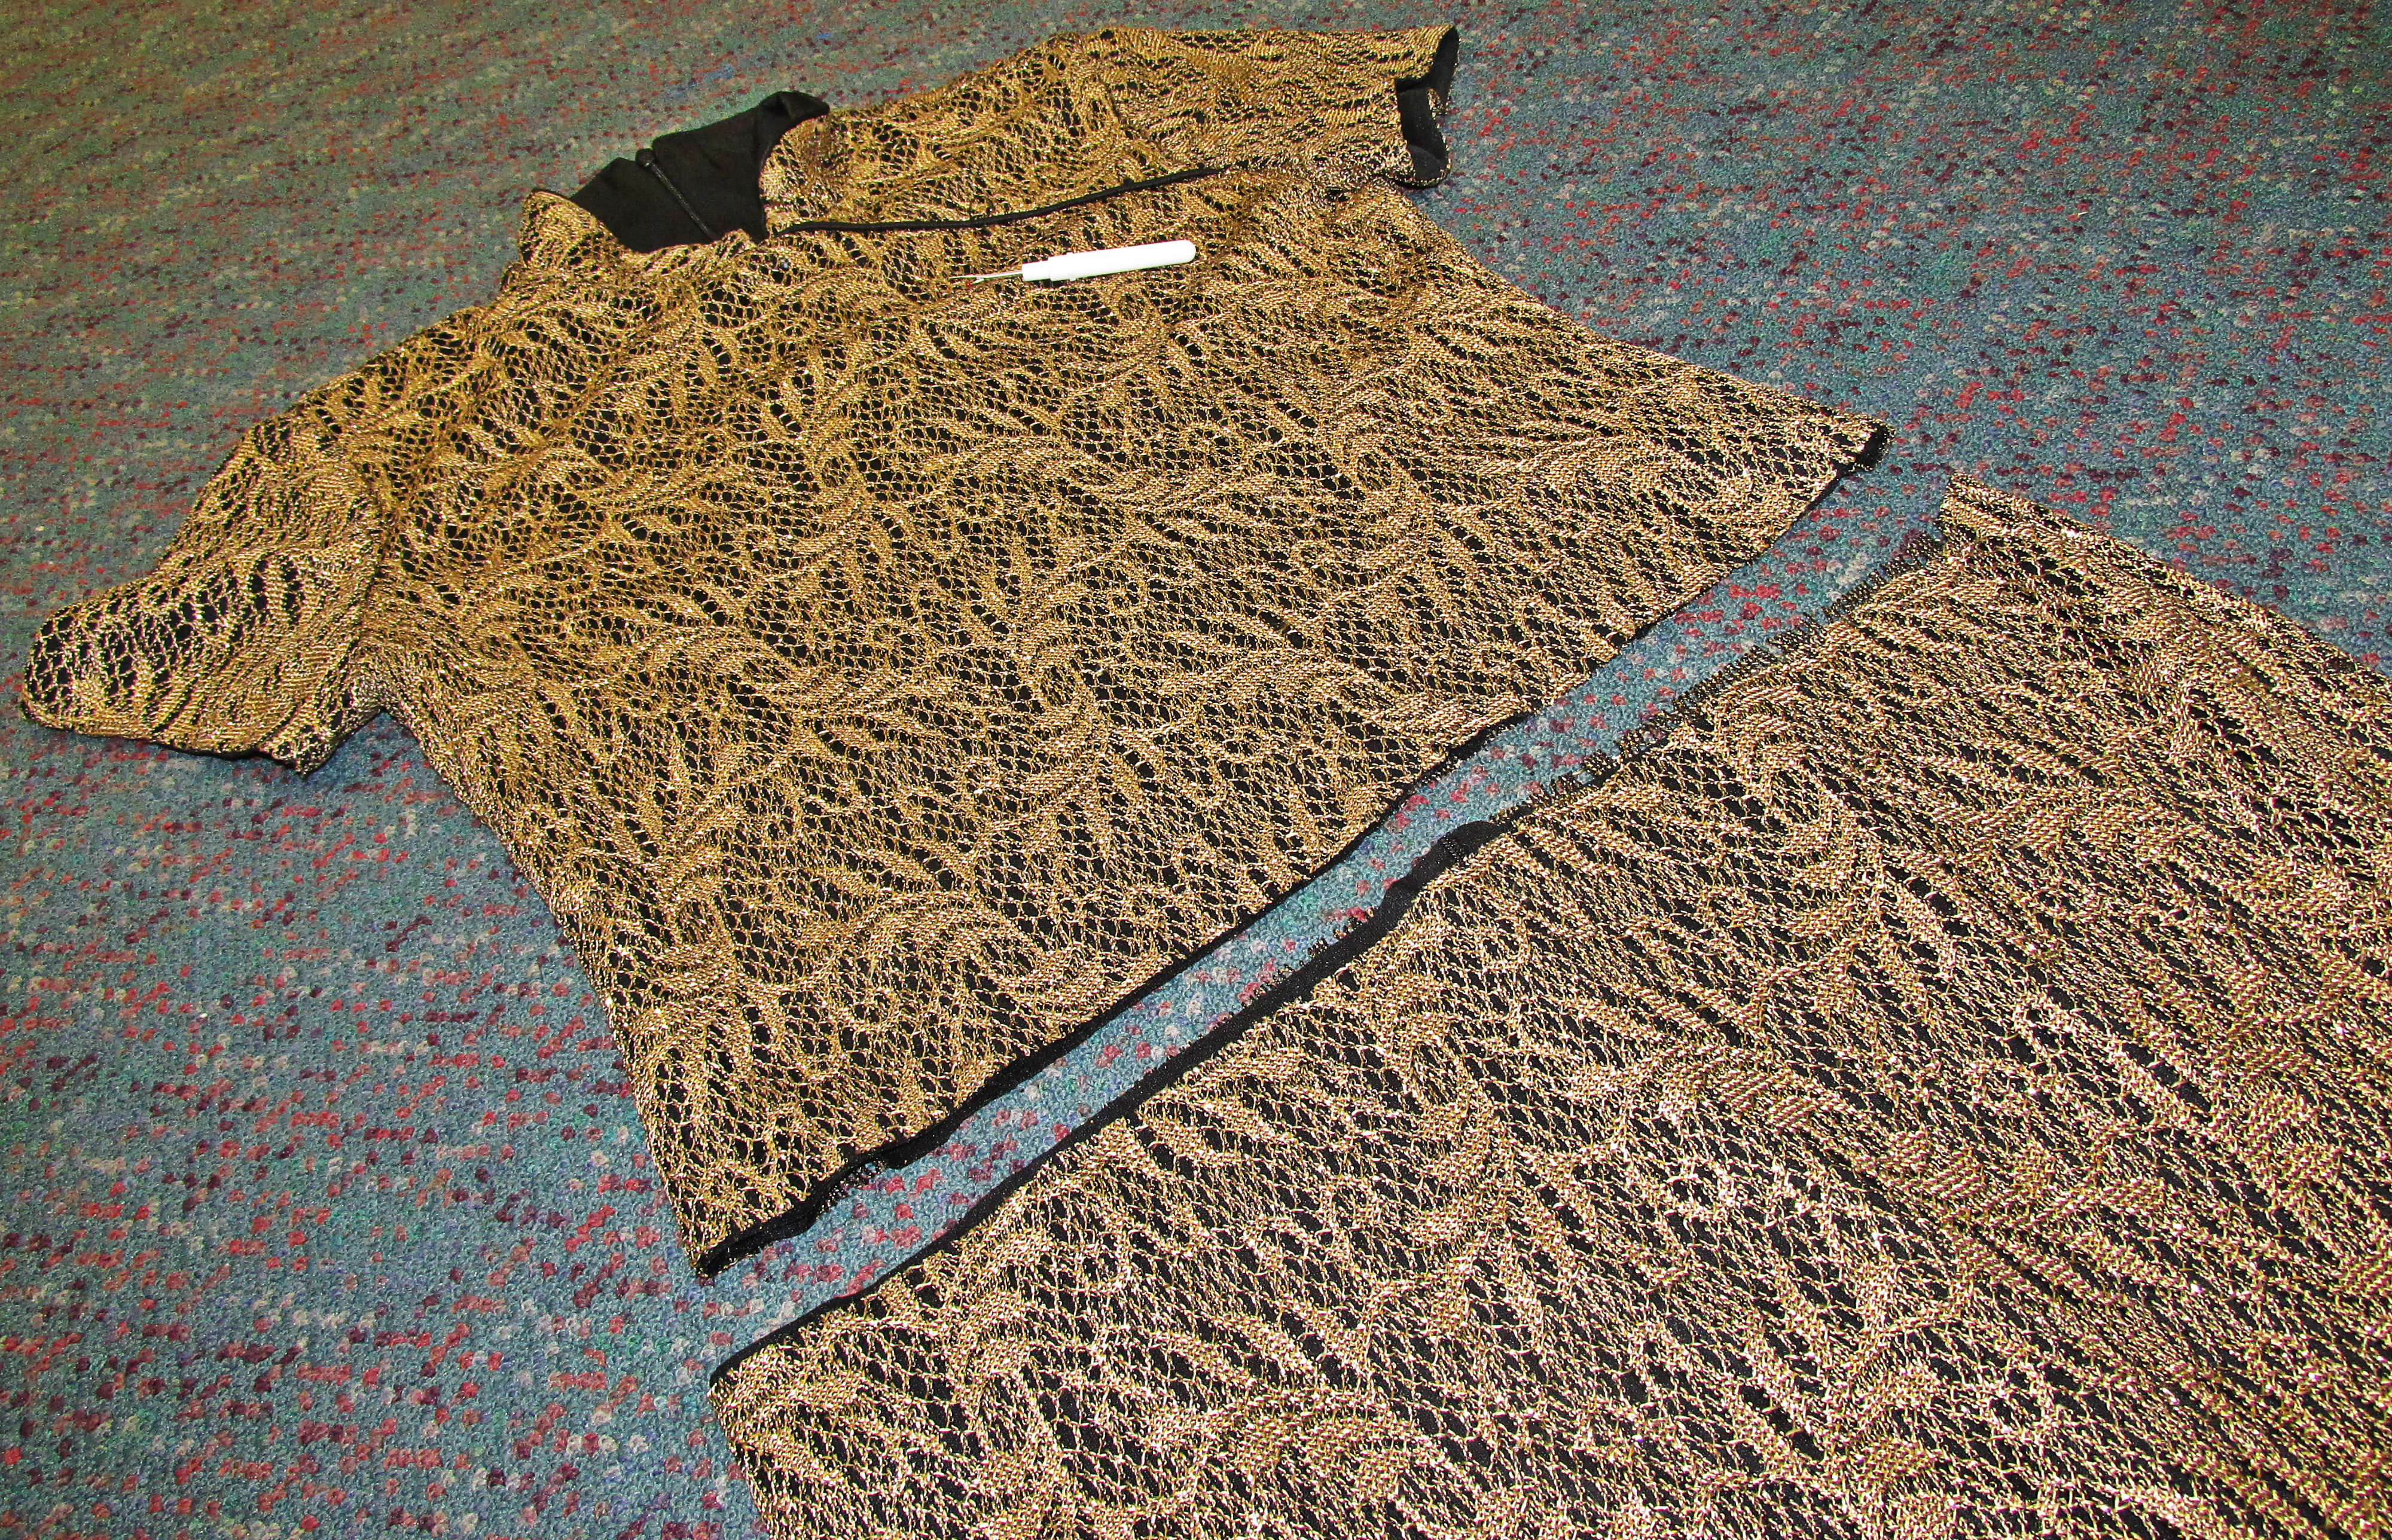
“For this week’s challenge I refashioned a maxi dress…from a
maxi dress. I was drawn to the gorgeous gold metallic netting overlay and I had to
have it.
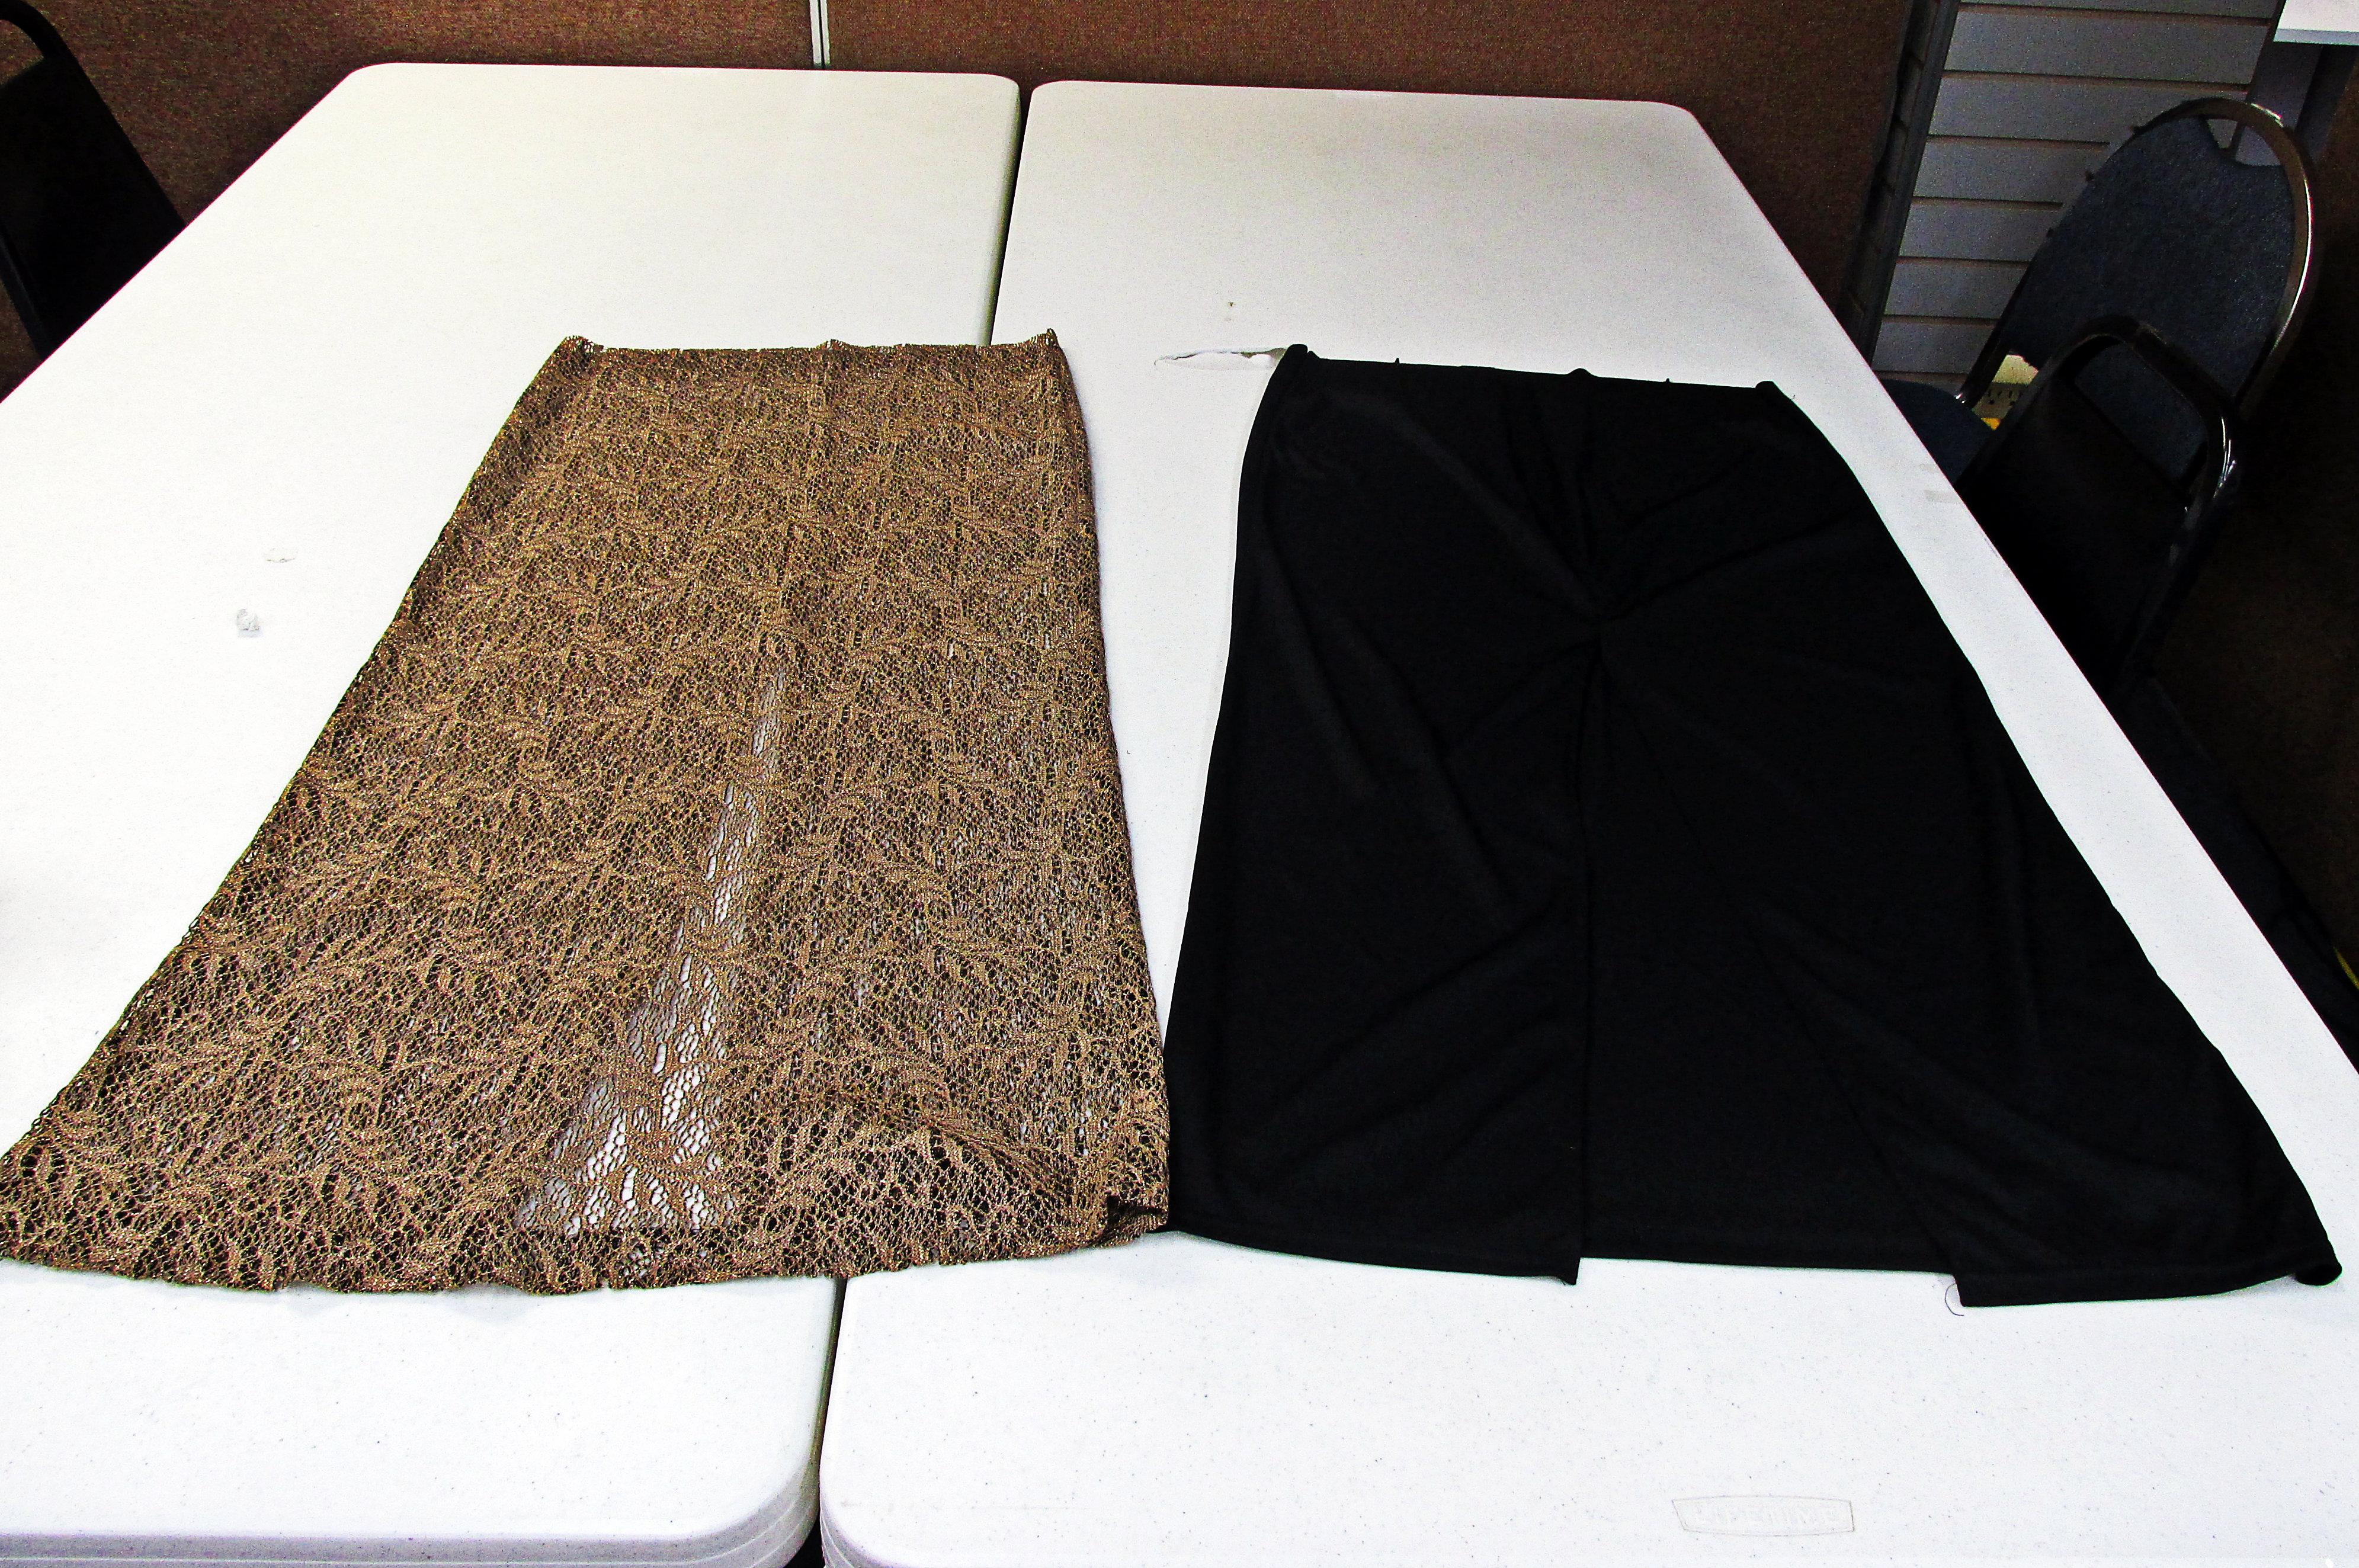
I cut the dress at the waist and separated the netting from the black
lining.
I serged the raw edge where the black lining was cut and made a casing for
elastic.
There was so much of the gold netting, that I made a kimono from the
scraps.
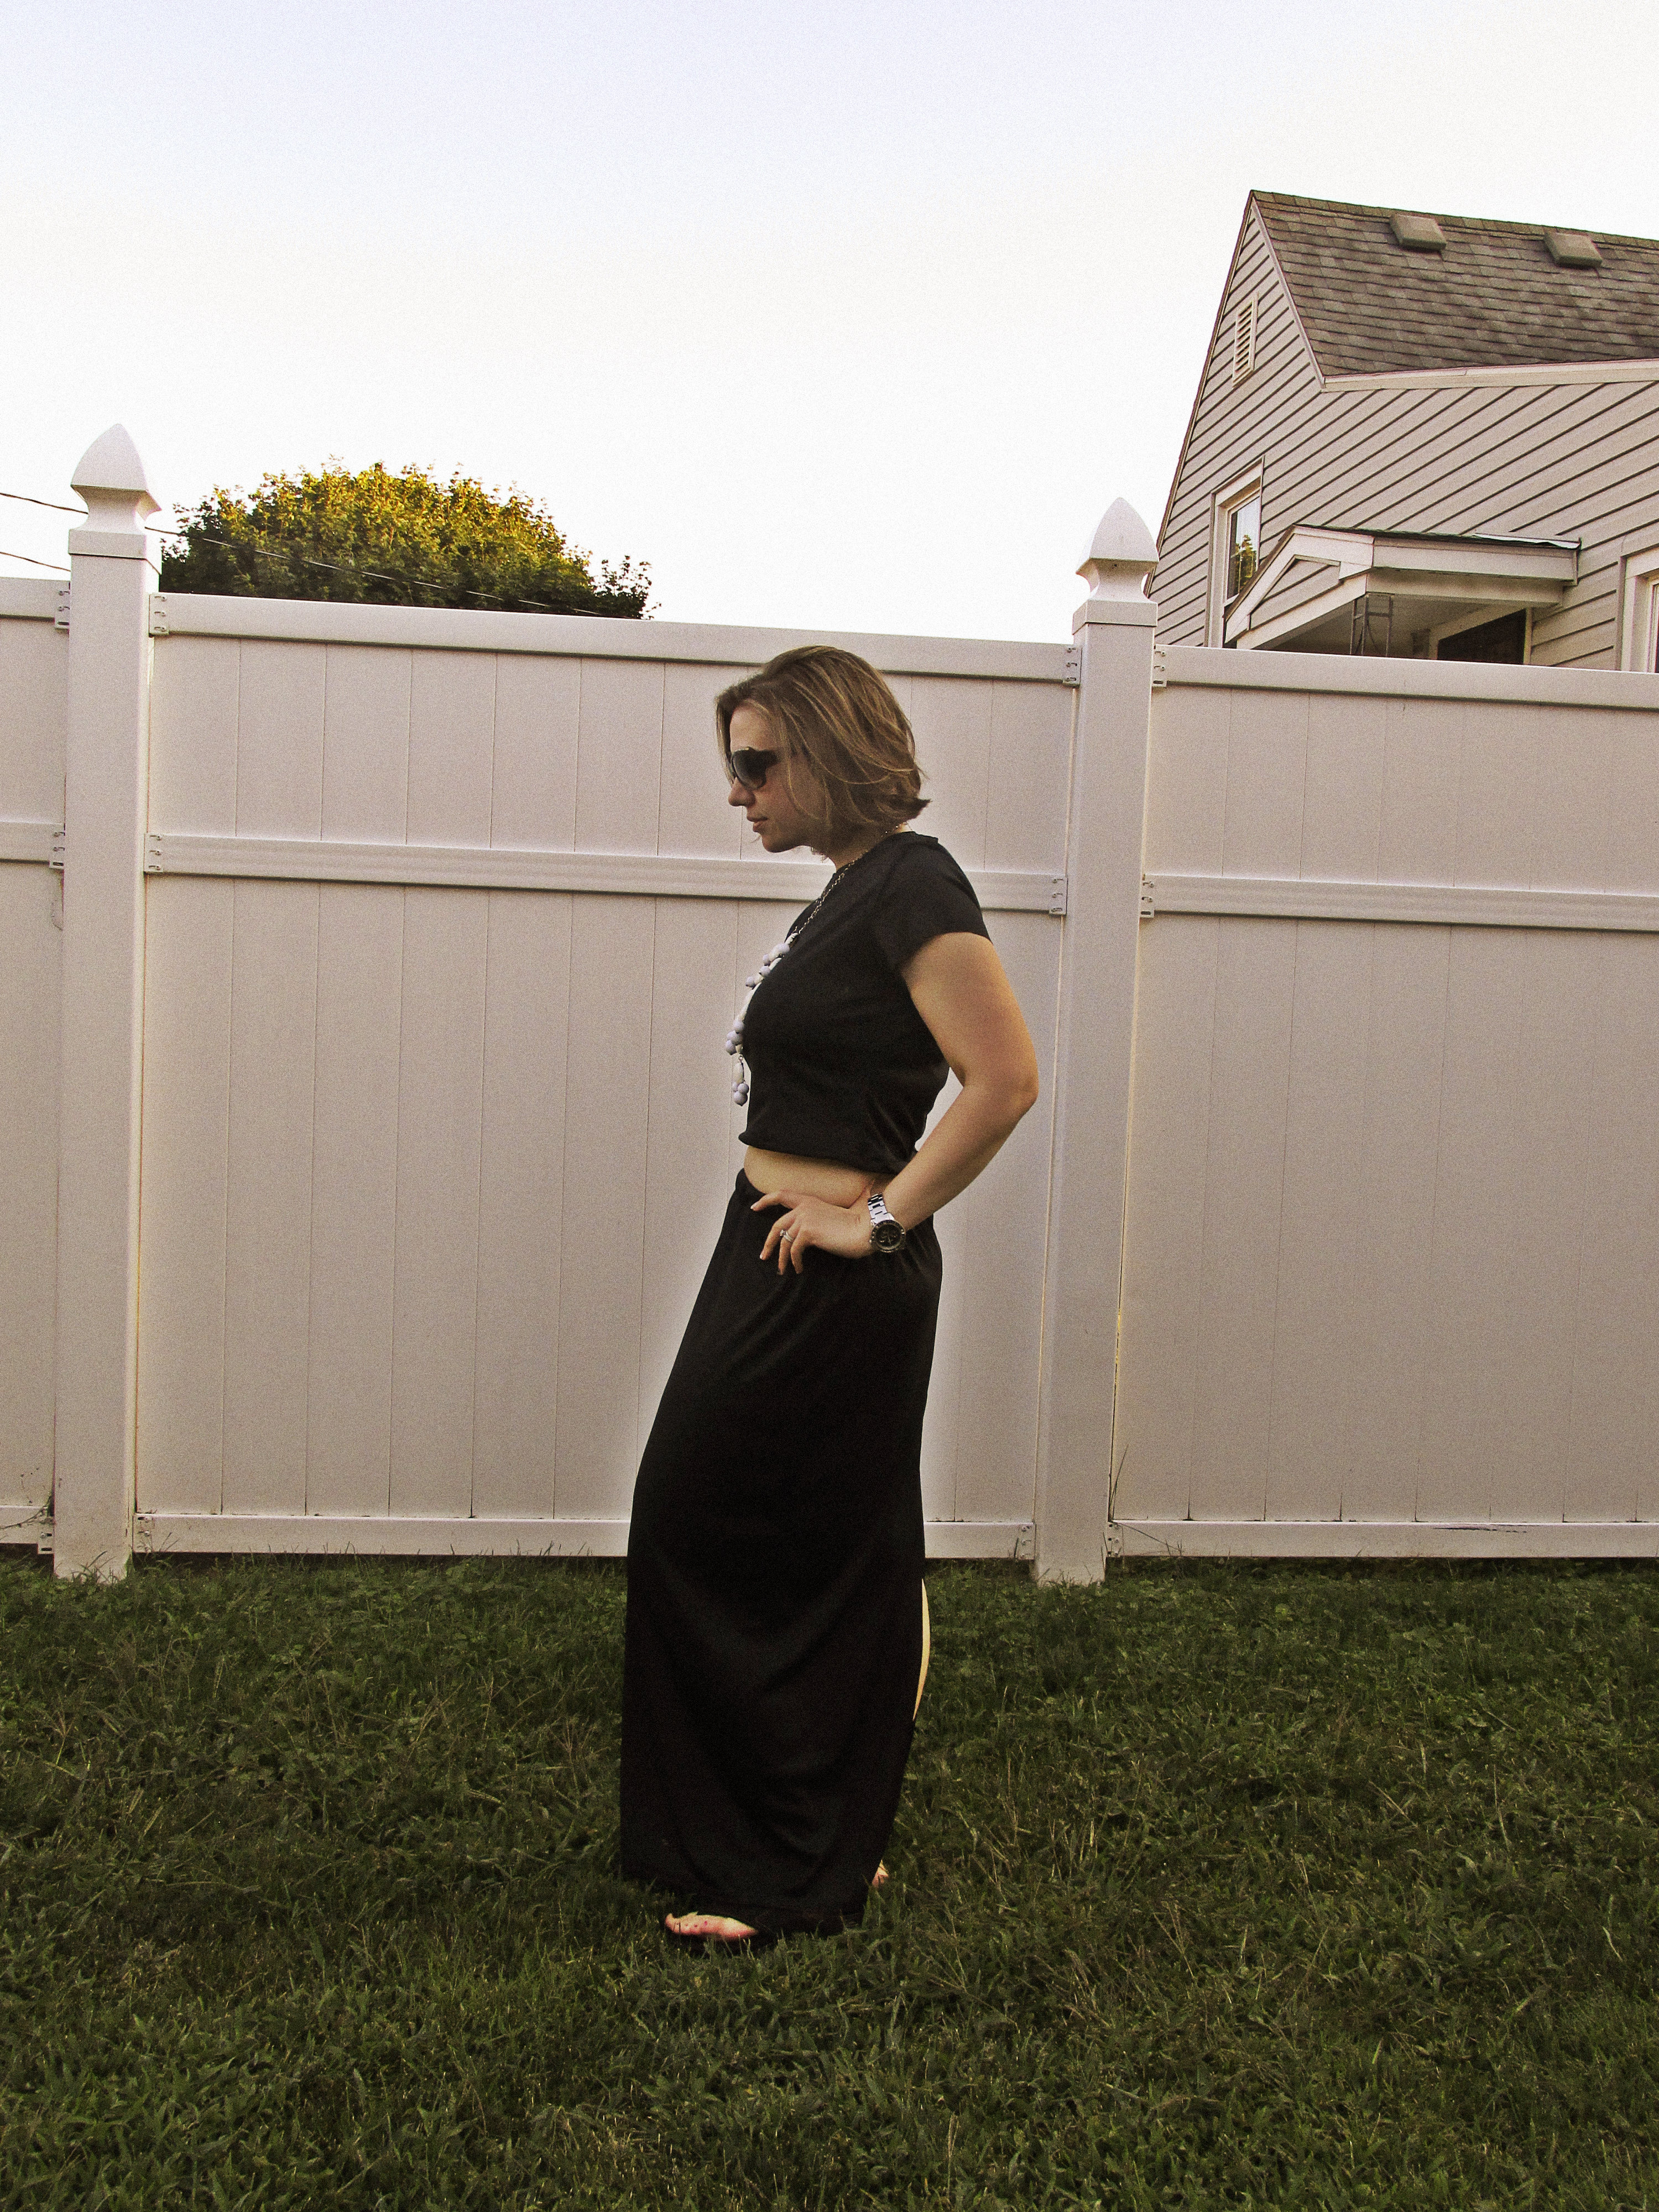
I still had the top scrap of the dress leftover and I decided to get a
little adventurous… I removed the gold netting from the lining, along with the
collar and other embellishments. I gave all the raw edges a clean hem (not an easy
task since the material was SO thin and stretchy!).
What I ended up with was a 3
piece transformation: A Maxi skirt, a crop top, and kimono; 3 pieces that can be
worn together or separately for only .99 cents. I’ll call that a win! 🙂
This is the very abridged version of all my work 🙂 I’ll have a more detailed
tutorial on my site.
Thanks :)”
***
Now let’s see the transformation Sarah from Life is Beautiful has created for us this week.
“Okay guys, I’m so embarrassed that I thought the challenge meant a maxi
skirt or a dress, and not a maxi skirt or a maxi dress. Can we blame it on
how English isn’t my first language and I moved here from Korea when I was
10 years old so I’m practically a F.O.B(fresh off the boat)? Haha, does
that work? If so, yes! Count it! Nevertheless, thank you so so much for
your understanding and being flexible, you guys are truly awesome!
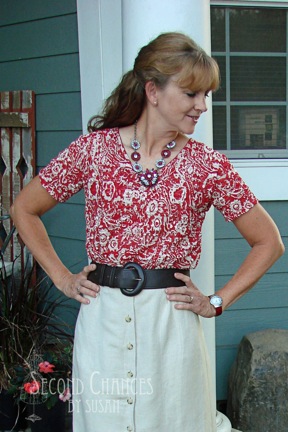
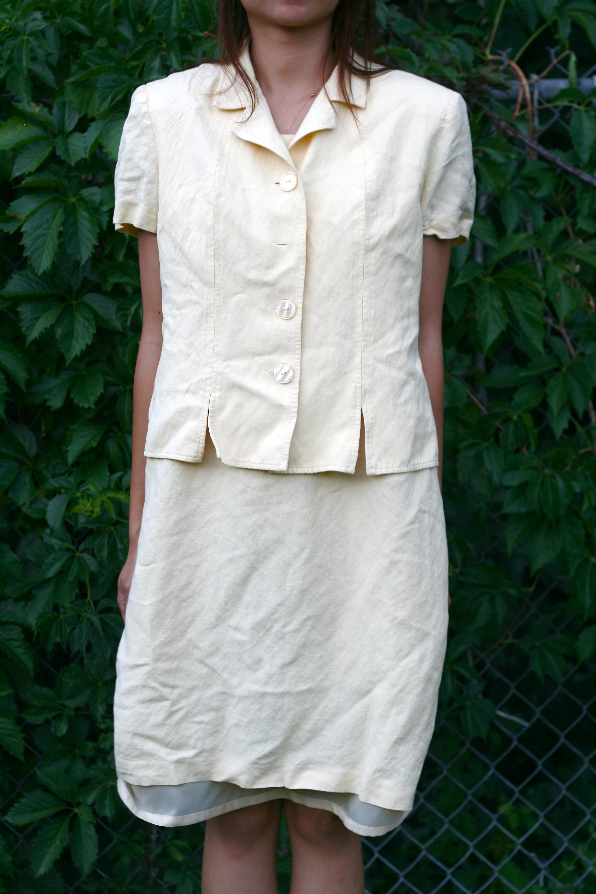
Hello Refashion Runway readers! Thrifted dresses are one of my favorite items to refashion so I was really excited about this challenge!
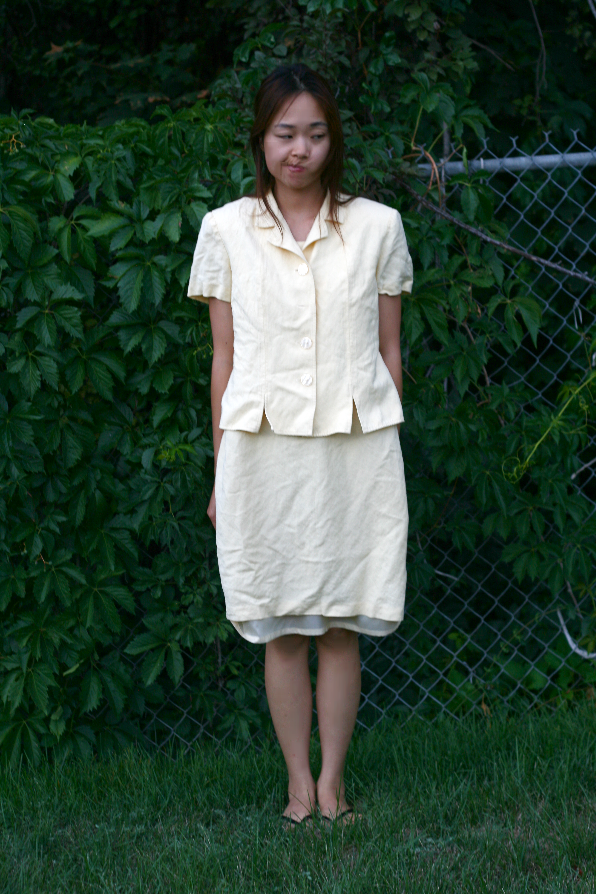
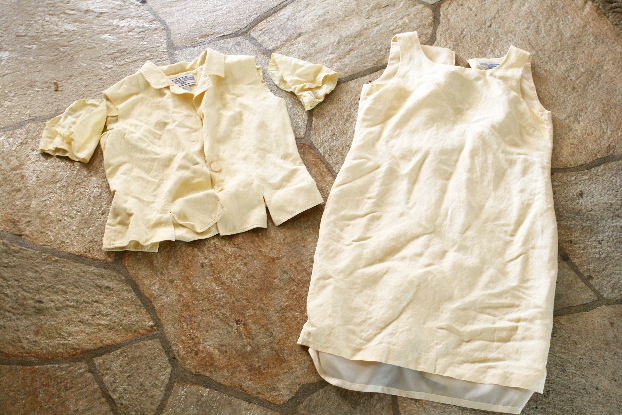
I got this really outdated, oversized, faded yellow dress suit from a thrift store. I am still in love with peplum design clothes, I think peplums are so flattering on many body types as it accentuates the waist-to hips ratio and by helping to make your waist look slimmer. After debating whether to dye this dress to a mint color or red, I decided to go with red since I’ve always wanted a red peplum dress.
BEFORE:
You guys, what is this face? I mean, seriously, what is this FACE!!!??? In my head I was trying to look all cute like a sad little puppy face with a pout but no, this doesn’t have an ounce of cuteness in it. I literally am giggling right now and laughing at myself as I am posting this picture. I know many people would just not post this but it’s just so funny to me. HAHAHAHAHA okay, moving on….
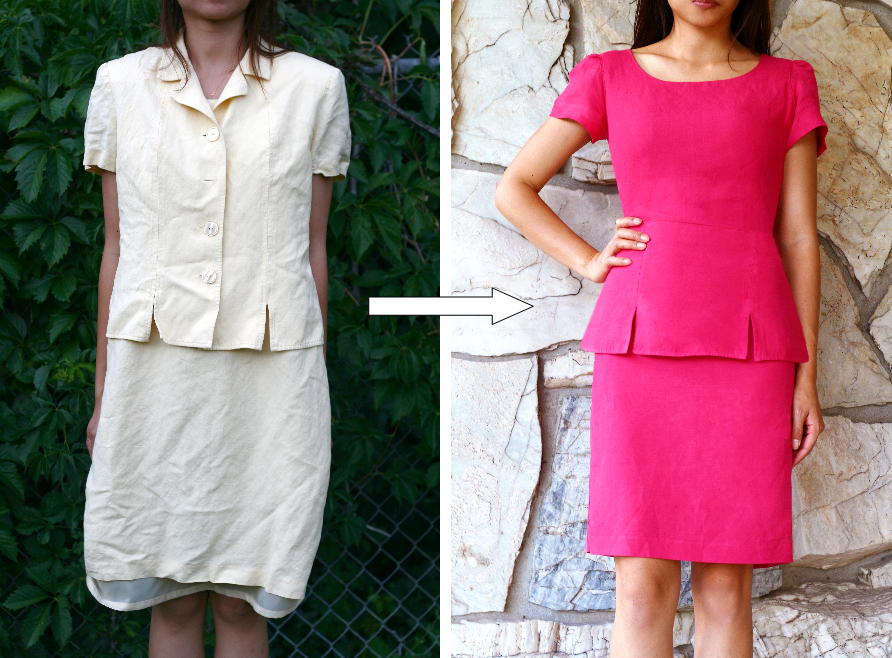
BEFORE/AFTER:
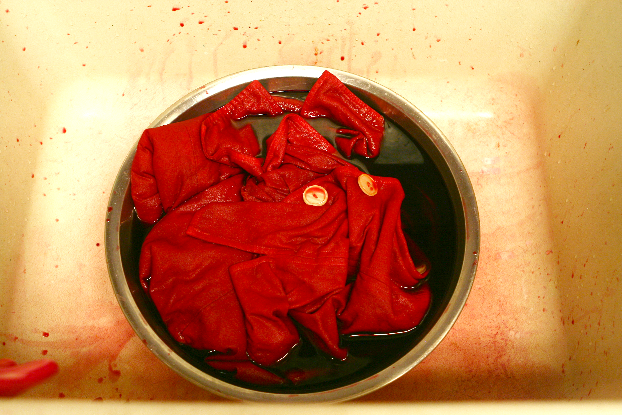
The first thing I did was dye the faded yellow dress suit.
I was on a time crunch(the story of my life) so I didn’t take step by step pictures along the way.
AFTER:
Do you want to know how to put full make-up on in under 5 seconds? You don’t! You put an over sized sunglasses on!
The camera and the lighting picked up more of a pink, fuchsia hue but in real life it’s a classic cherry red color. The two slits on the bottom of the peplum is the same slits as the jacket. I cut off the sleeves from the jacket and added it onto the sleeveless dress, altered the dress smaller and form fitting, cut the lining of the dress shorter so it wouldn’t show,
What you’ll need:
-A dress suit
-Fabric dye
-Big bowl or a bucket
-Gloves
-Matching thread
-Sewing machine
-Scissors
Estimated time: 3-4 hrs.
Budget: $10
Skill level: A confident intermediate to advanced
***
Let’s check in on Kara from While Camden Sleeps and see what she has created for us this week.
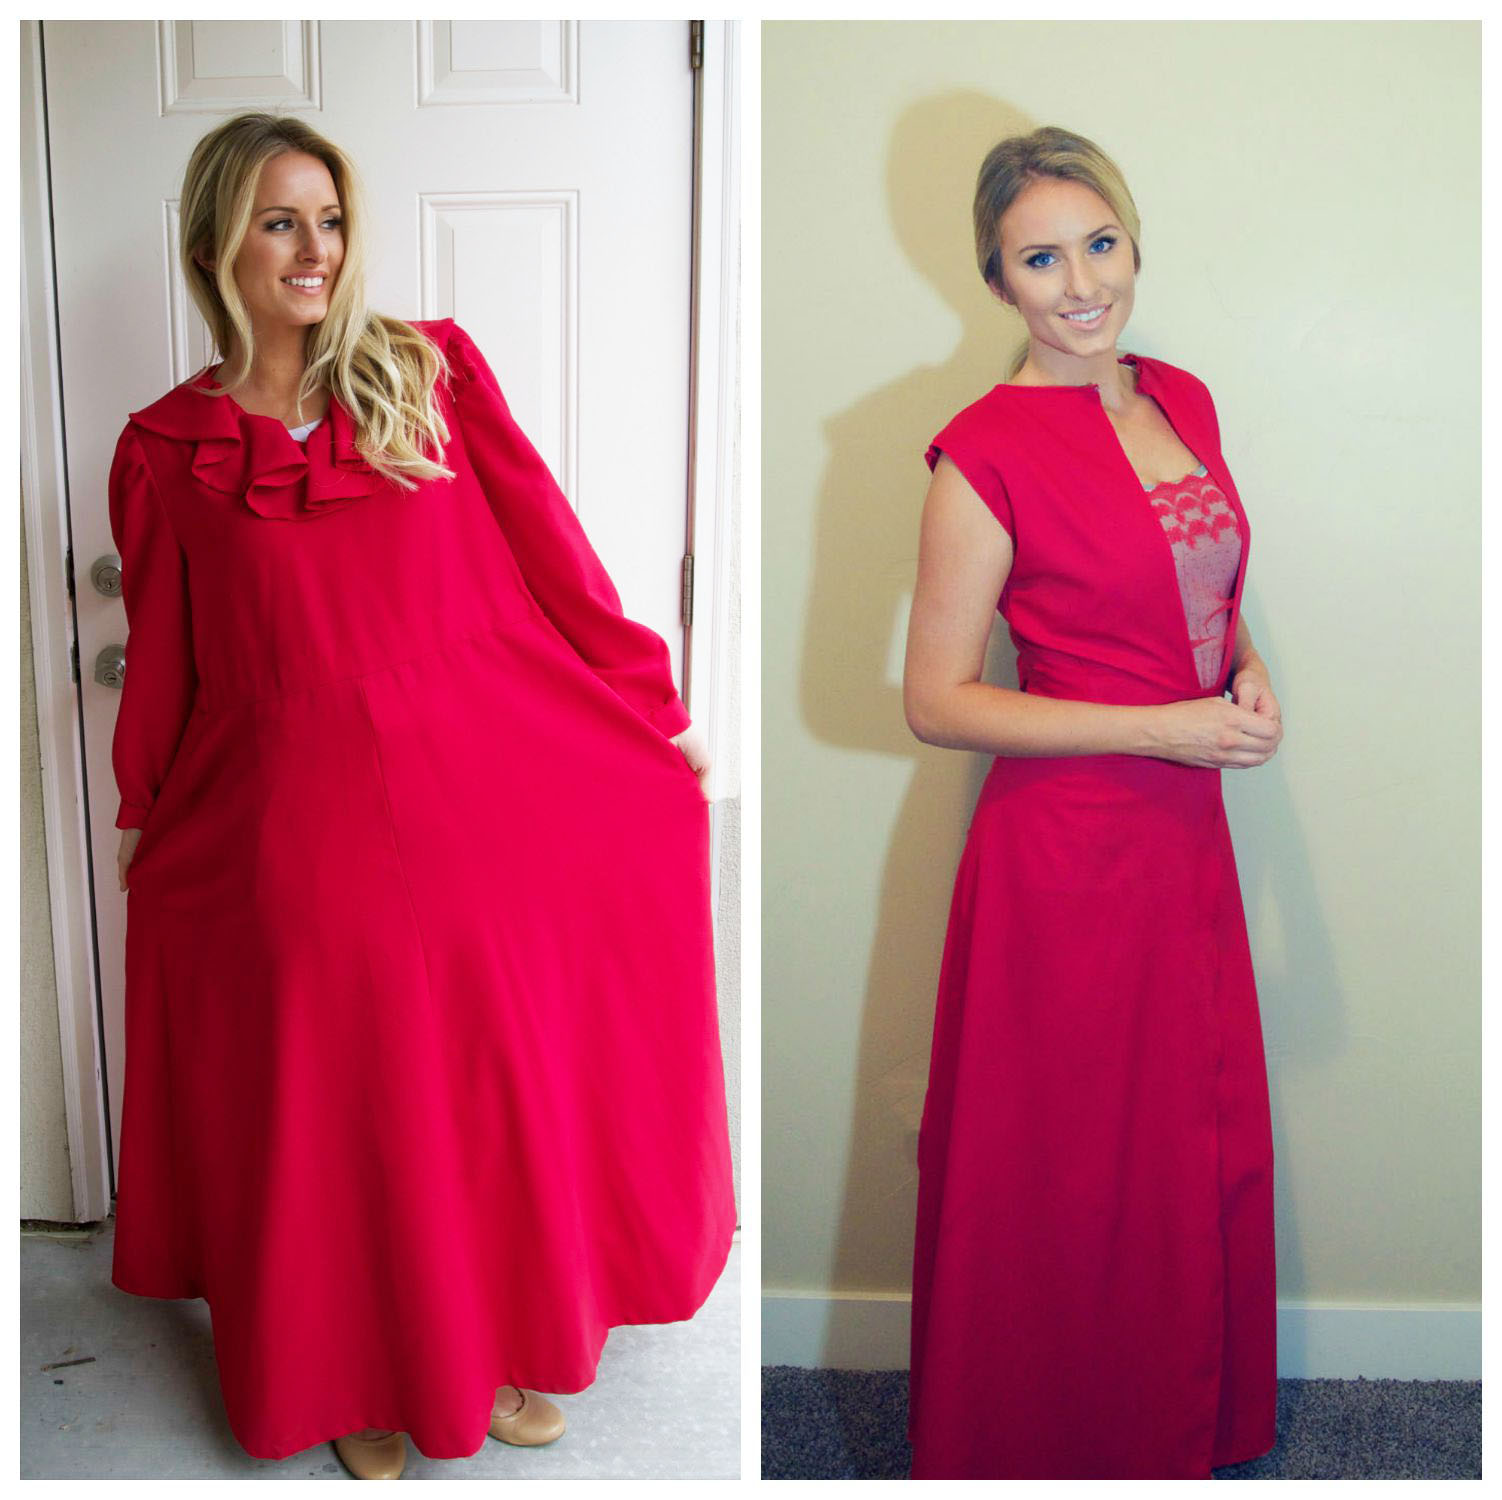
“This dress was homemade,
which I quickly discovered as I began disassembling it. I kind of love
that, knowing that someone else worked hard with the same fabric I’m
working on.
After I was almost finished with this dress, I put it on backwards and
realized that I loved it even more that way! So I created a panel of lace
from another dress I refashioned. The lace just happened to be the same
exact color as the dress. (link to that dress here: http://whilecamdensleeps.com/2015/02/laced-refashion.html )
I’m excited to see what everyone came up with!”
***
Let’s check in on Gema from Sequins and Slippers to see what she made this week.
“So! Hello!
To say I’m looking forward to seeing everyone’s maxi dresses this week is
an understatement!! Can’t. Wait.
I had a bit of difficulty with this project – my machine was not wanting to
cooperate, the thread kept on breaking and feeding the fabric through into
the feed dog… Not good. By the by, I fiddled around, cleaned out the lint,
changed the needle, and rewound the bobbin – which seemed to do the trick!
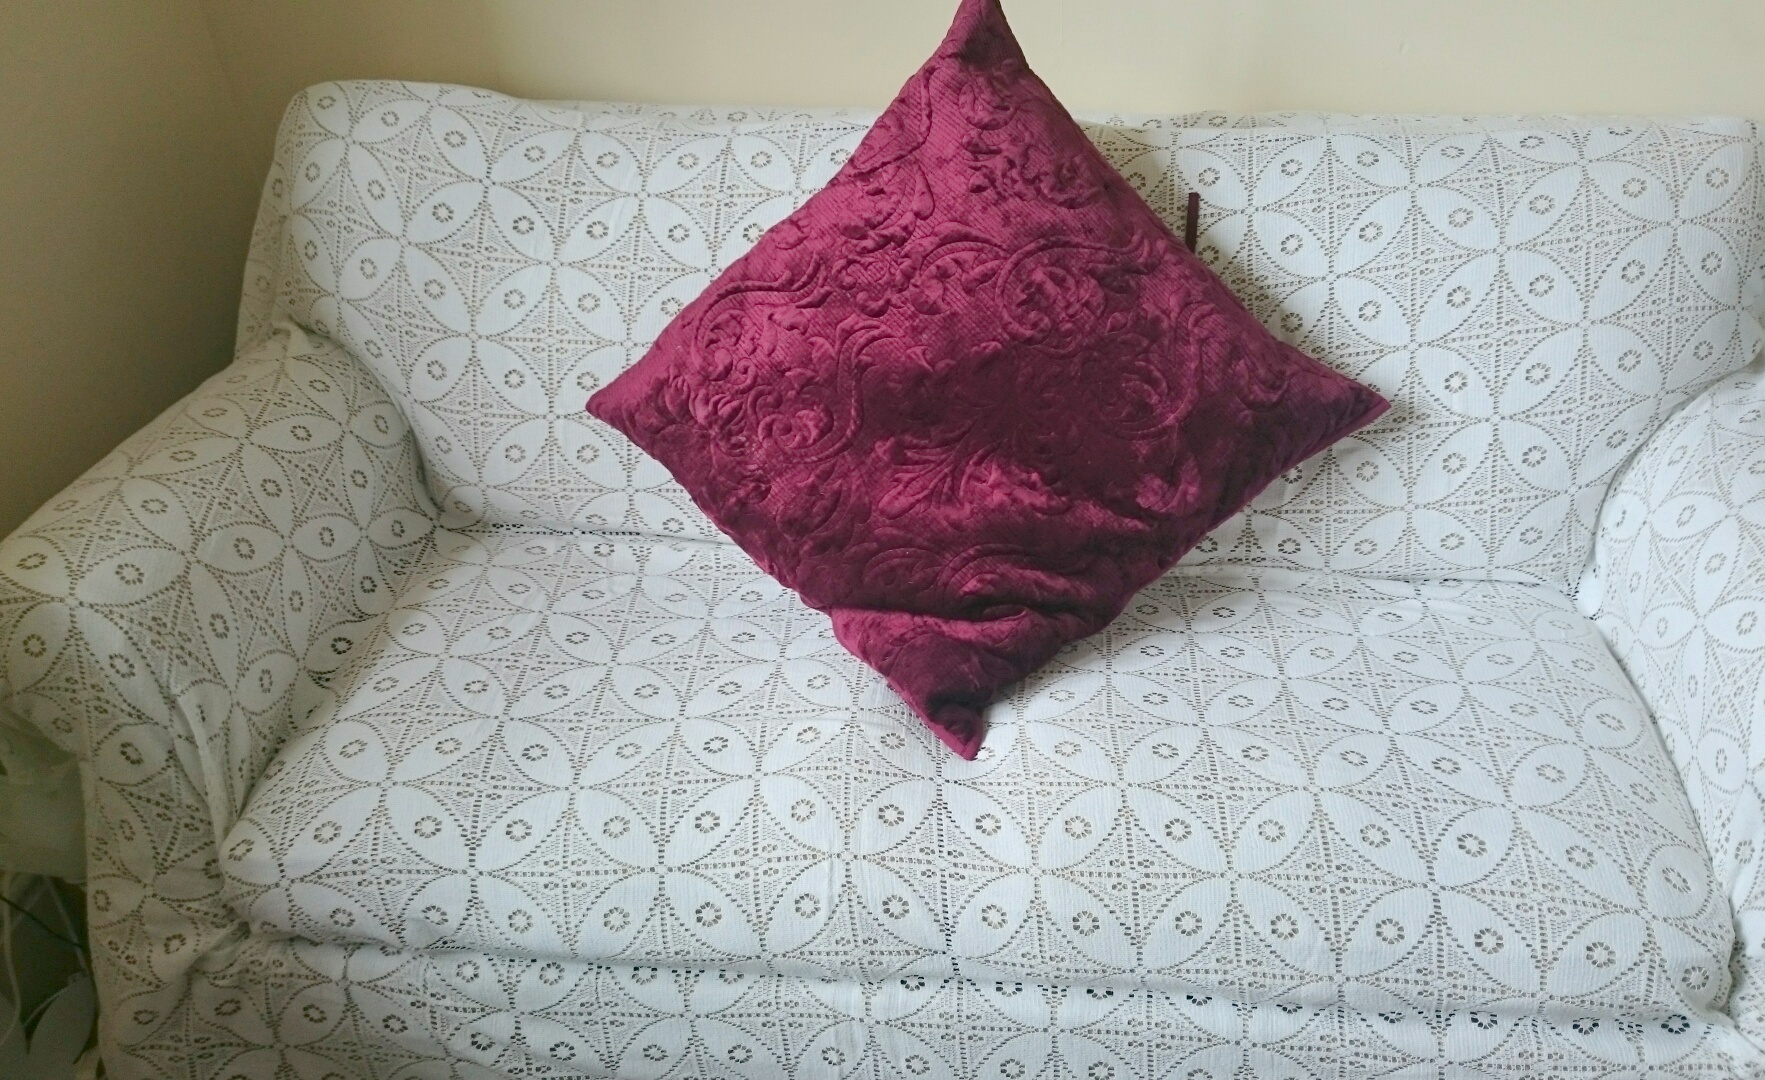
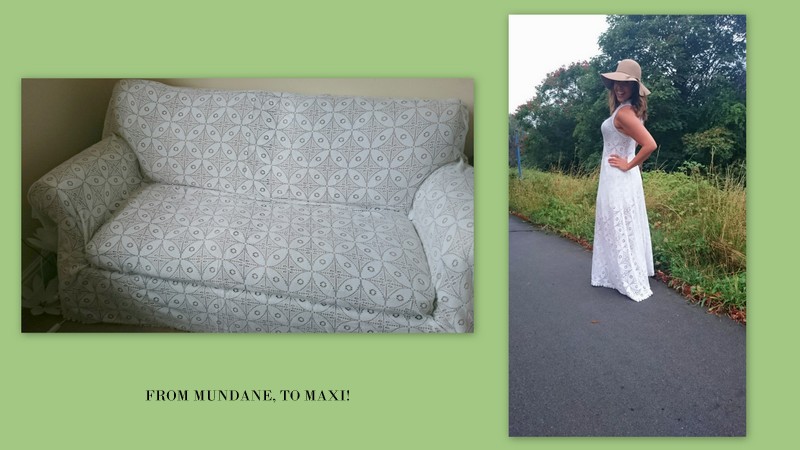
I took an old sofa cover…
Used my friend Dolly to try some different looks by draping…
I created armholes, by cutting out – and then realised the weight of the
fabric was making the dress drape too low (for decency at any rate).
So I then hitched up the dress by the scruff of it’s neck, thereby taking
up the armholes, and made that permanent by sewing up the back (making sure
to pattern match the back pattern). It created a racer back effect.
I then stabilised the holes by attaching bias binding…
I then played (for far too long) with the different looks, wrap around,
centre parting (!), flaps in, flaps out… before deciding on centre seam,
flaps in.
I removed all the lace trim, cut a new hem, and reattached the trim around
the new hemline.
I made all the seams ‘French seams’ (not only would it be stronger, but
also look better on the inside). I added darts through the bodice, and a
‘pinch’ to the neckline, before sewing up, to give it a bit more shape.
The dress flaps (folded in on the inside) are wide enough to hide underwear
at the front (!) – but I also wore shorts for the photos (and will in
future) so as not to give anyone a nasty surprise from behind..! I’ve left
out these bits so I can get straight to the ‘After’ pics…
What do you think?
Funny to think it started life in the back bedroom…
Now all we need is some sunshine so I can wear it out, properly, for the
whole day – and not between rain showers!! J”
***
Wow! Aren’t they all amazing!
Now it’s your turn to vote for your favorite maxi or dress refashion.
Be sure to click on the vote button at the bottom of the poll after you select your favorite so your vote will be counted.
This week has been full of great bag refashions from all the contestants and everyone who sewed along. Thanks to all of you for being a part of this great challenge. It’s been so much fun!
She wowed us this week by totally revamping a hat to create this fun bag! Such a unique idea, Gema.
Congratulations, you are the winner this week!
But now comes the hard part again,
we have to tearfully say “see you later” to one of the most enthusiastic Refashion Runway contestants EVER!
I’m so sad to see Sylvia from Her Kitschy Majesty have to go. I’ve really enjoyed her energy and style.
But she won’t leave us without a great prize from Lekala Sewing Patterns. They will be giving Sylvia 10 free custom sewing patterns. You send in your measurements and they will send you your custom patterns. How cool!
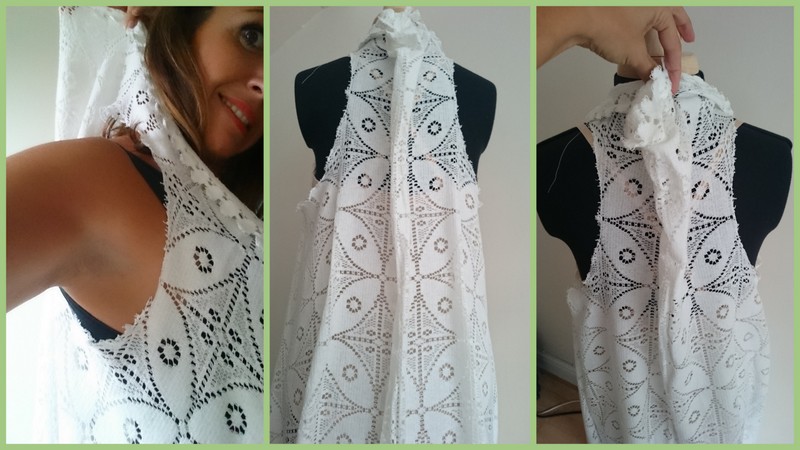
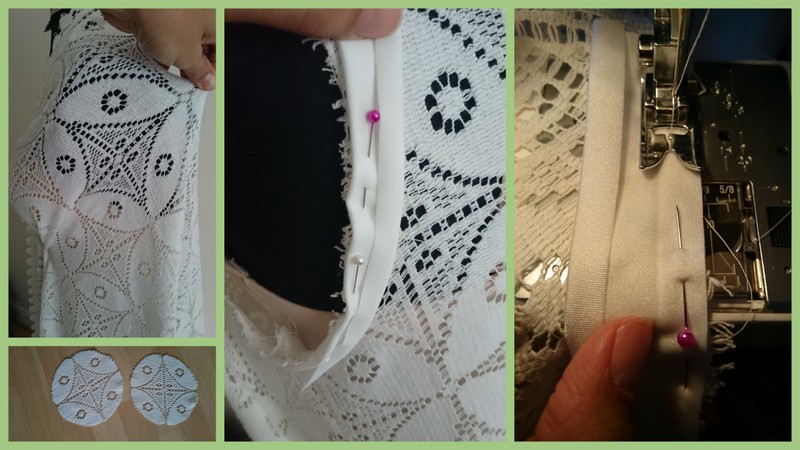
Let’s take a look at Sylvia’s unique Maxi Dress Refashion from this week:
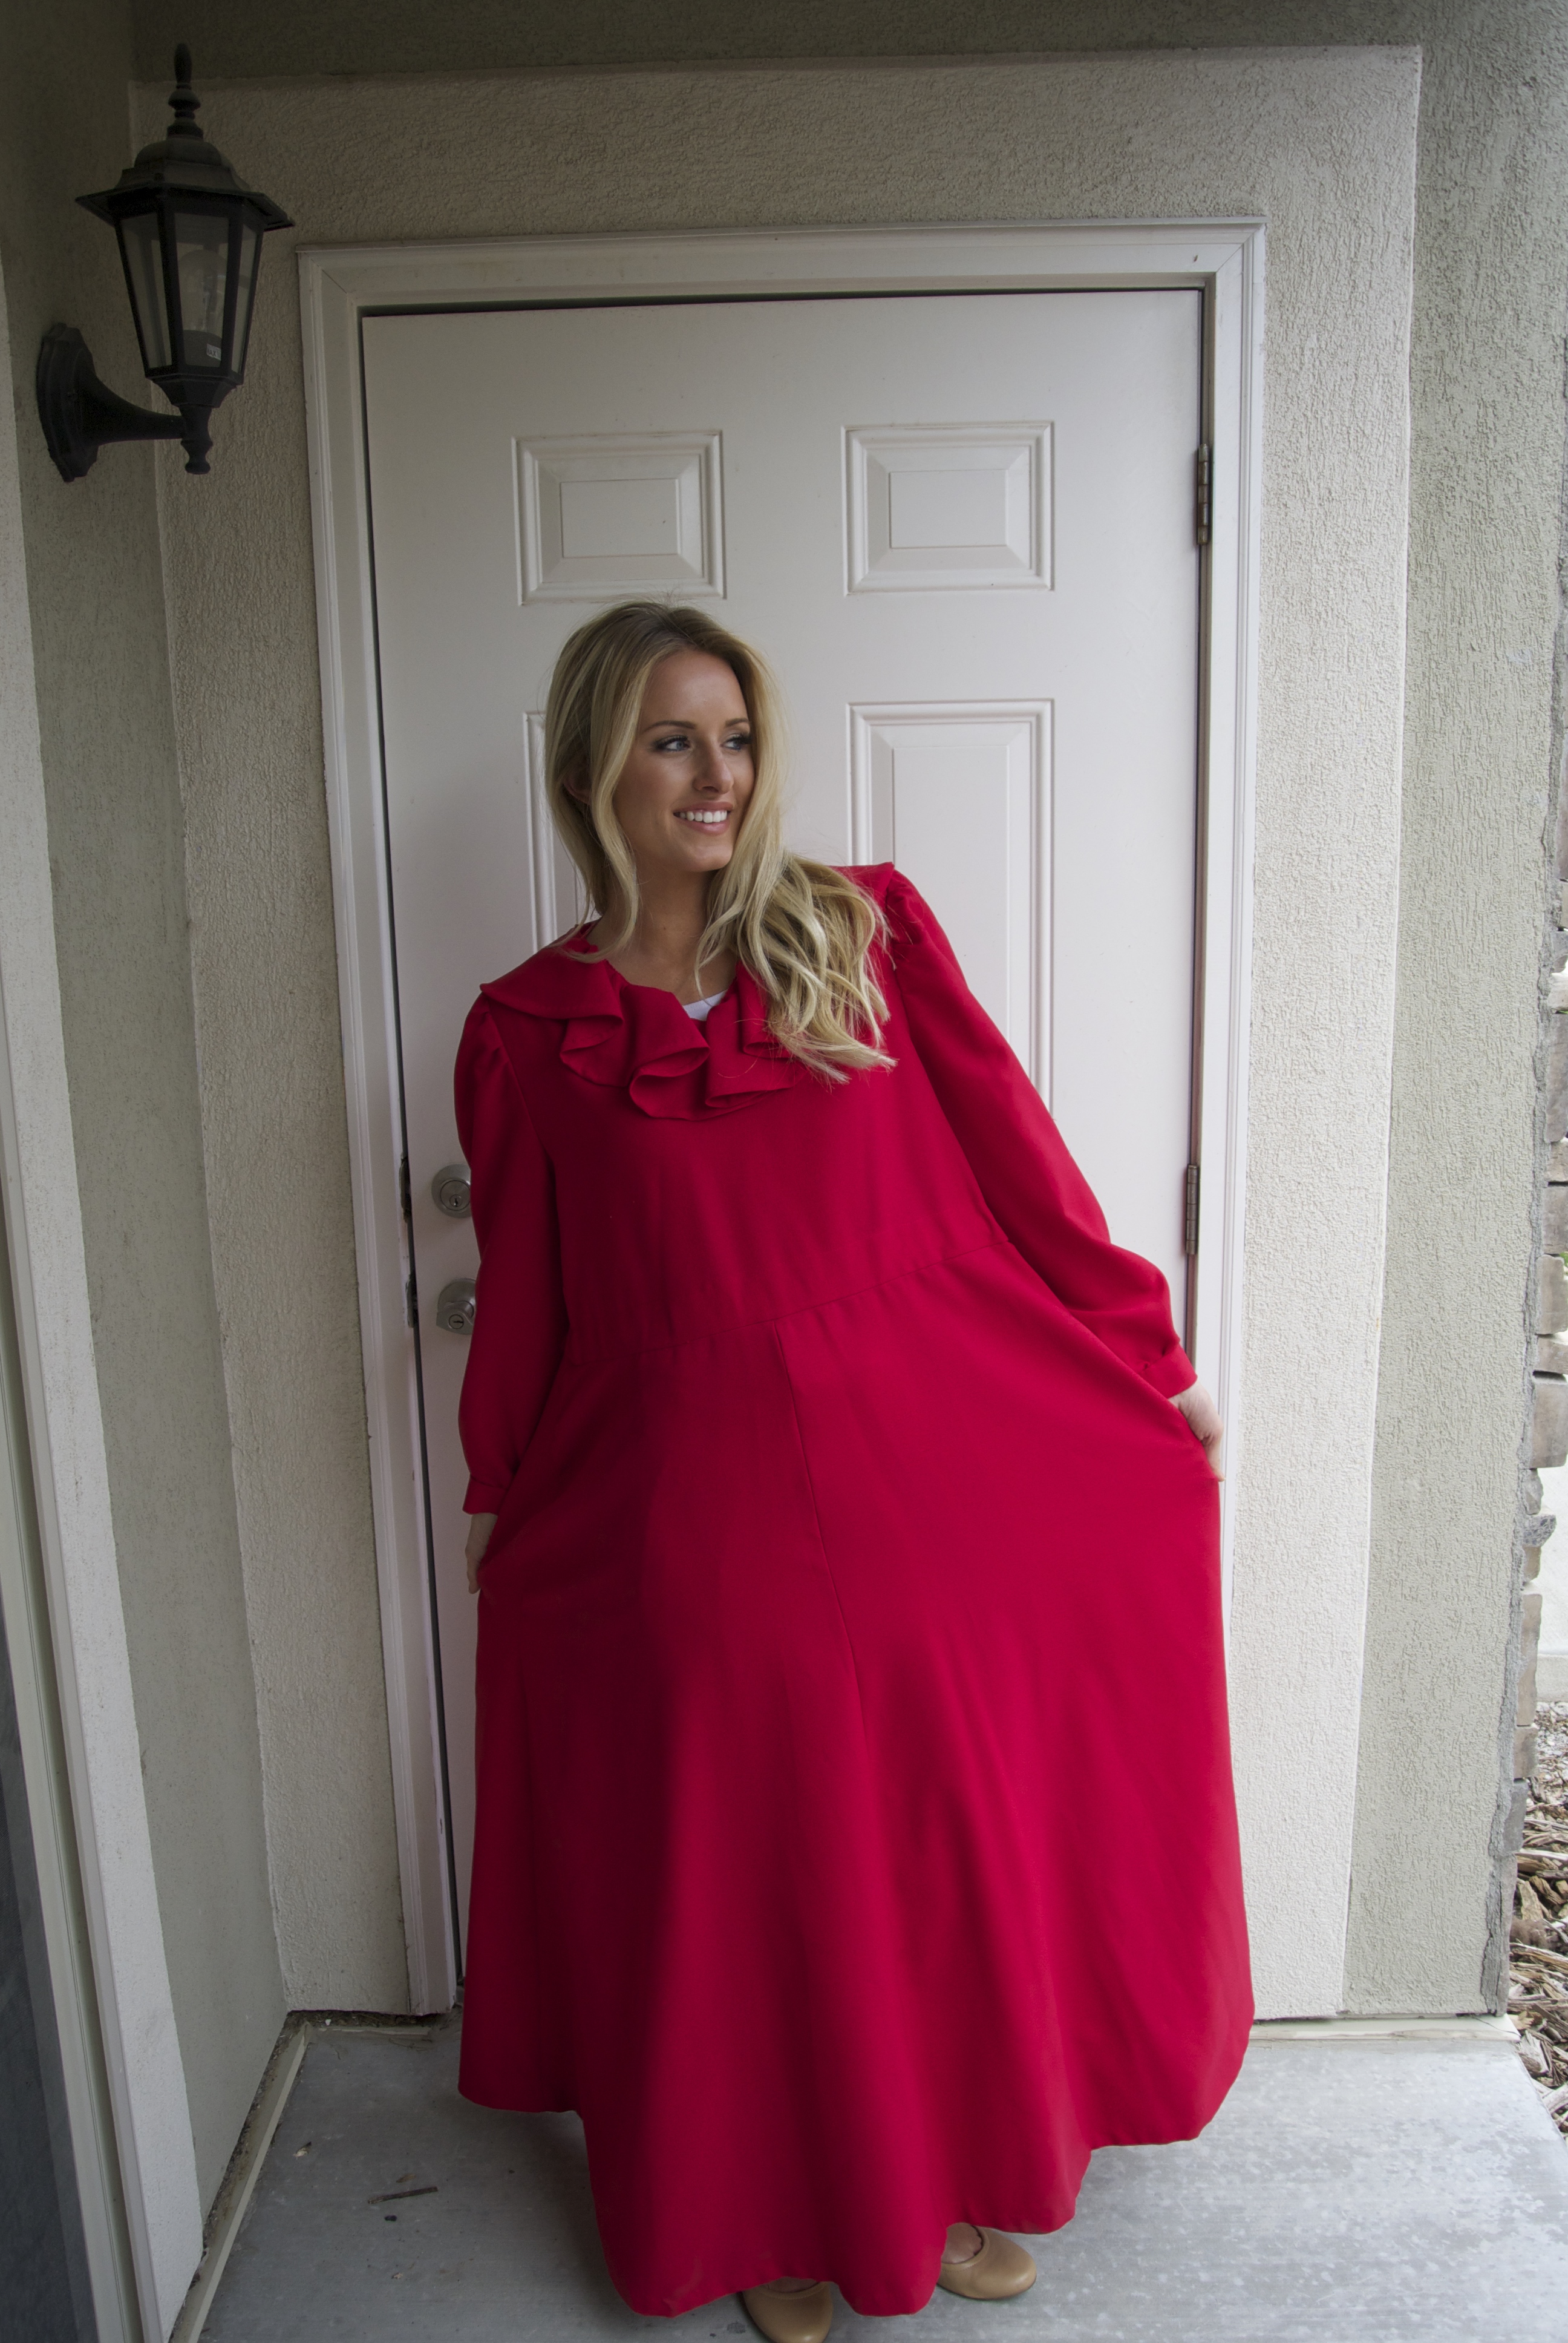
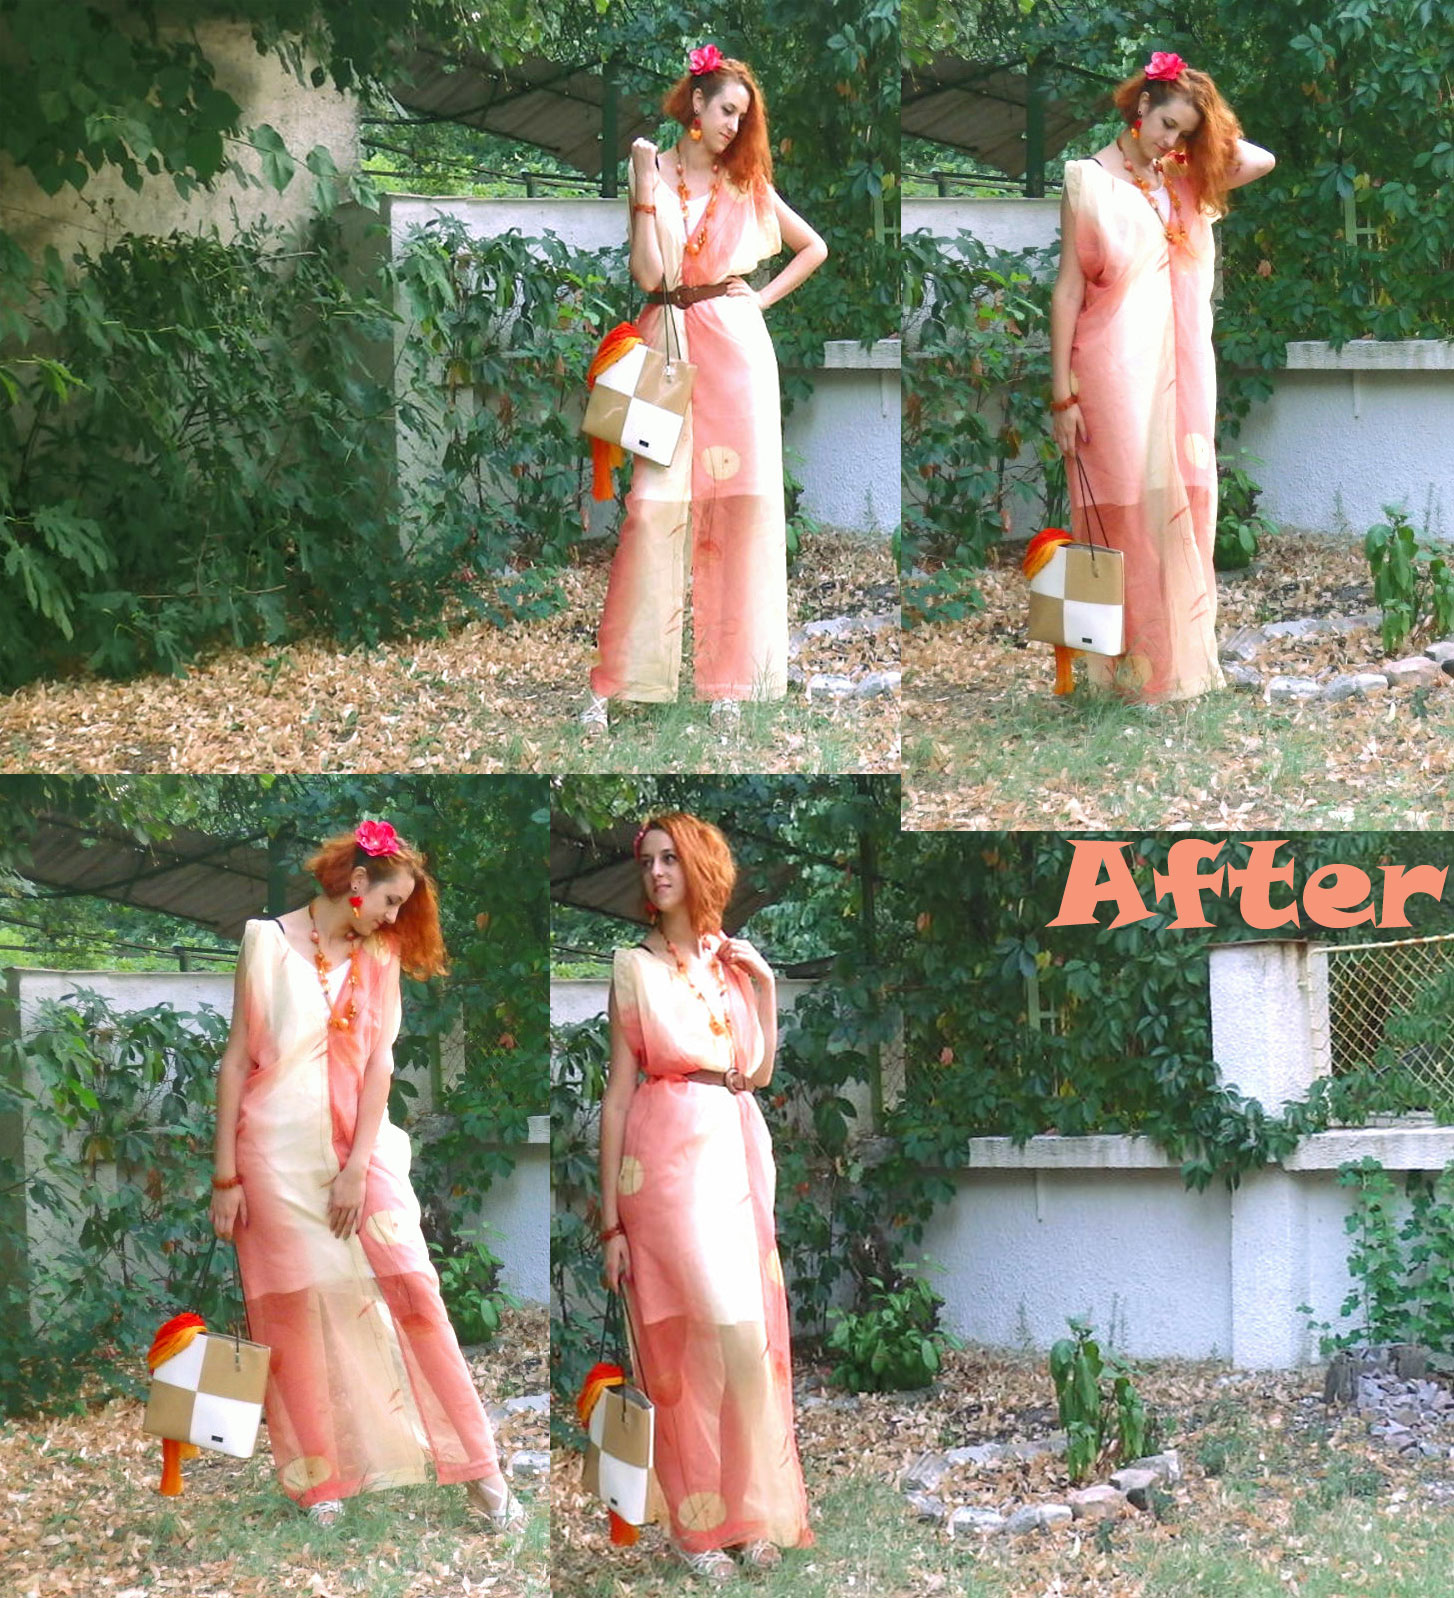
“Finding a good maxi anything was always a very personal mission on
my end. Try finding a maxi dress that would look good on that 6ft+ slender
to skinny frame of mine. I double dare ya.
Having said that, I never found the perfect maxi to buy. This left me with
the only option to create some myself!
I had these two gorgeous curtains that were laying around waiting for their
turn. The first one is a two-piece set of curtains with hems and all – but
they were quite see through, so I needed to cover it up a little. I used
the second white curtain to create an undergarment to the maxi I had at
mind.
I had a couple of different scenarios and designs in my head but having
recently spied a massive trend of Grecian style maxis, I decided of going
with it – not only would it provide me with a versatile and comfortable
summer garment, but it was piece-of-cake job to do.
First, I sew the two orangey-yellow curtains to each other, and the seams
where I sew them together, would become the front and back of the dress. I
left some slits on the upper sides to create the new neckline and backline,
and on the lower sides, as well – to ease movement with the dress – they
would go again as front and back slits at knee height. Next, I laid the new
structure on the white curtain to measure and cut a kind of undergarment. I
cut a large rectangular (consisting of two layers – for front and back of
the undergarment), folded it and just cut it some armholes and a neckline.
Then I sew the undergarment’s front and back together and attached it to
the outer part and I was done.
I imagined the dress with a cinched waist to give it some structure but as
it turned out, it worked even better when not belted. I wore it to my best
childhood friend’s birthday party, and I was sure – I totally made the most
comfortable party maxi in Grecian dresses history!”
***
I’m going to miss your dramatic flair Sylvia! I hope you’ll continue to sew along with us for the rest of the season! And please keep in touch.
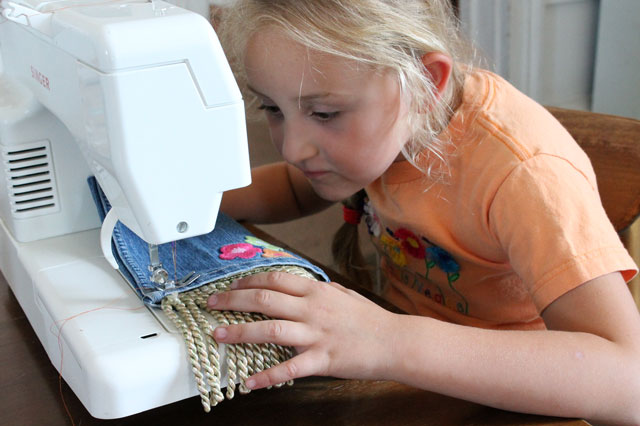
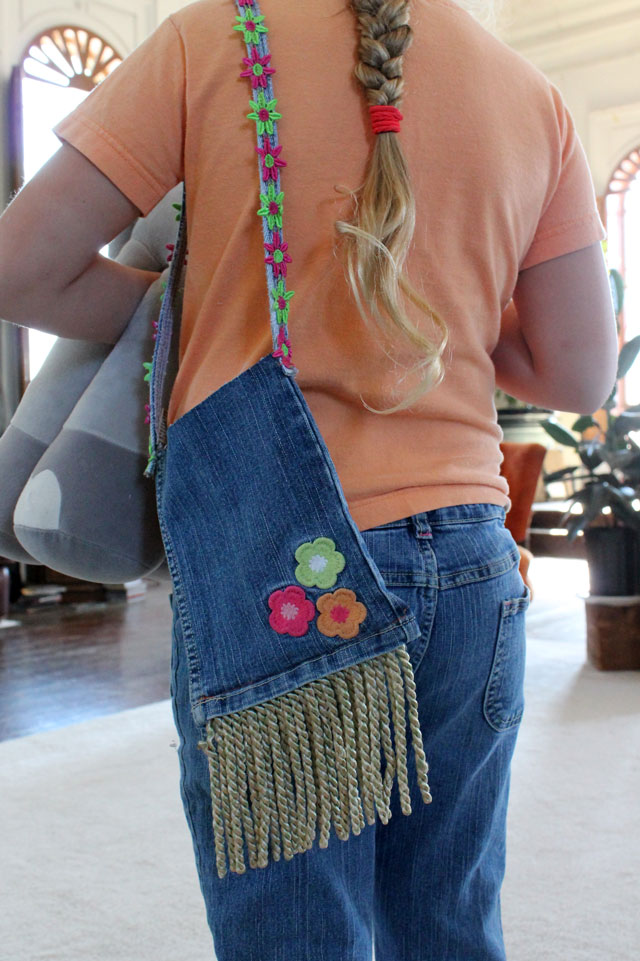
I have to say this first project is one of my mostest-favoritest sew alongs EVER!
Not only because it’s a cute bag, but those little hands belong to someone very special. Those little hands love to create. Those little hands spent an afternoon creating with me in my studio the other day. And those little hands made the cutest bag EVER!
And those little hands belong to my fun Granddaughter, Brooke!
Thanks for sewing along with us this week, Brookie!
***
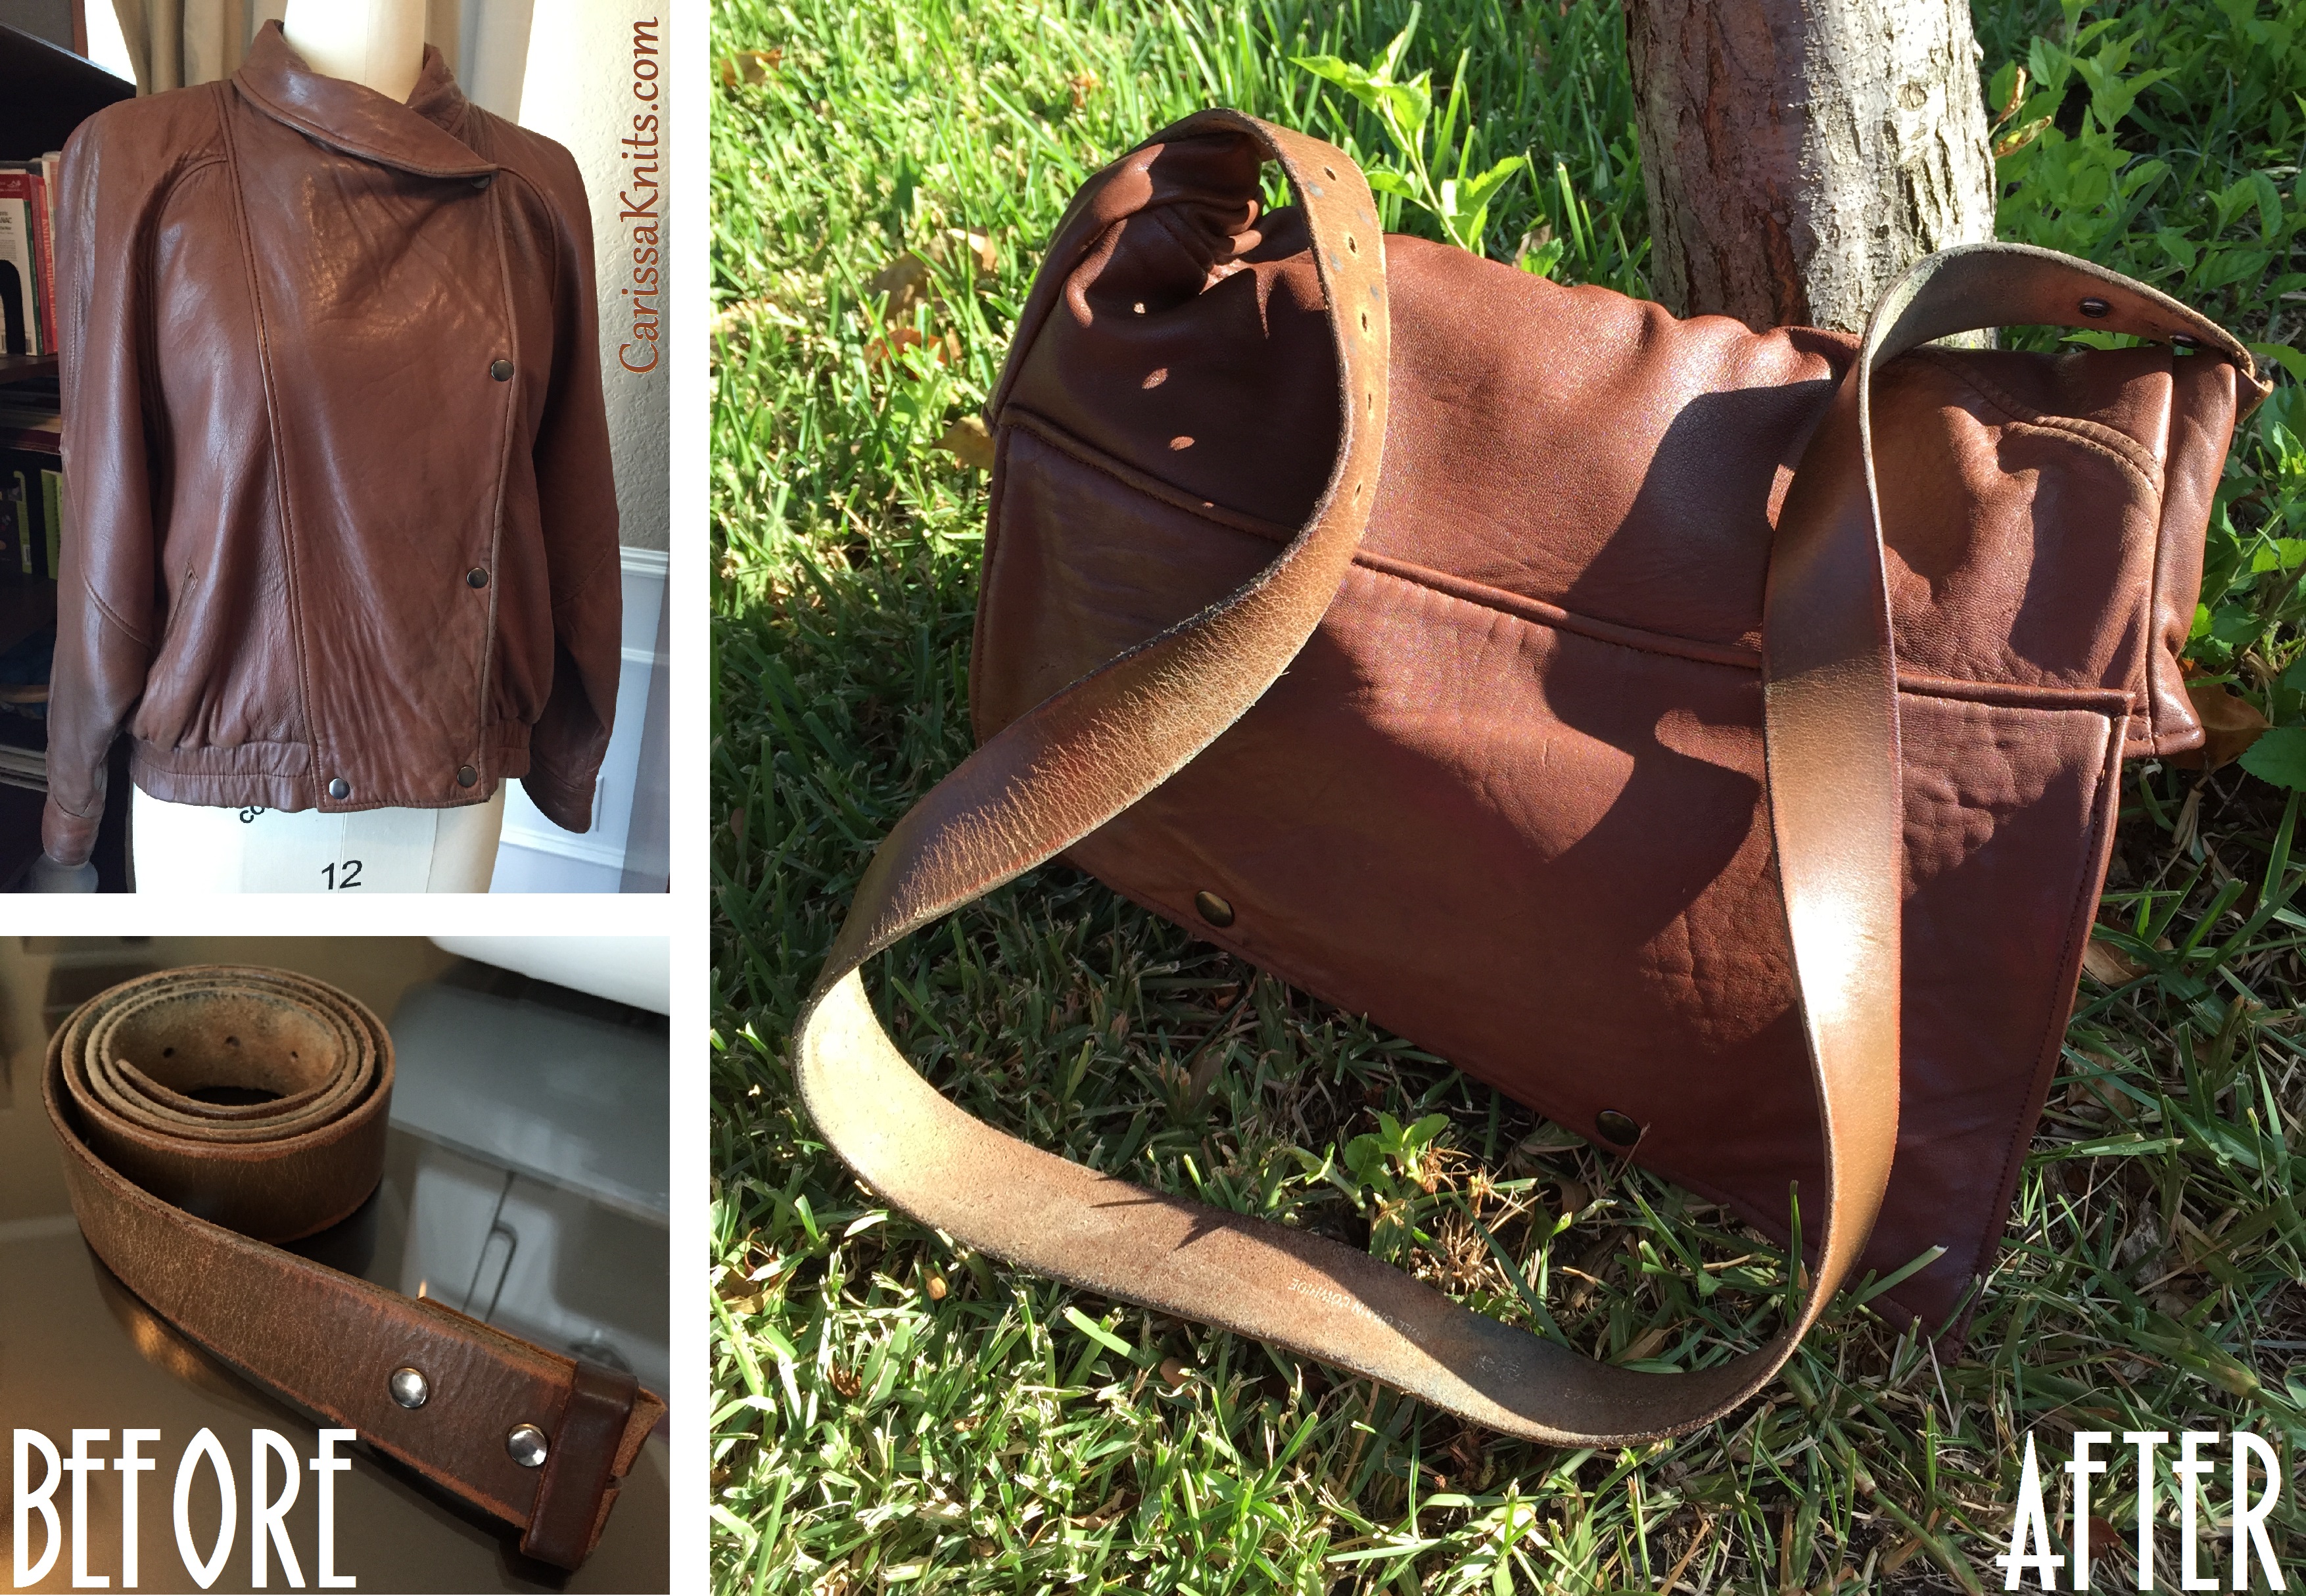
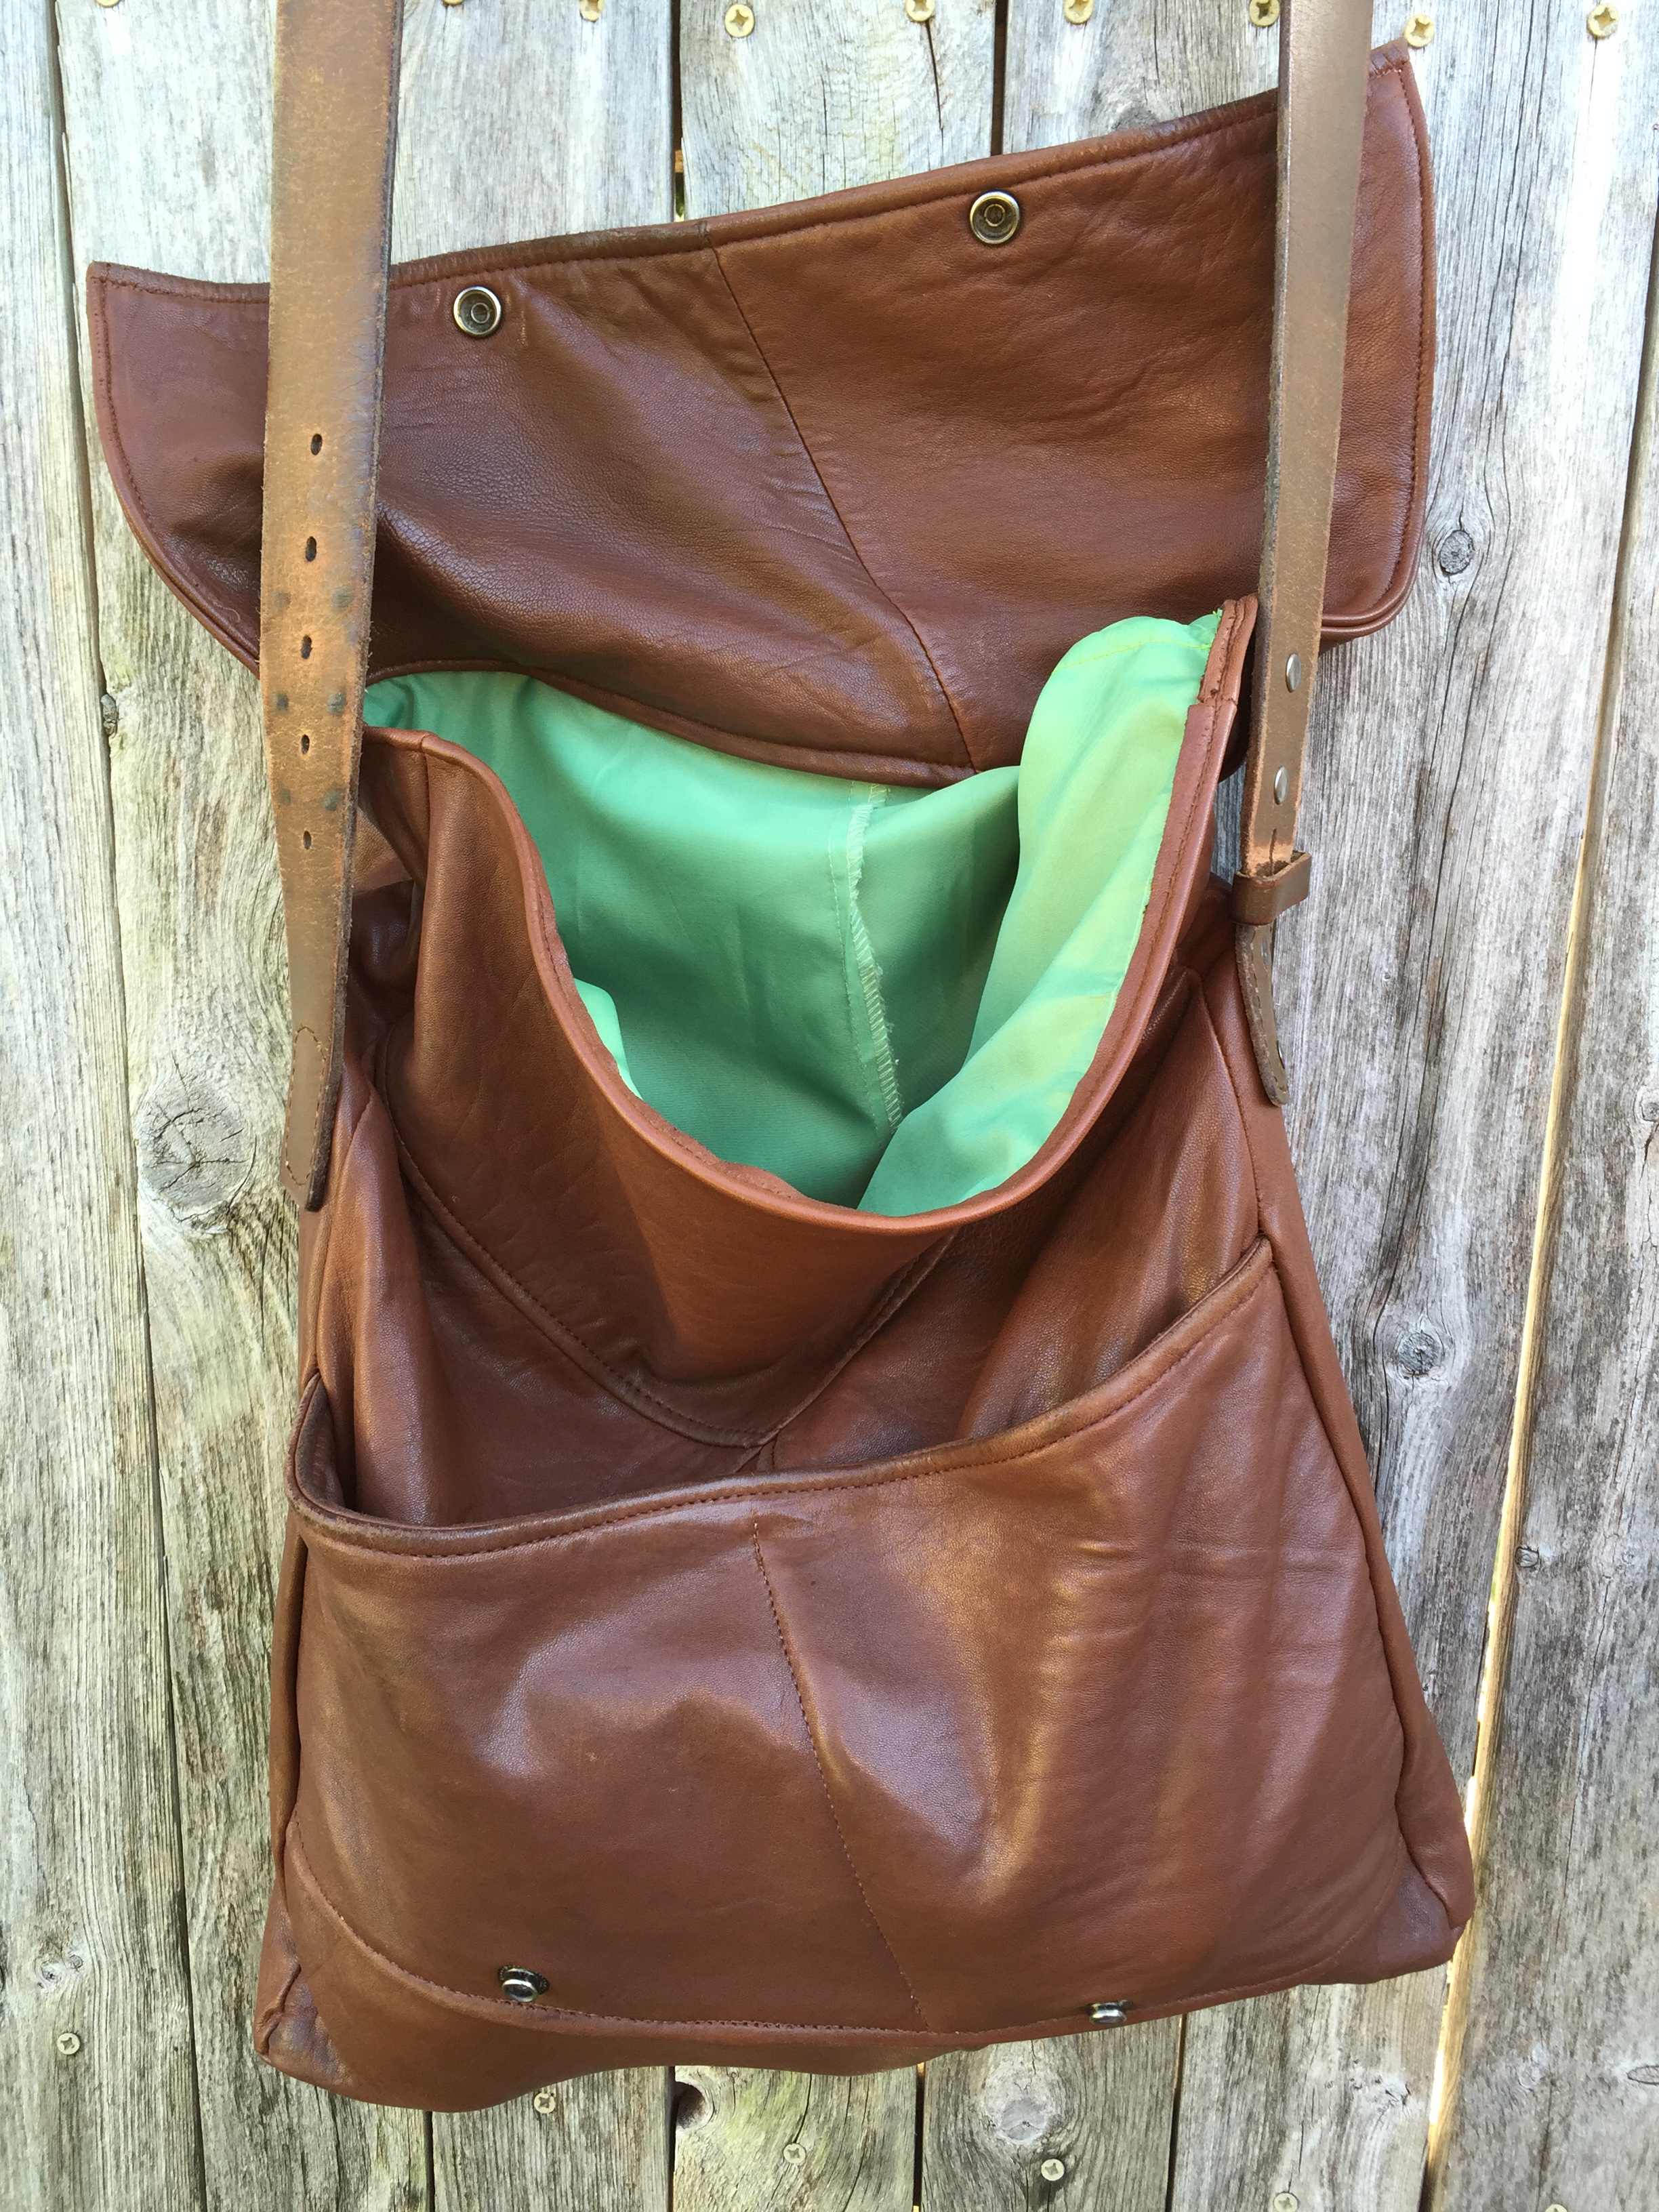
Carissa from Carissa Knits gathered up her courage to try sewing with leather again and bravely created this great bag from a free, outdated leather jacket.
***
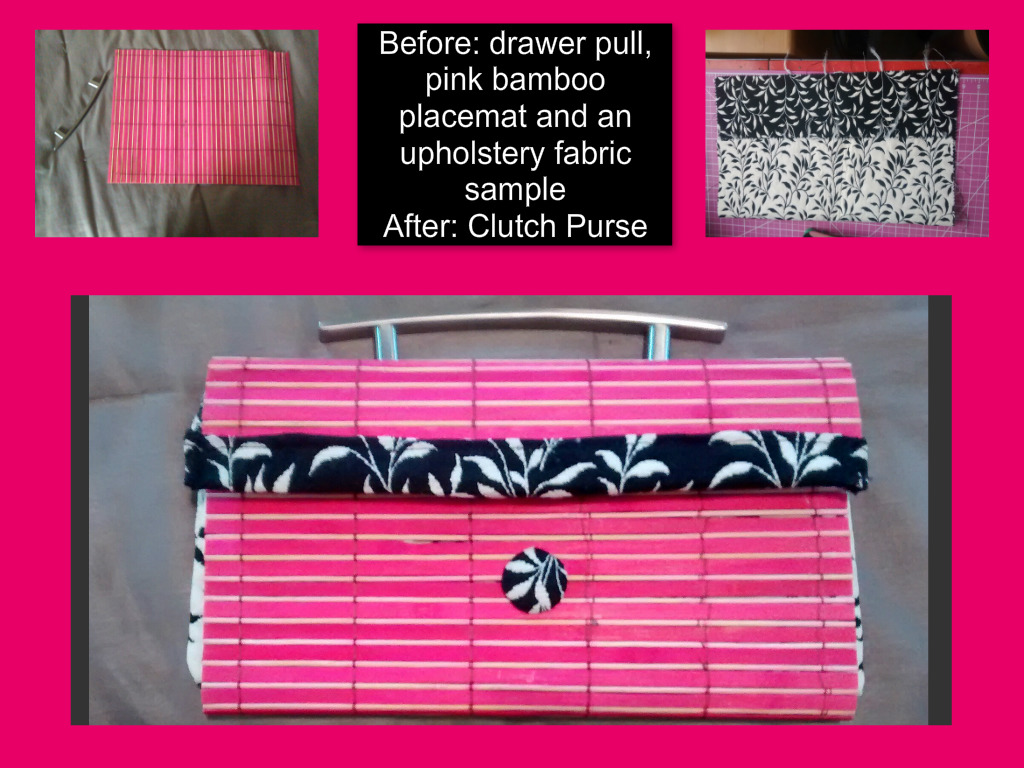
Brandy Whitfield used some unexpected items to create this amazing clutch. I love the drawer pull idea for the handle! Not to mention her fun color combo.
***
Vicky Myers from Vicky Myers Creations joined us for the sew along this week and created a lovely bag from some old trousers, a tweed skirt and a duvet.
***
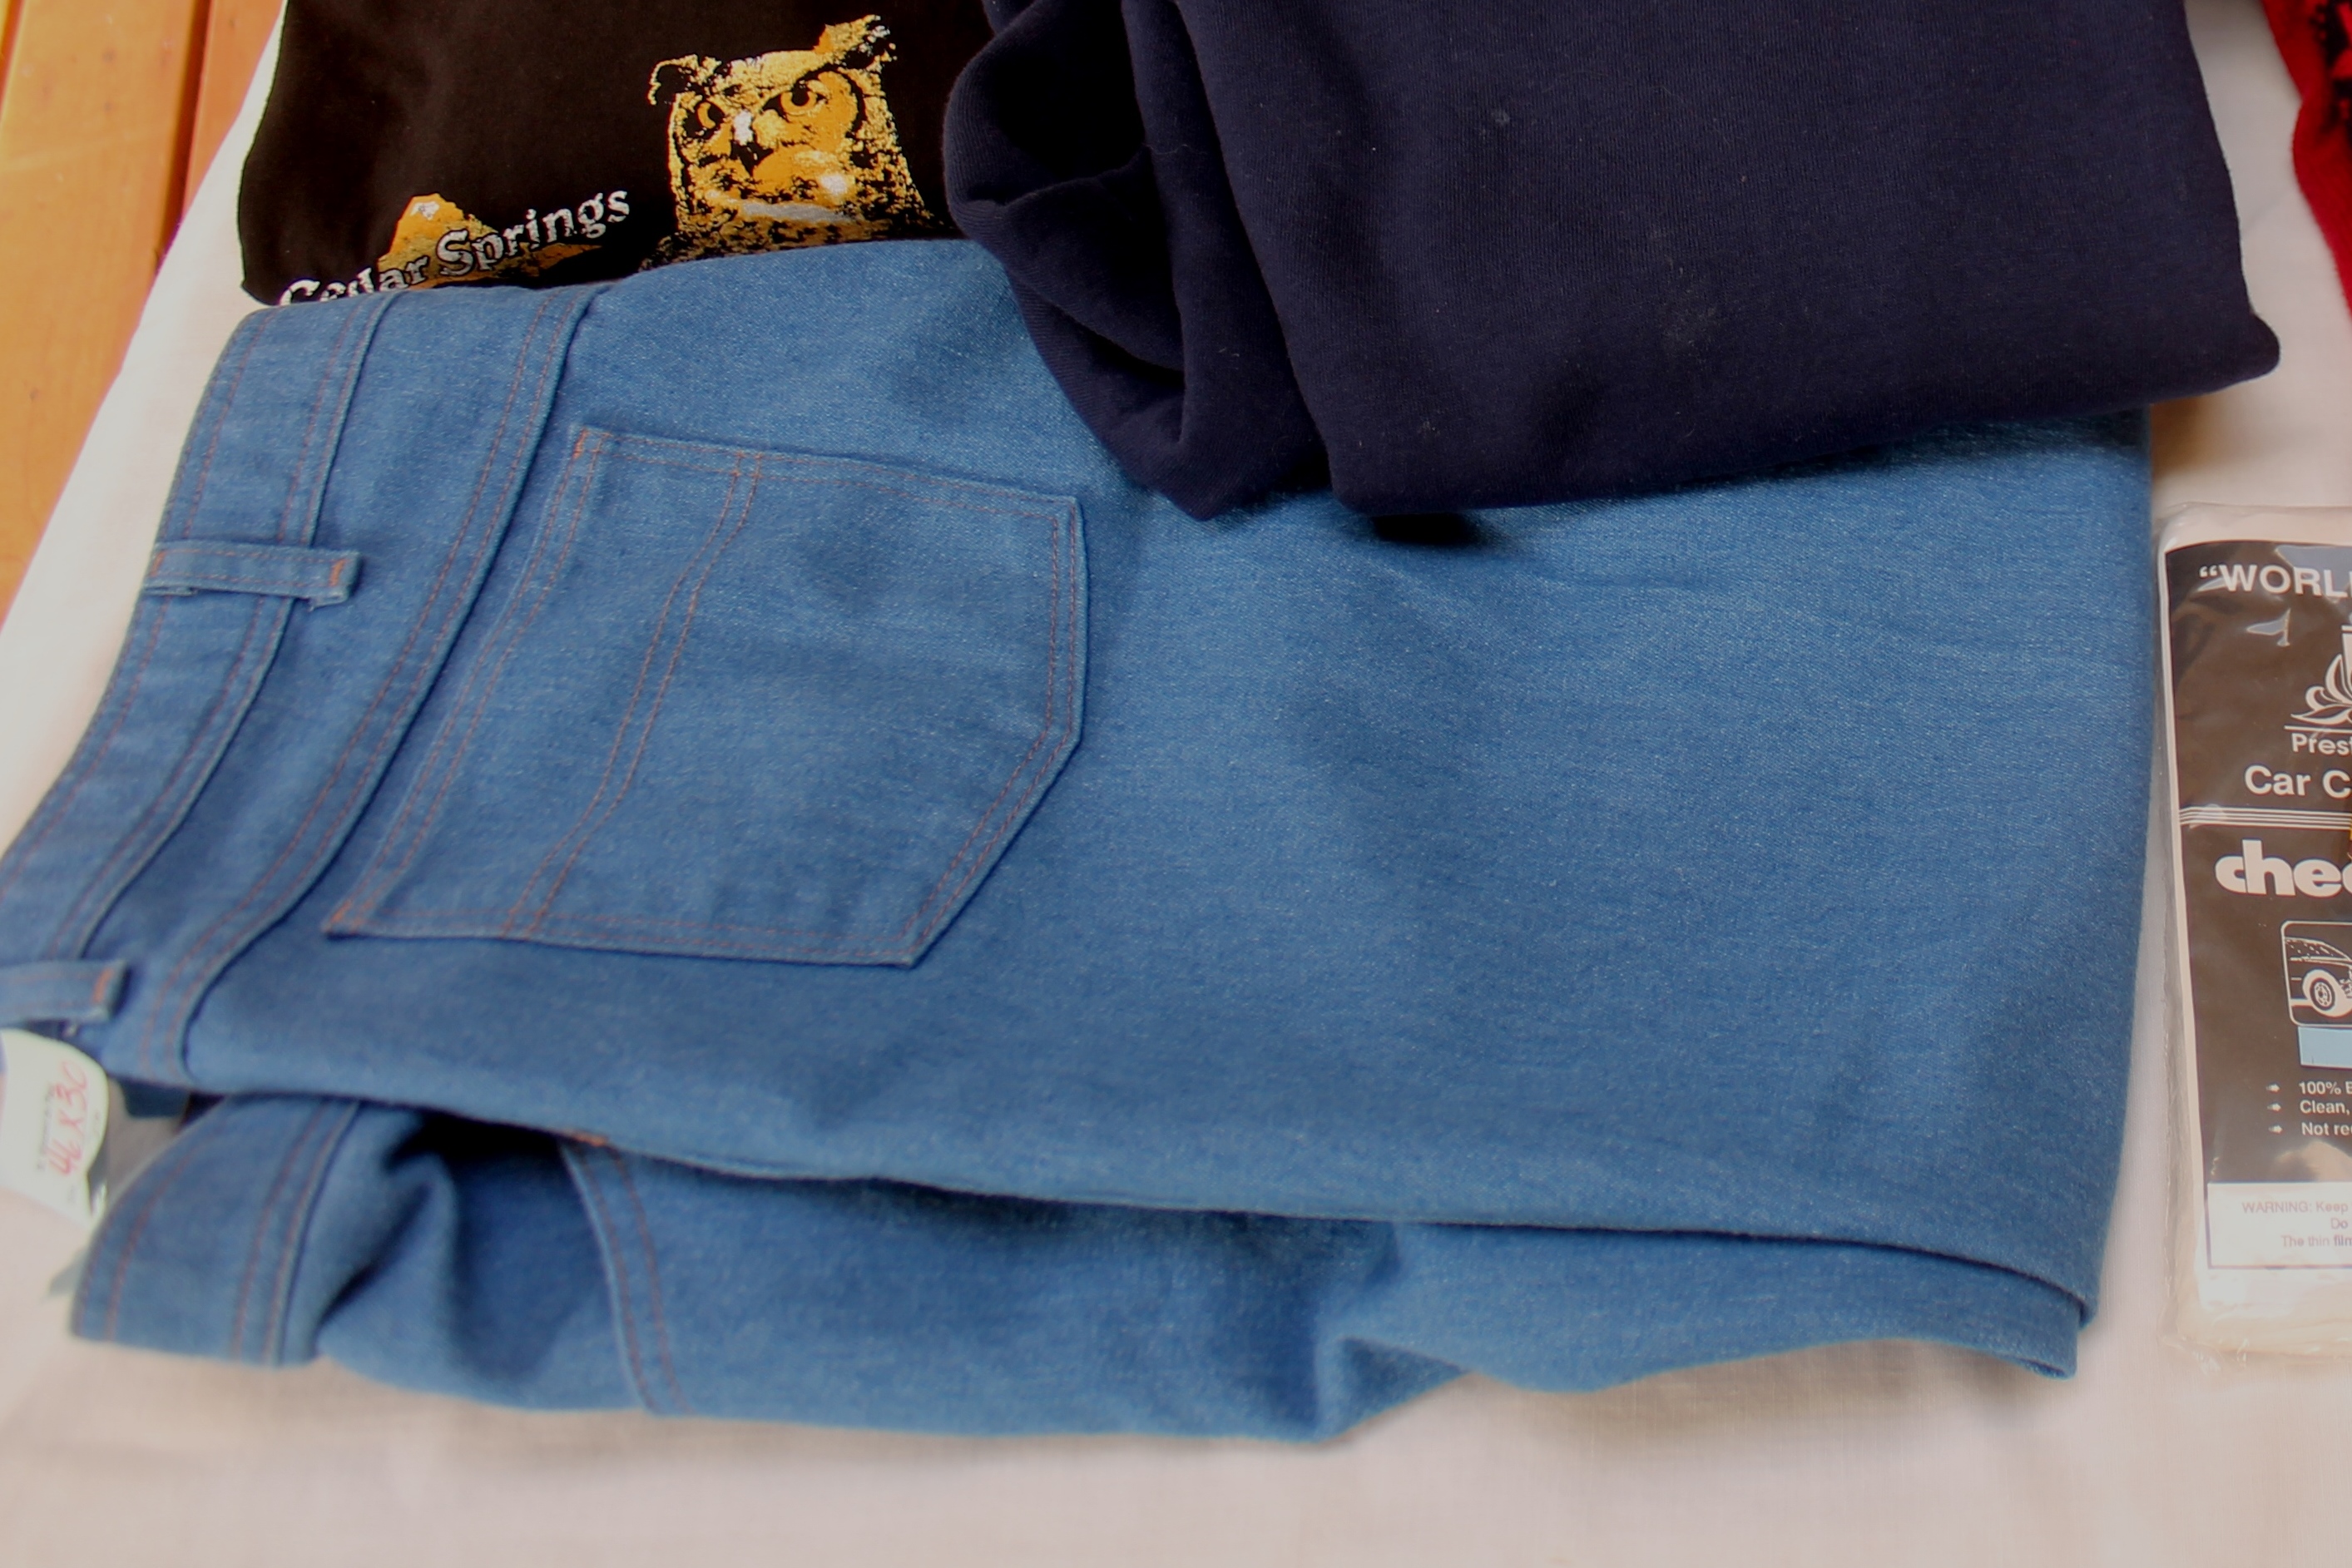
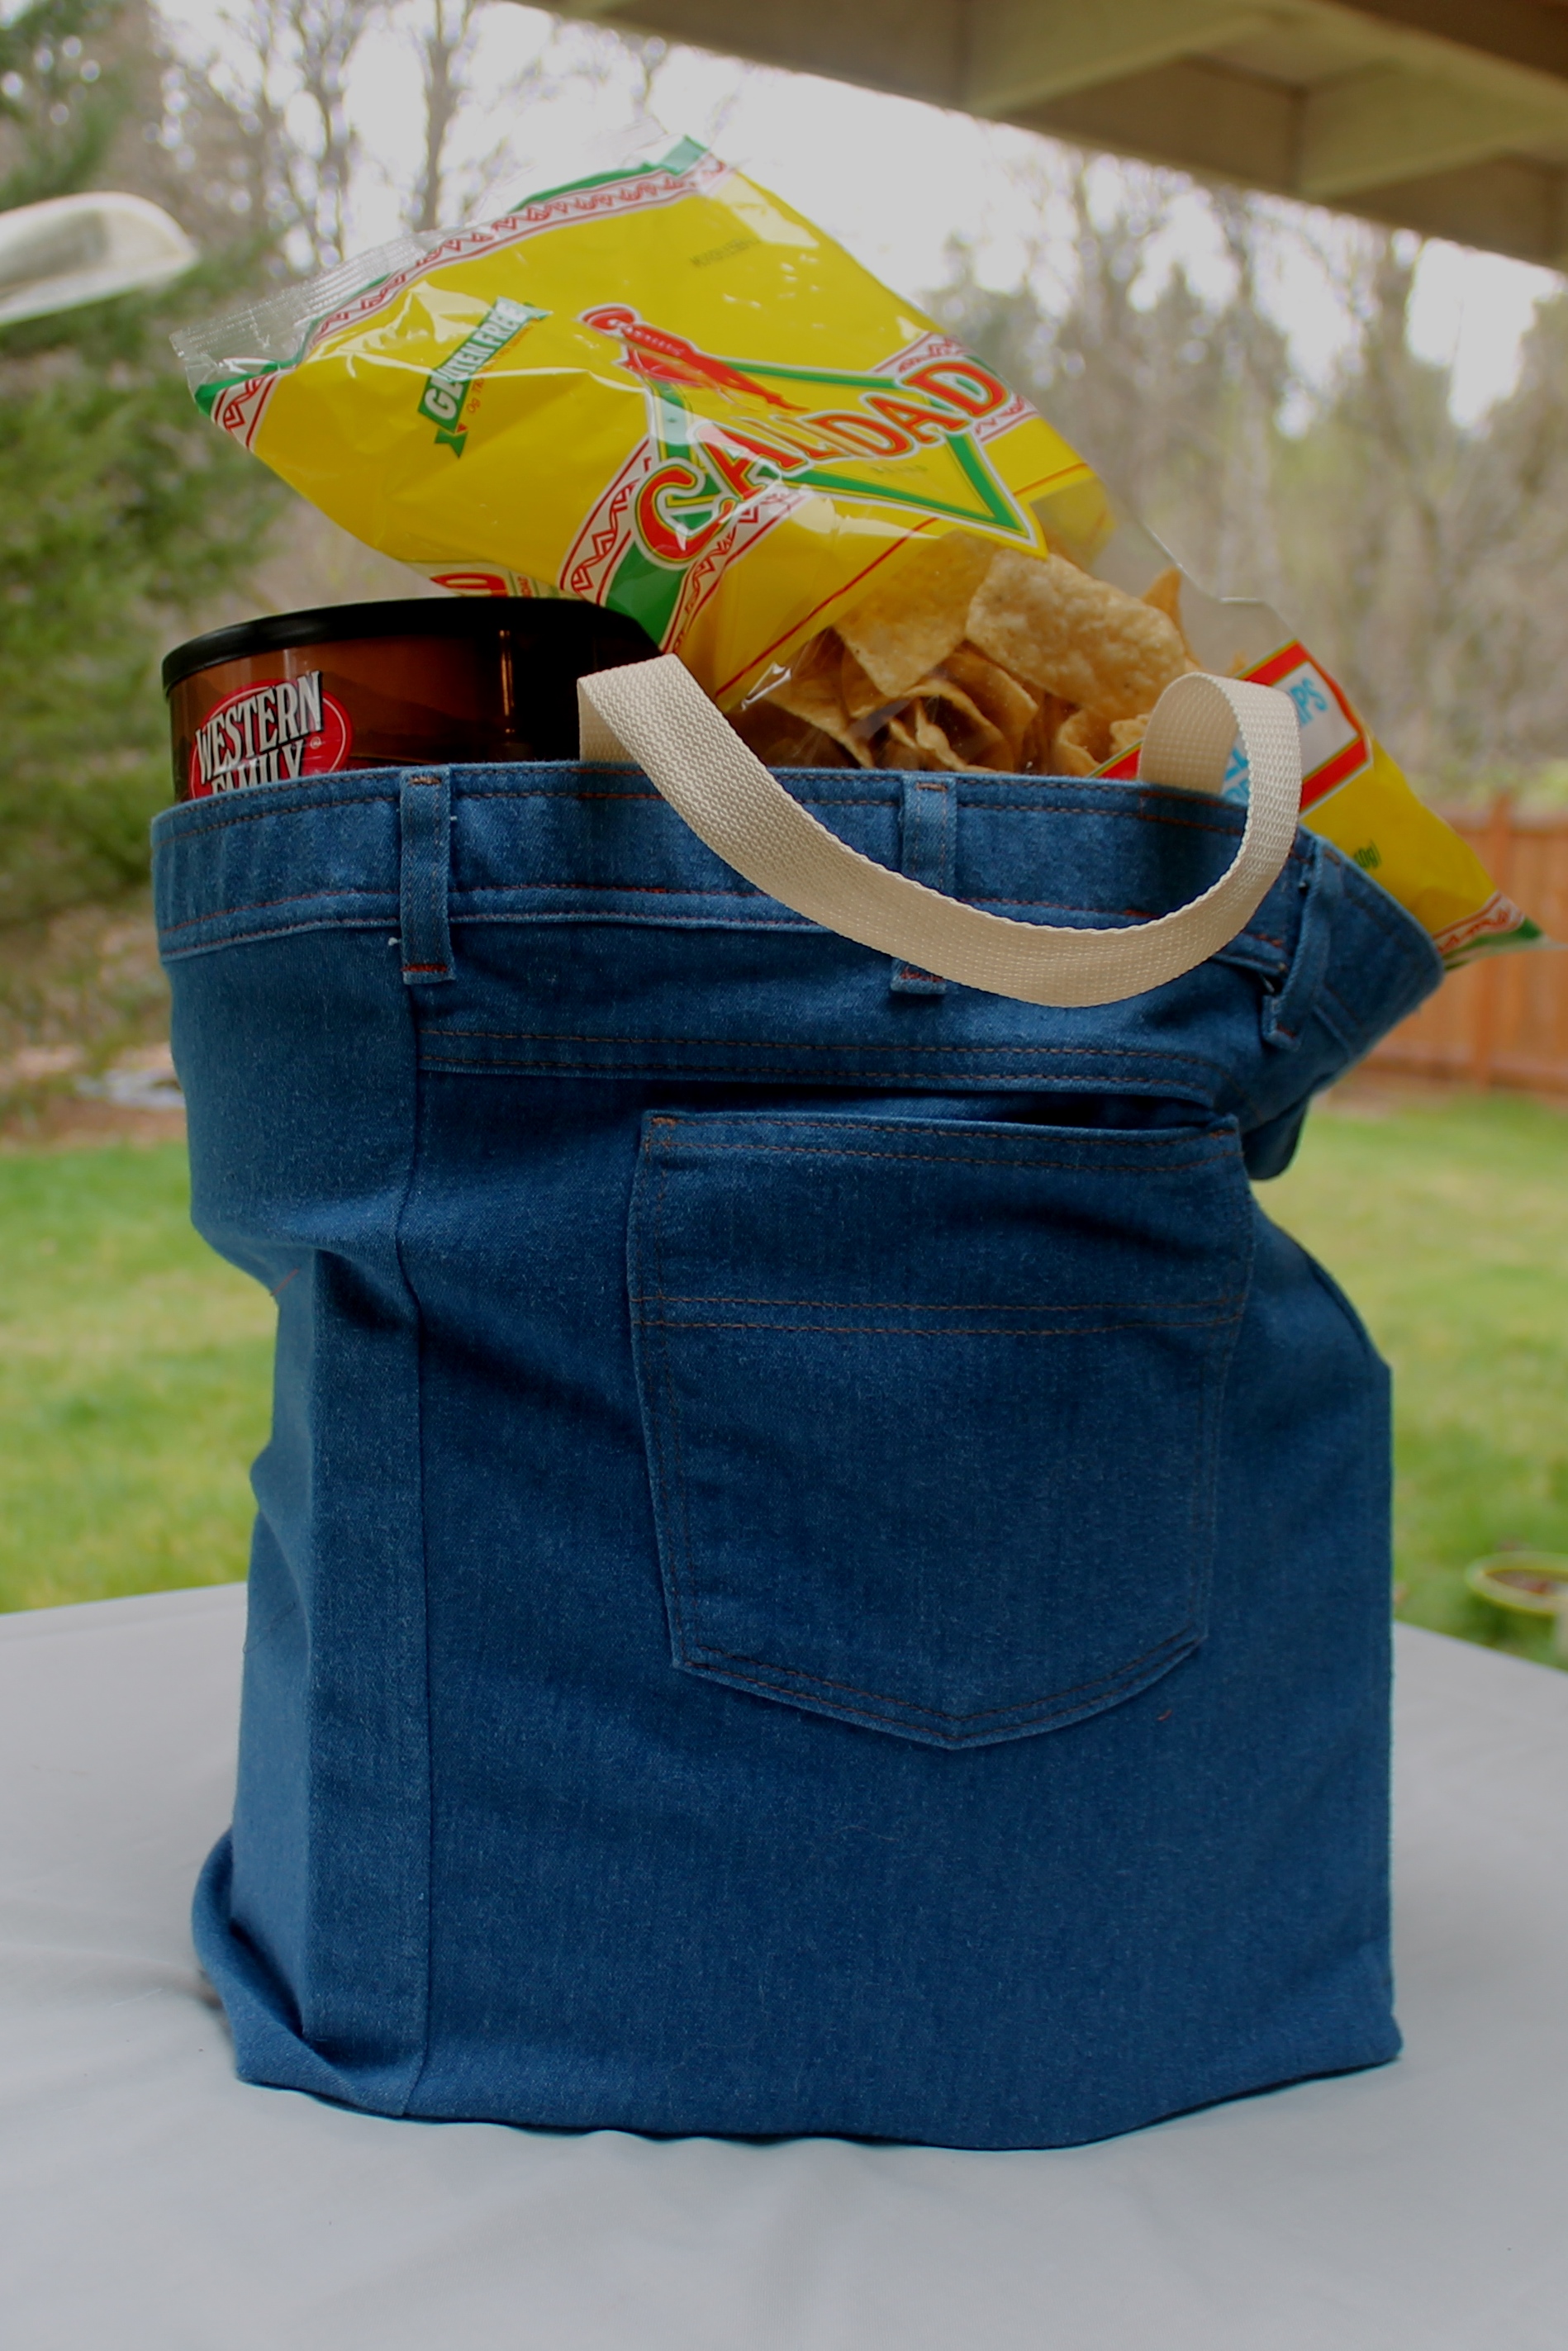
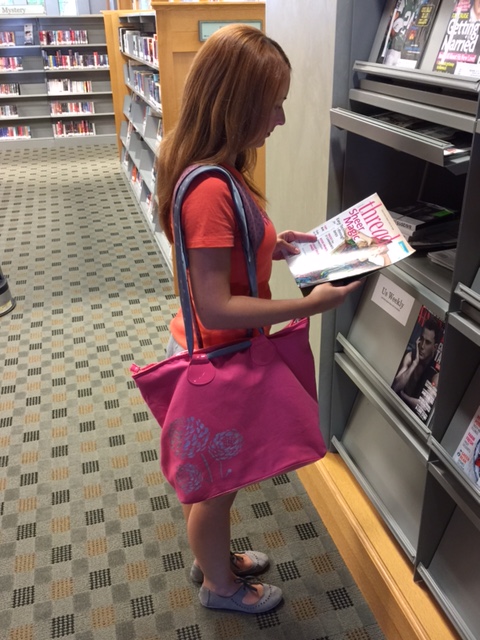
A Frugal Spinster sewed along with us and transformed some old jeans into a handy and durable shopping tote.
***
Joy Candrian from XOXO Grandma combined a pair a pants and a tablecloth to make an innovative bag.
***
Cassie Woolard loves to make bags from all kinds of repurposed materials.
***
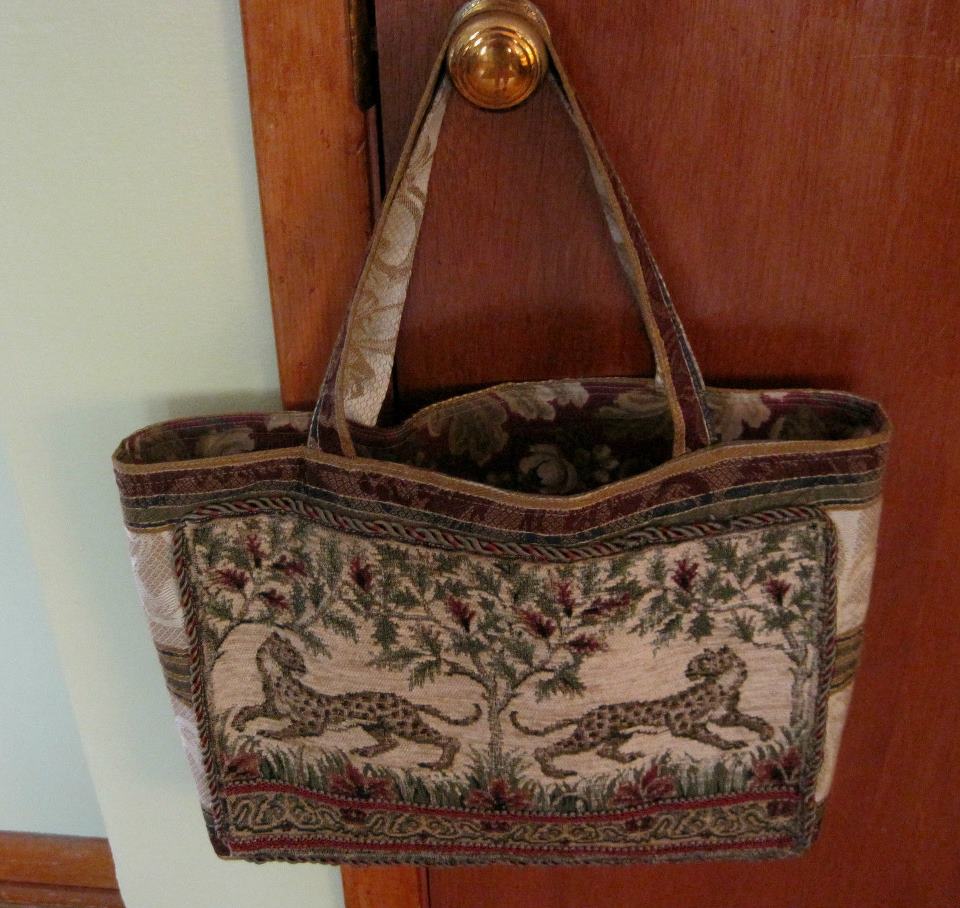
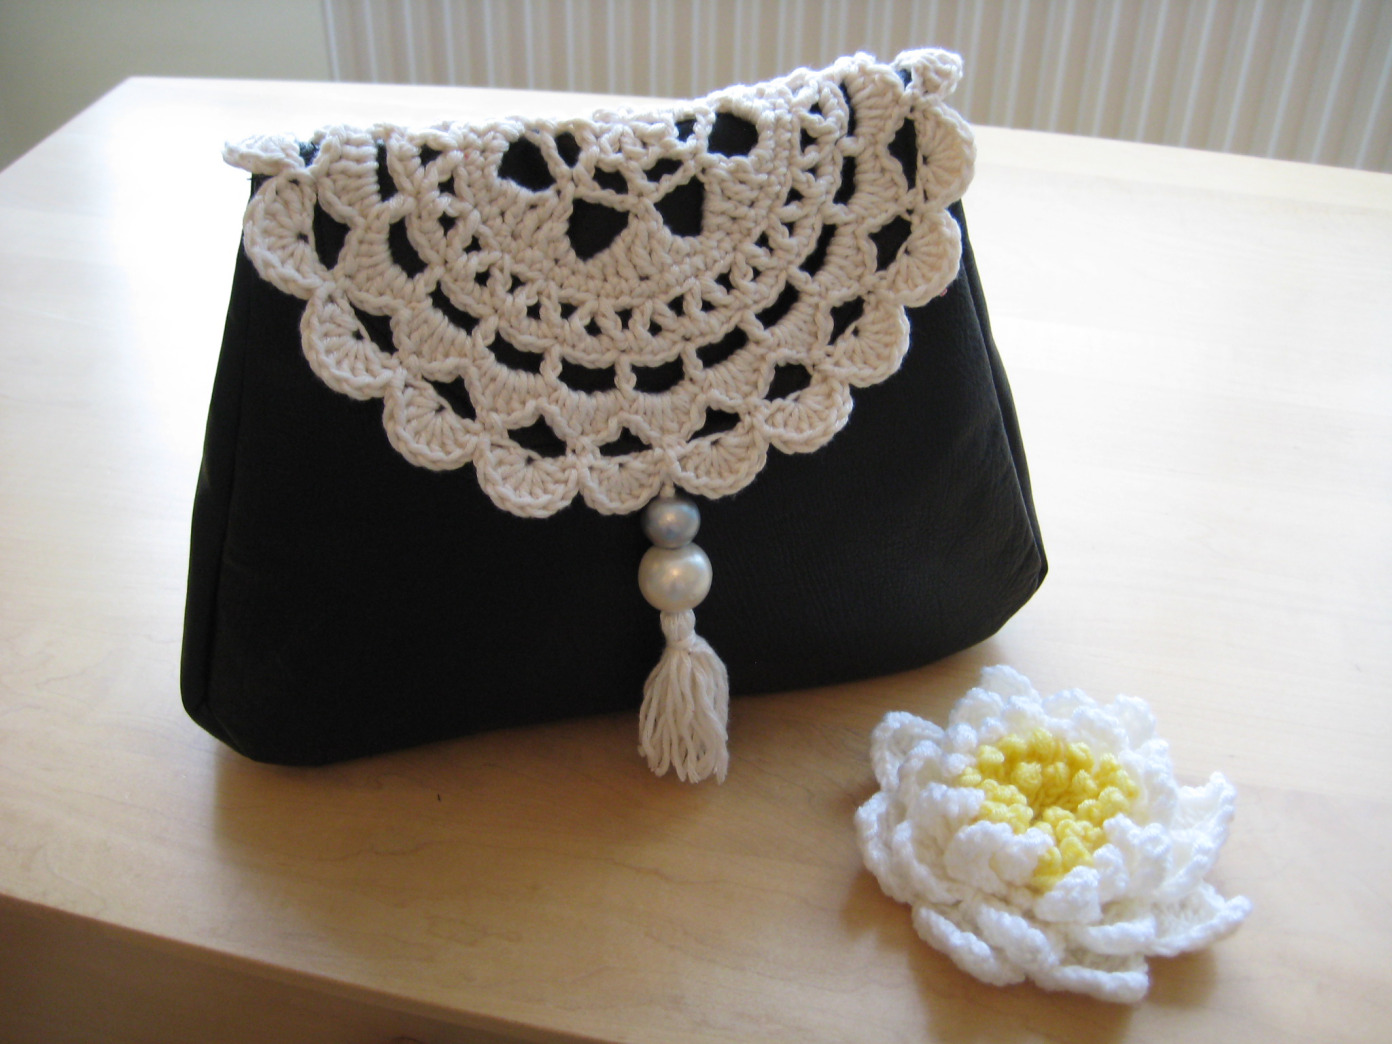
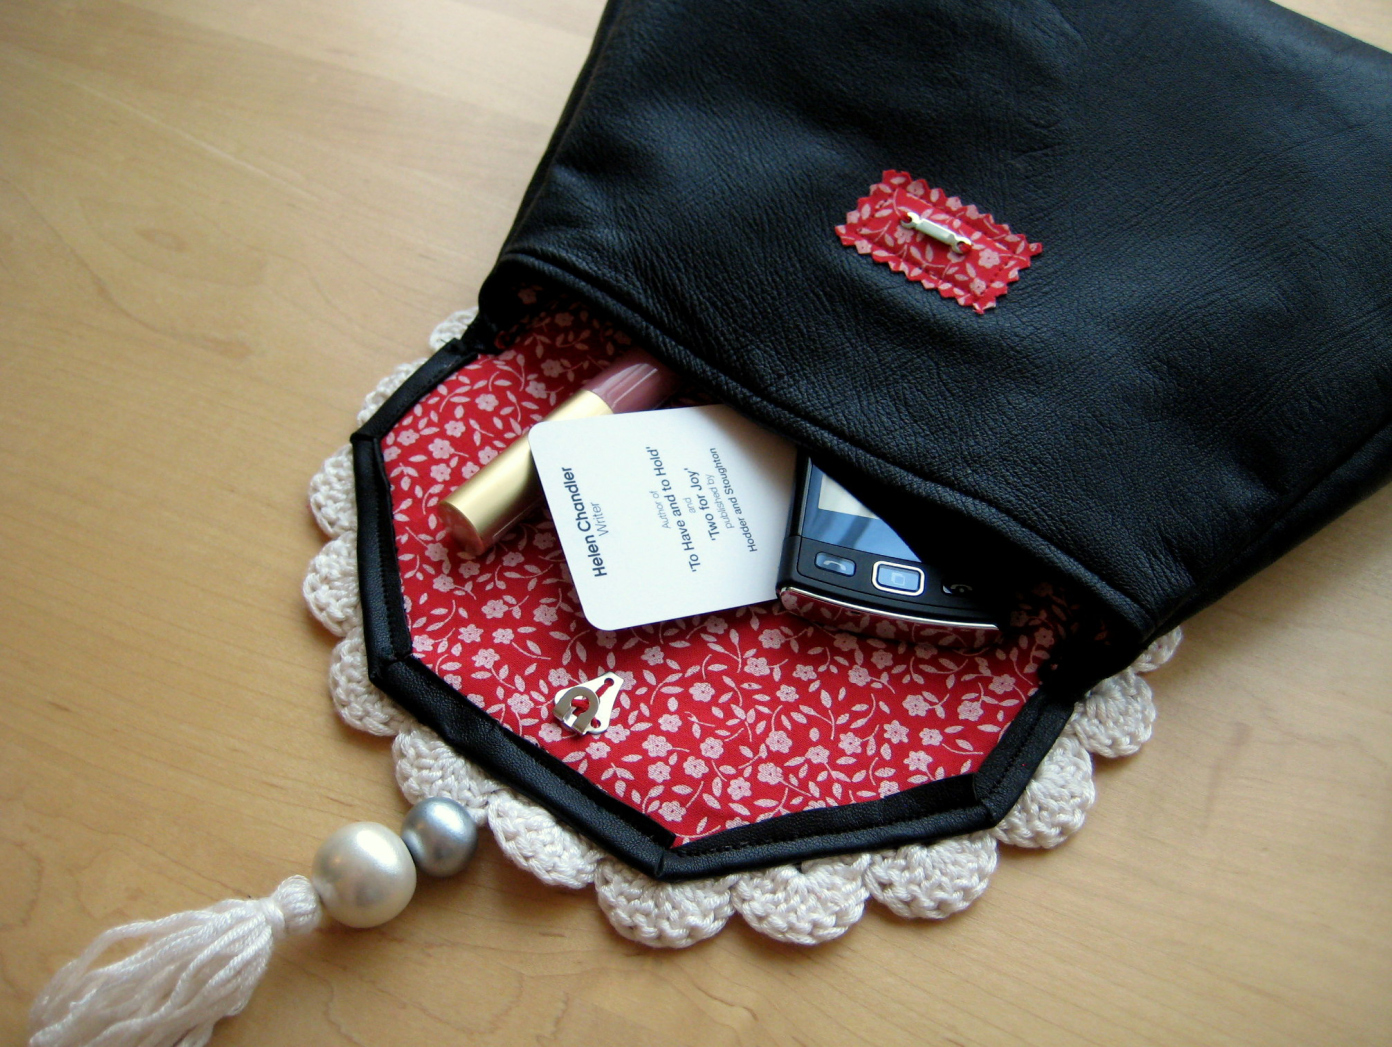
Esther Chandler from Make My Day Creative sewed along with us this week and cleverly used an old leather jacket to make this cute leather and doily clutch.
Thanks for sharing this with us this week, Esther!
***
If you are following along with the Refashion Runway fun and you decide to sew along with us for any of the challenges, photograph your project and send it to me at bhunting@eoni.com and I’ll post it for you. It’s fun for us to see your creative projects, too.
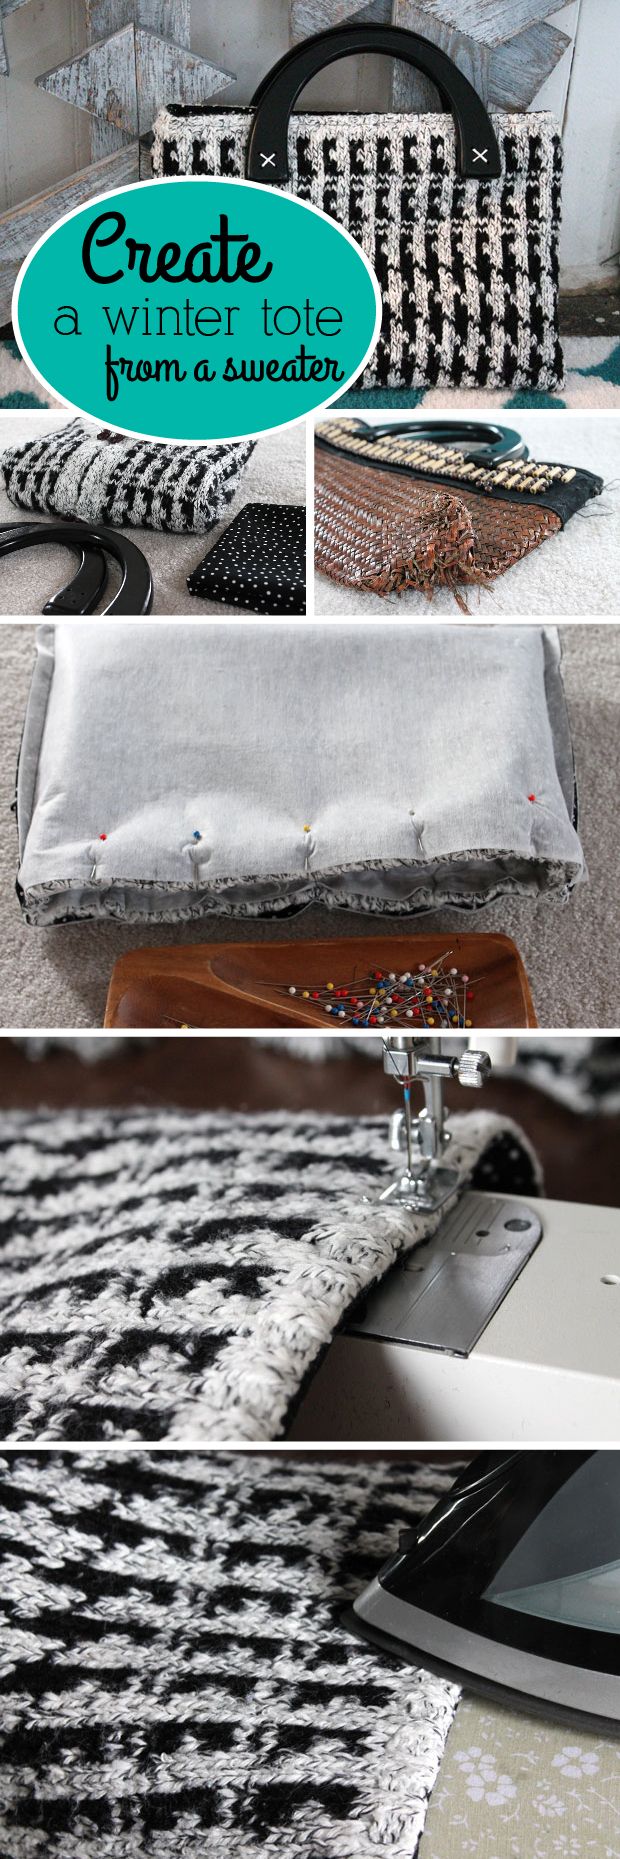
Since we’re on the subject of handbag refashions during Refashion Runway this week, I thought it might be fun to revisit a couple of my own bag refashions from the last year…
If you’d like to see the entire tutorial for any of these bags, just click on the image and it will take you there.
How about this bag made from an old sweater…
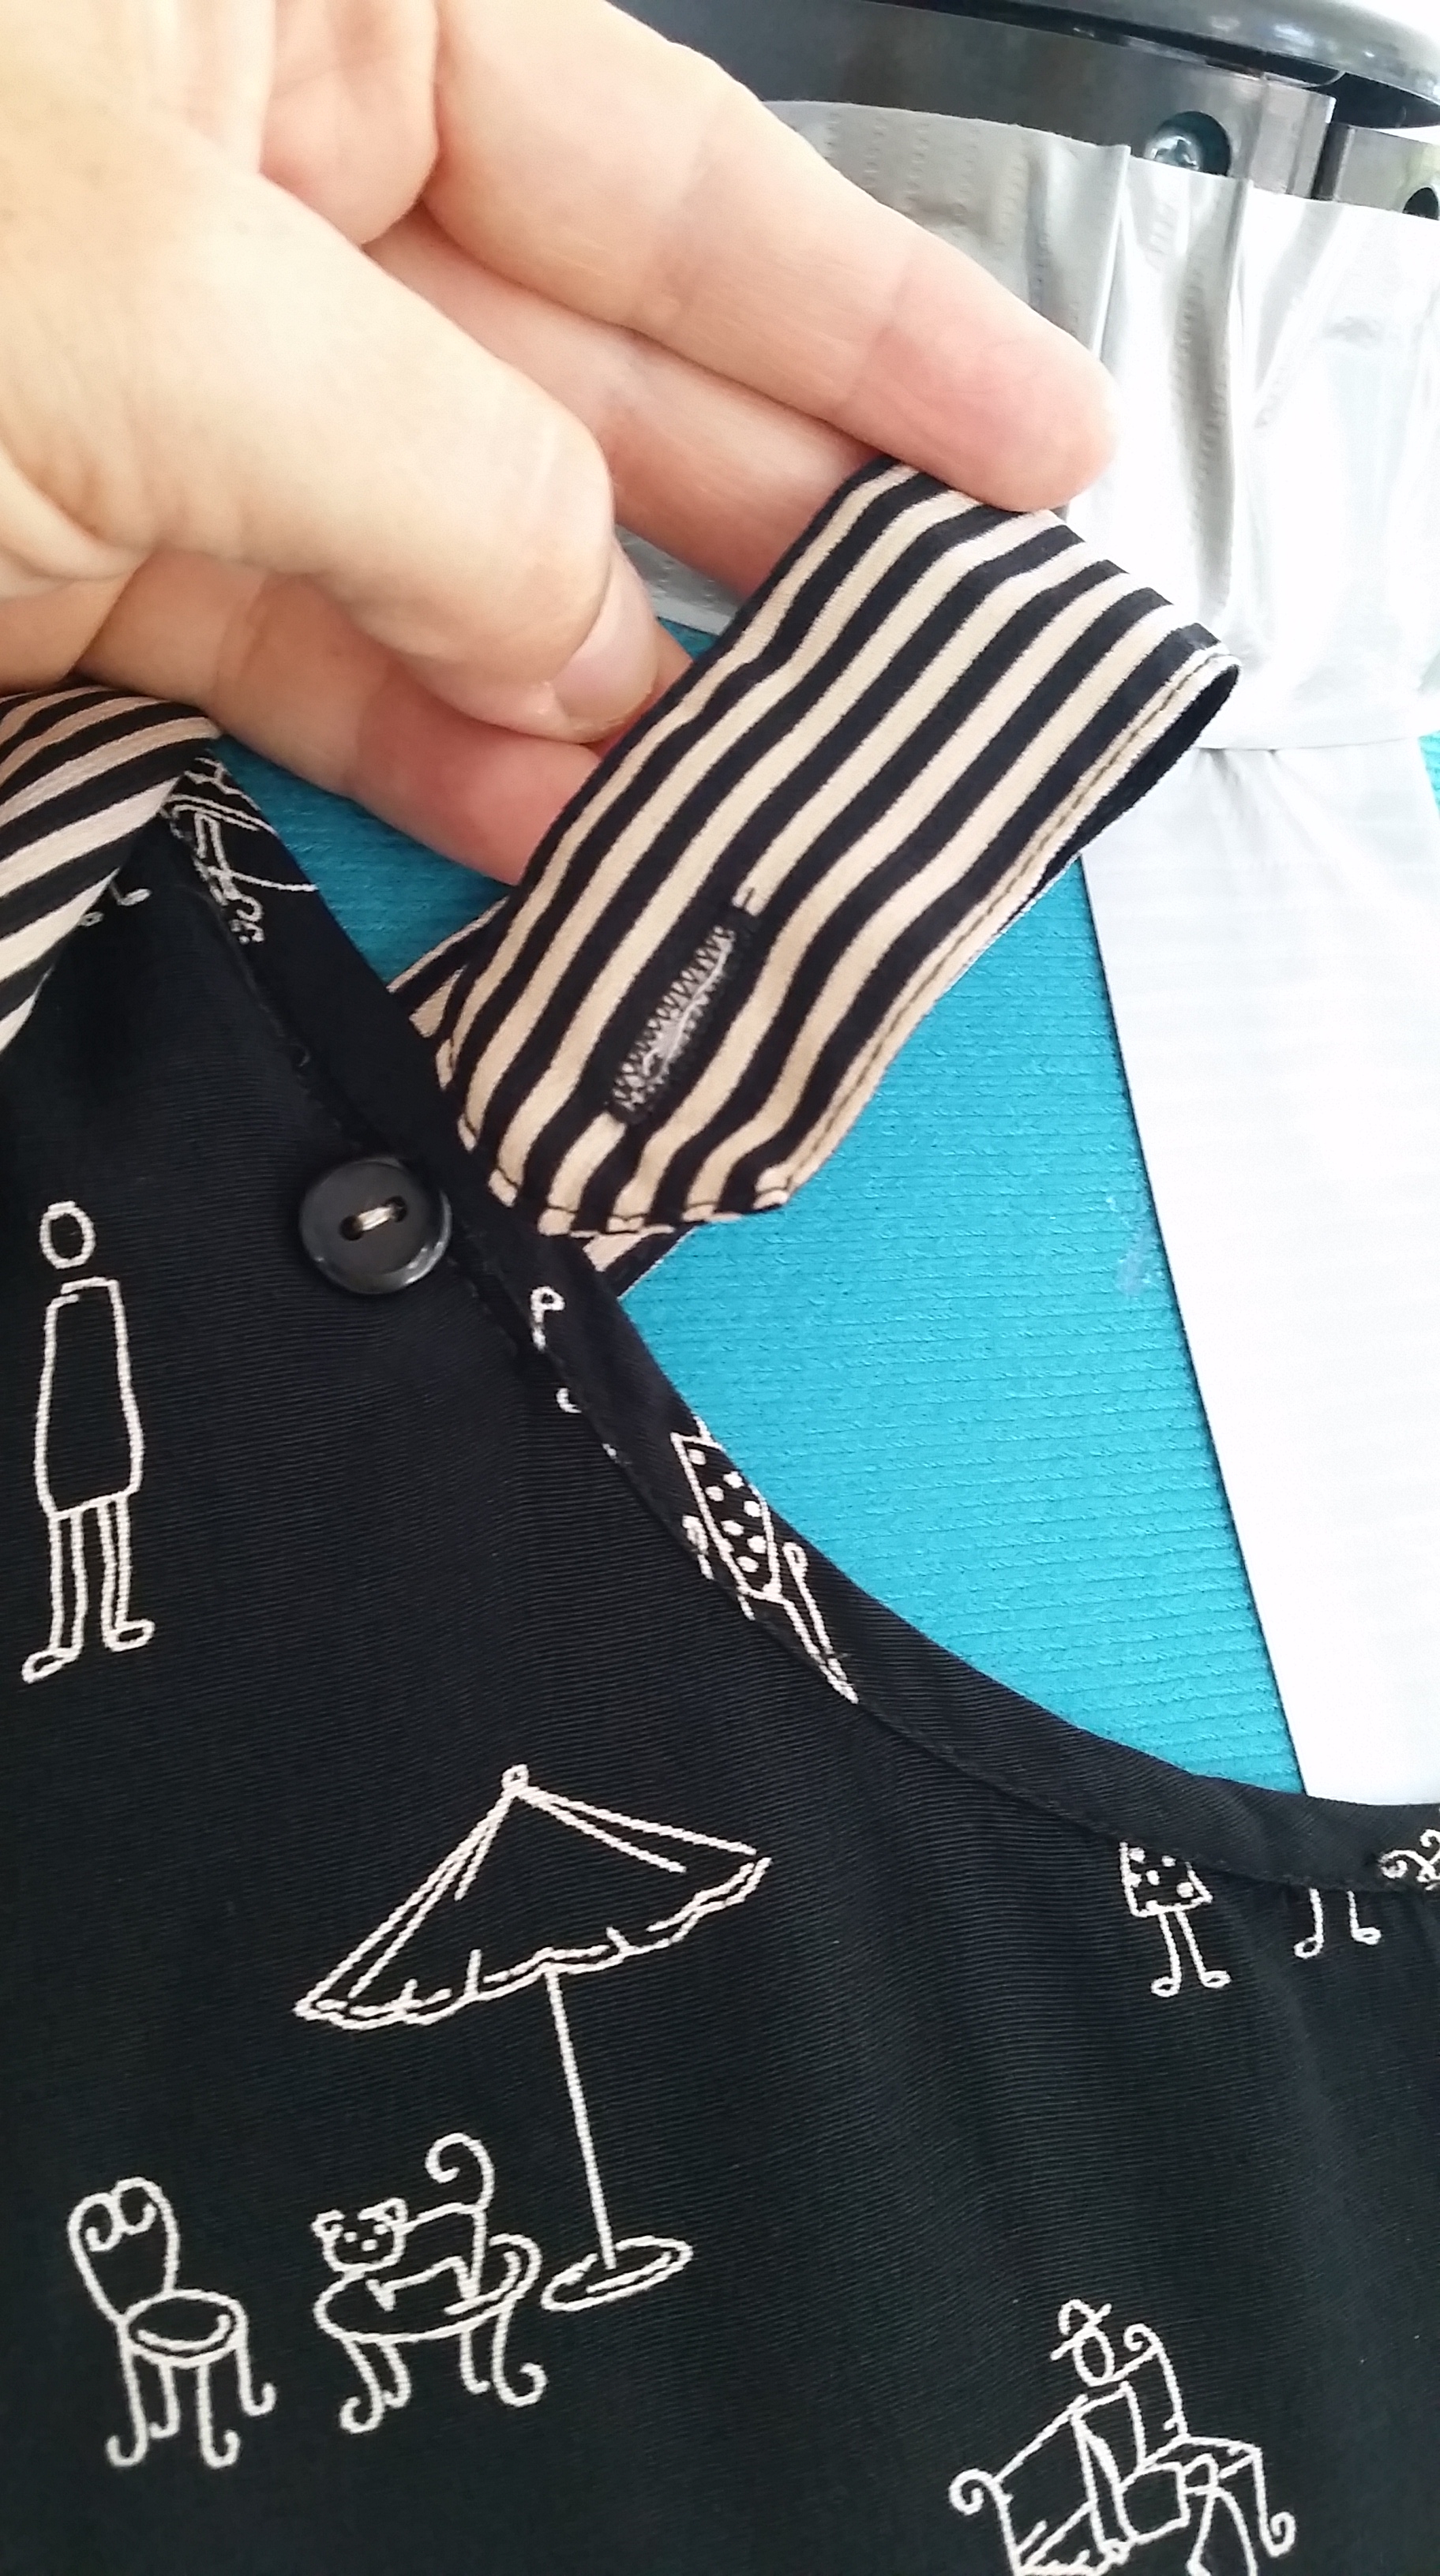
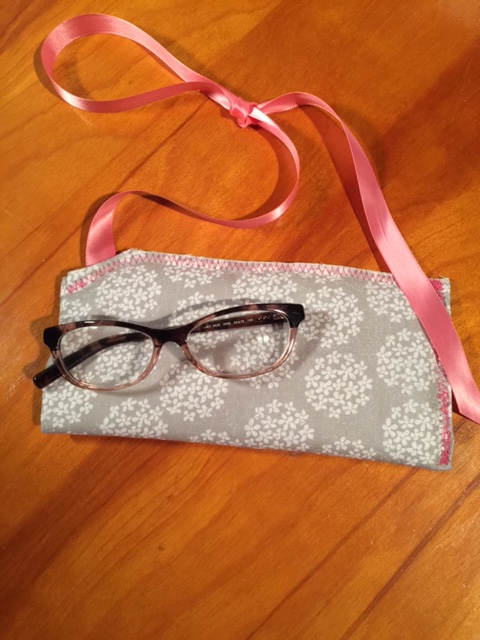
or this pencil case made from a reclaimed zipper and a discontinued fabric sample.
If you haven’t had a chance to vote for your favorite Refashion Runway bag refashion this week,
Have fun checking out the fabulous handbags these talented ladies have created this week. When you get to the bottom of this post, be sure to vote for your favorite by clicking on their picture and then clicking the vote button.
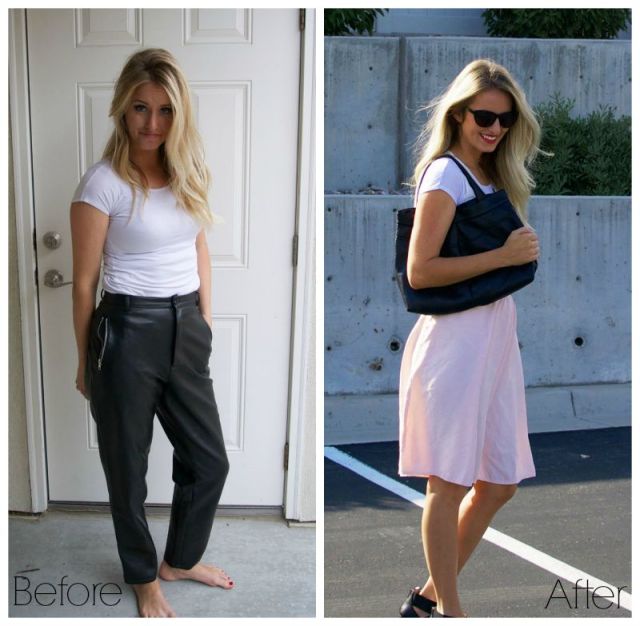
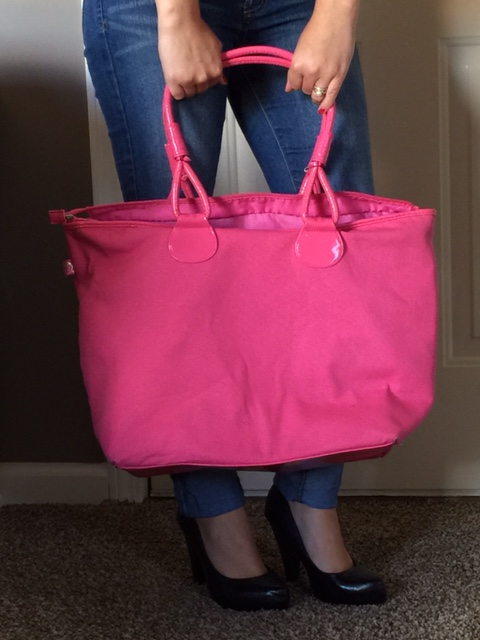
“This week’s challenge was something I’ve never even thought about doing
before, but I loved that it gave me a chance to try something new! I got
these pants at a thrift store for $10 (pricey if you ask me). They are
100% polyurethane, but look like leather. I tried using a leather needle
on them, but quickly learned that my ball point needle worked much better,
as there is some stretch.
I think a big part of refashioning is using the original construction of a
piece to your advantage. I loved the edgy zippered pockets, so I made sure
to keep them on. They add functional pockets to the front of the purse,
which are great for my phone and wallet.
To construct the purse, I cut off the pant legs, and sewed a straight seam
over the curved seam that once formed the backside of the pants. Then, I
stitched straight across the bottom to form a bag. To give the handbag a
better shape, I pushed in the corners, and sewed horizontally across them.
To make the purse more versatile, I added a liner that not only looks cute
on the inside, but makes the purse reversible as well. Lastly, I added some
simple handles. I love how it turned out!”
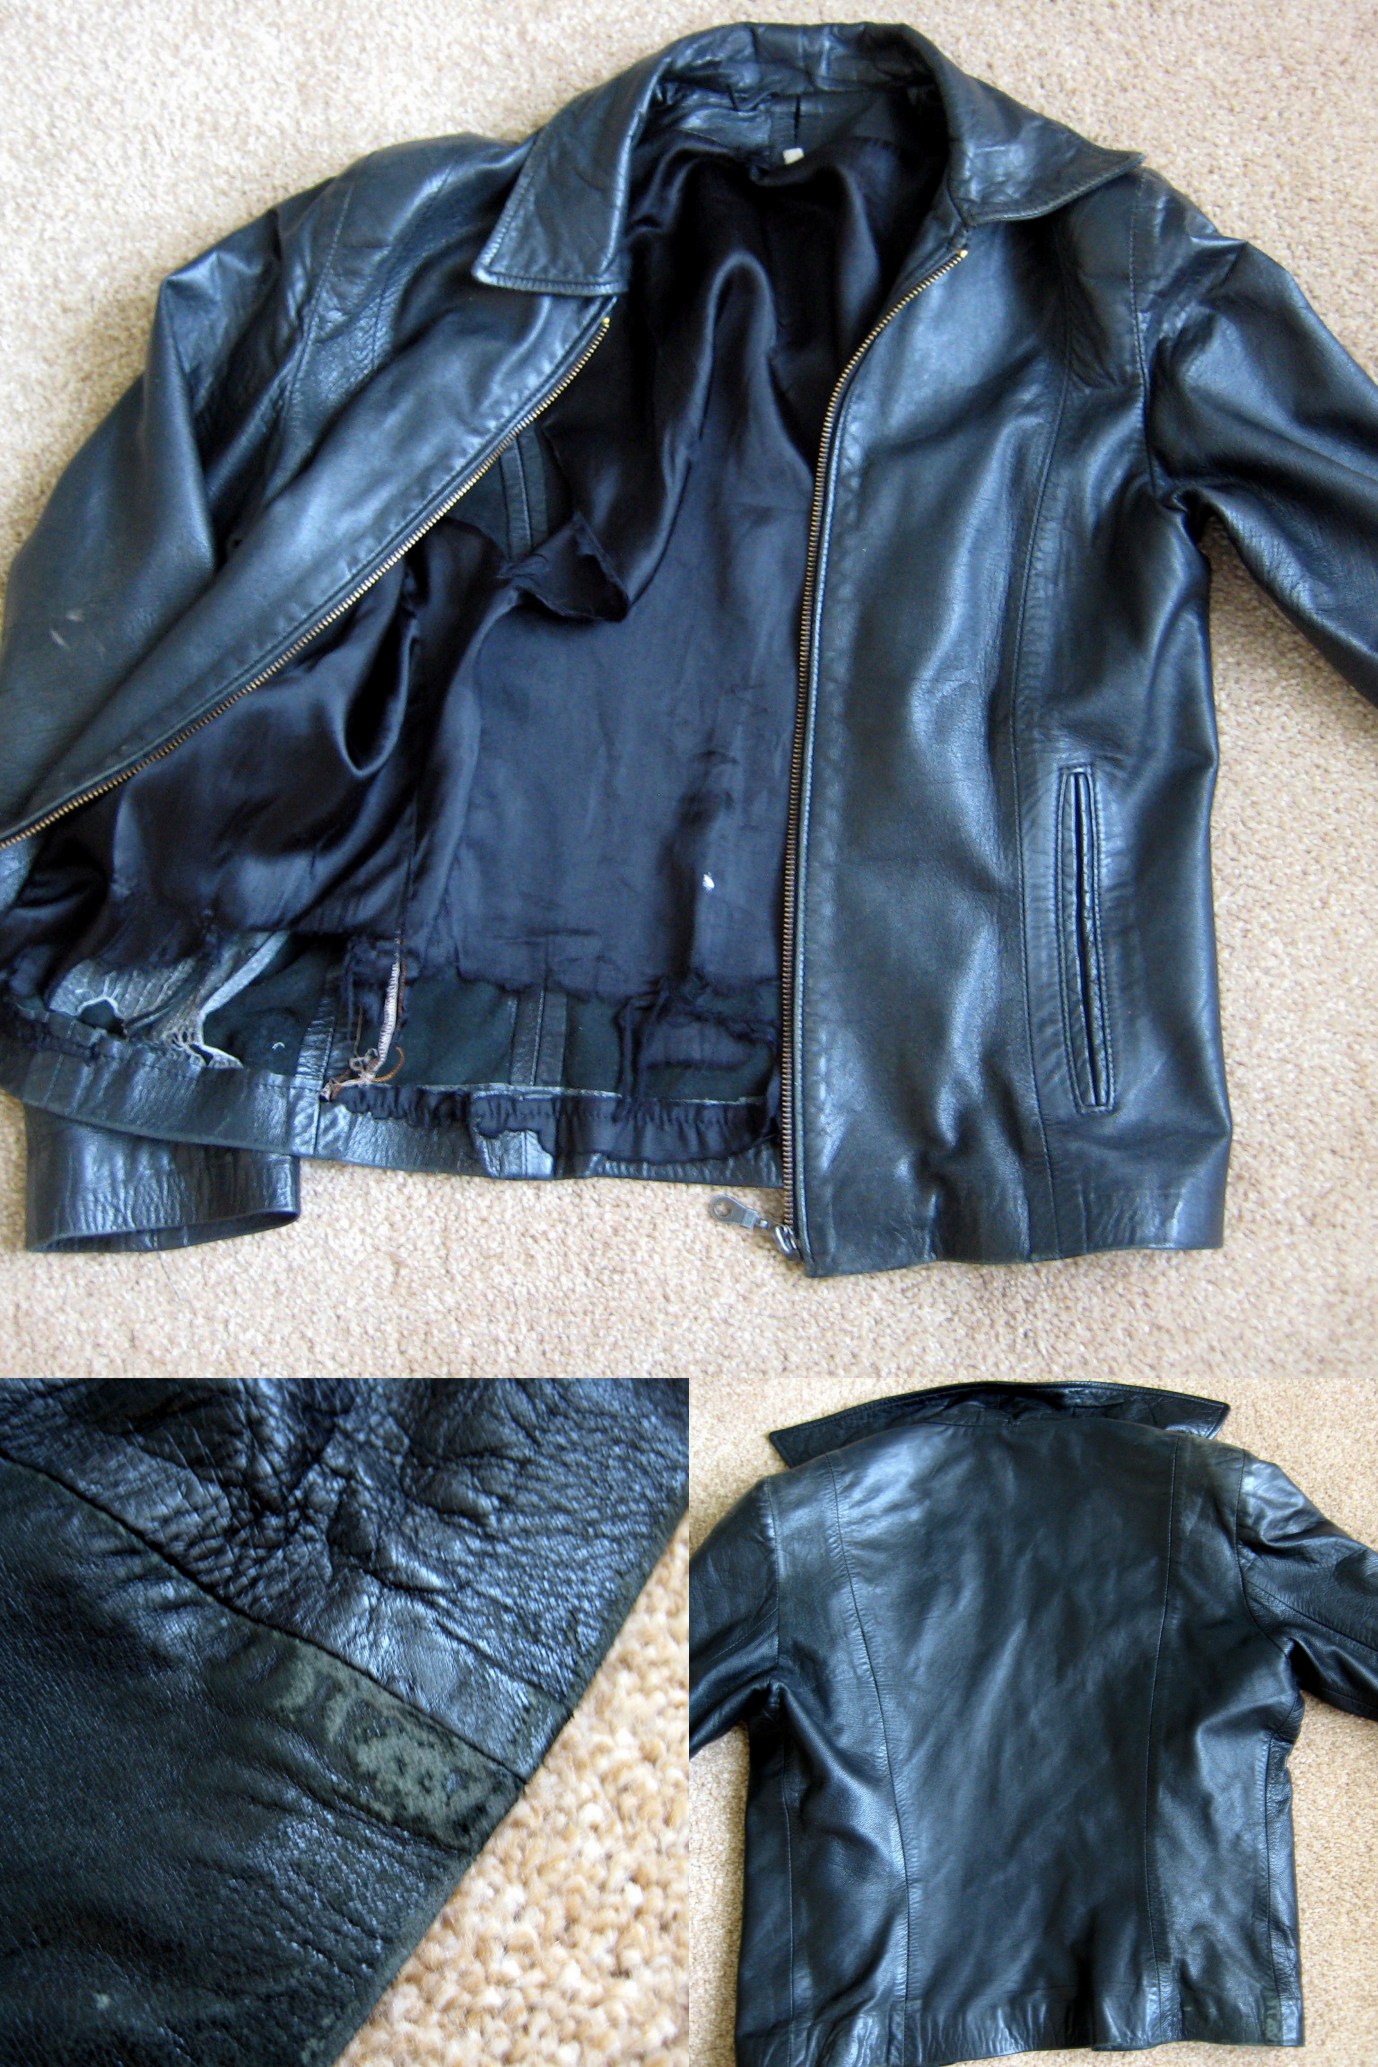
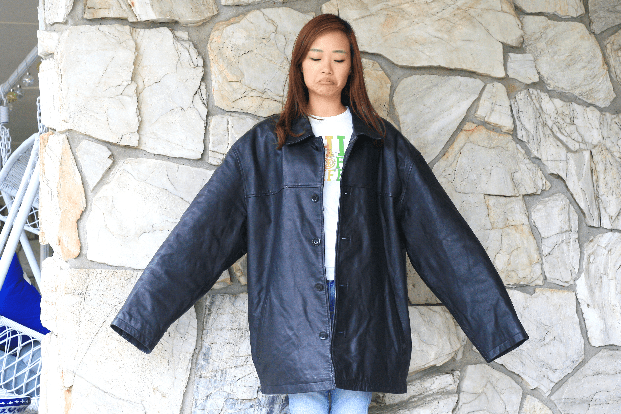
“Hello everyone! I found this week’s challenge to be the most
difficult and challenging for me. I’ve
never made a handbag/purse/clutch of any kind before and had no idea what I
was going to make. I thought oh, I have almost a week to decide and make
it, then the day before our family’s trip, I realized I didn’t have all
week to turn it in, I needed to turn it in before I leave on our trip! So I
had one day to figure it out and make it and submit this post, but I made
it guys, WHEW! And I am very happy with how it turned out!
BEFORE:
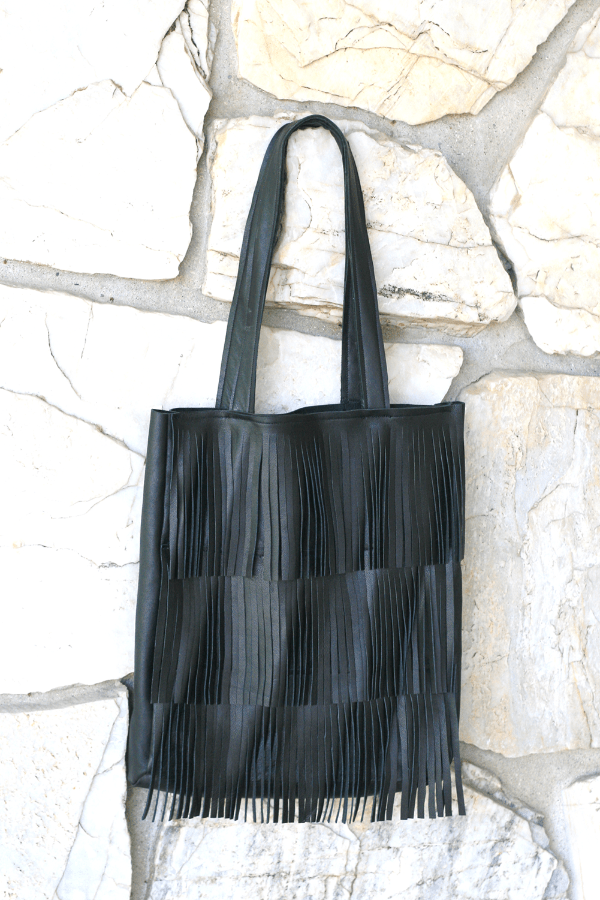
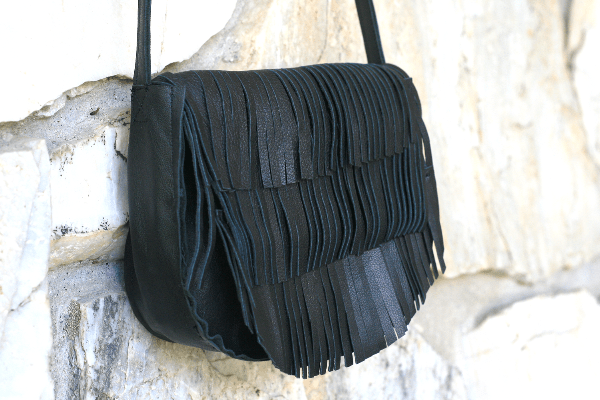
I got this big leather jacket from the thrift store. I picked out the
longest and the biggest size I could find because I knew the bigger it was,
the more I would have to work with. It’s 100% genuine leather and I knew
from the beginning that I wanted to make a genuine leather handbag.
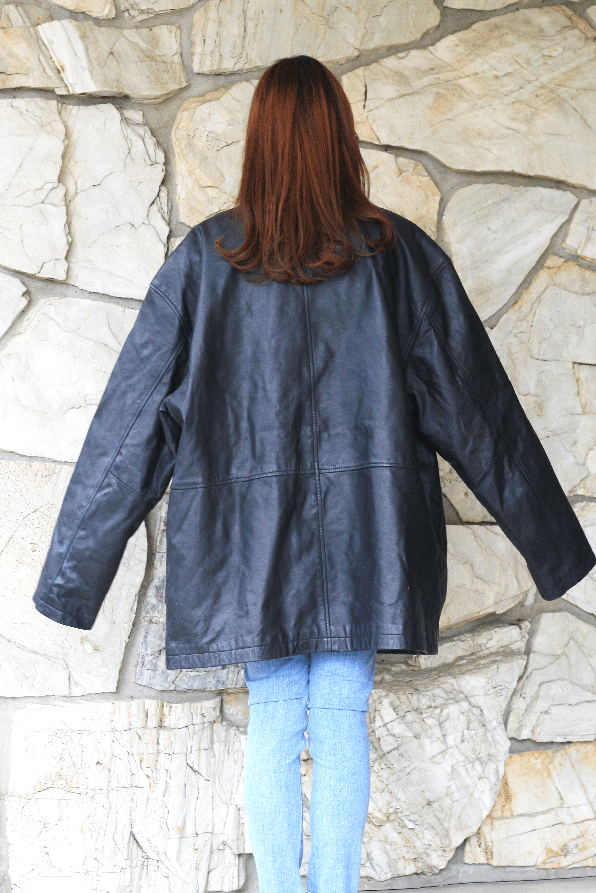
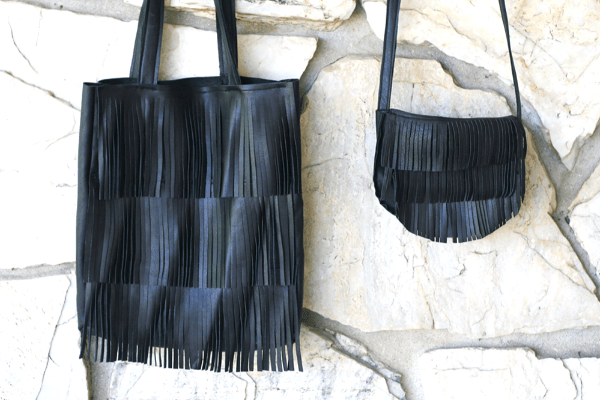
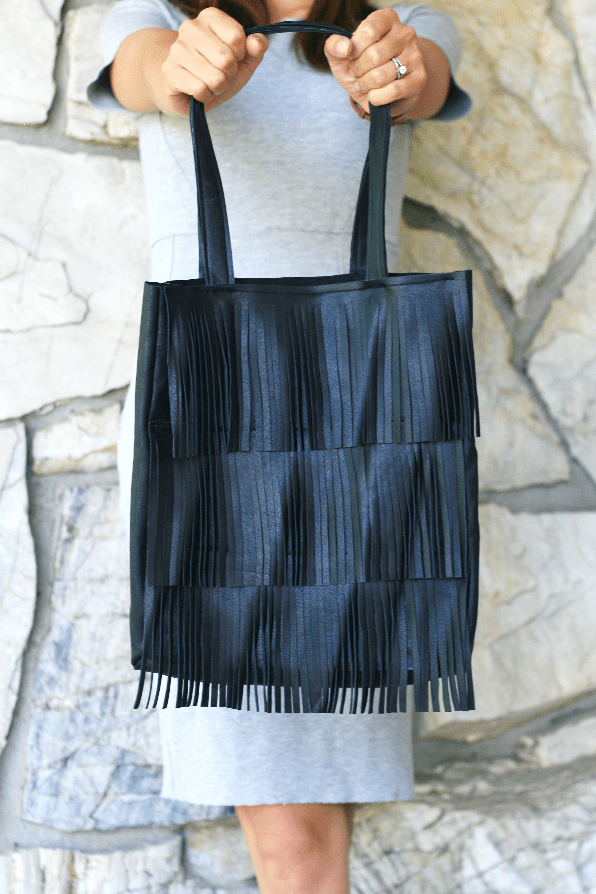
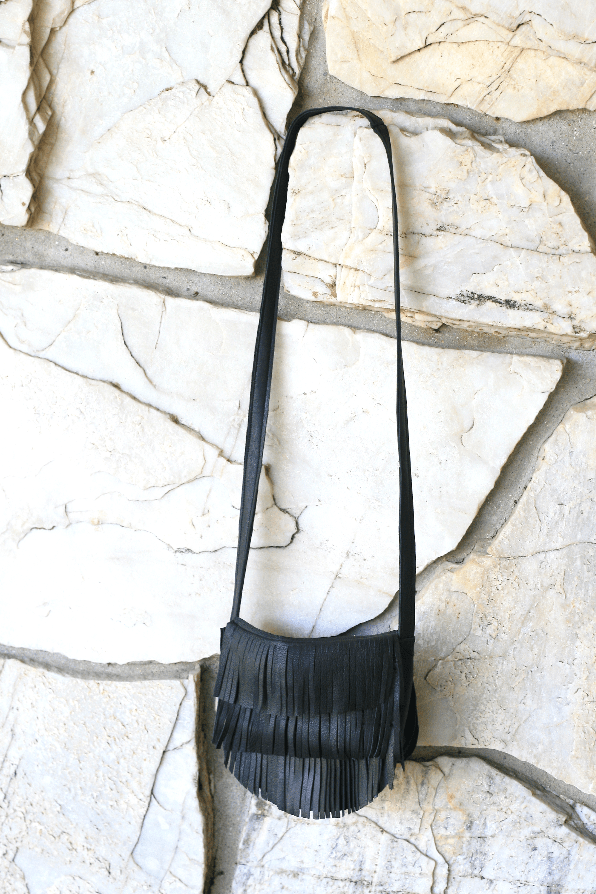
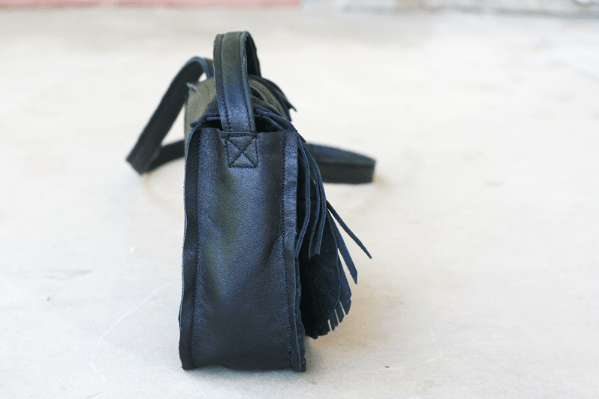
I was on a time crunch so I didn’t have the chance to take more pictures
during the process and write a tutorial. I knew I wanted my handbag to be
very simple, without any metals or hardware so the bags are made of leather
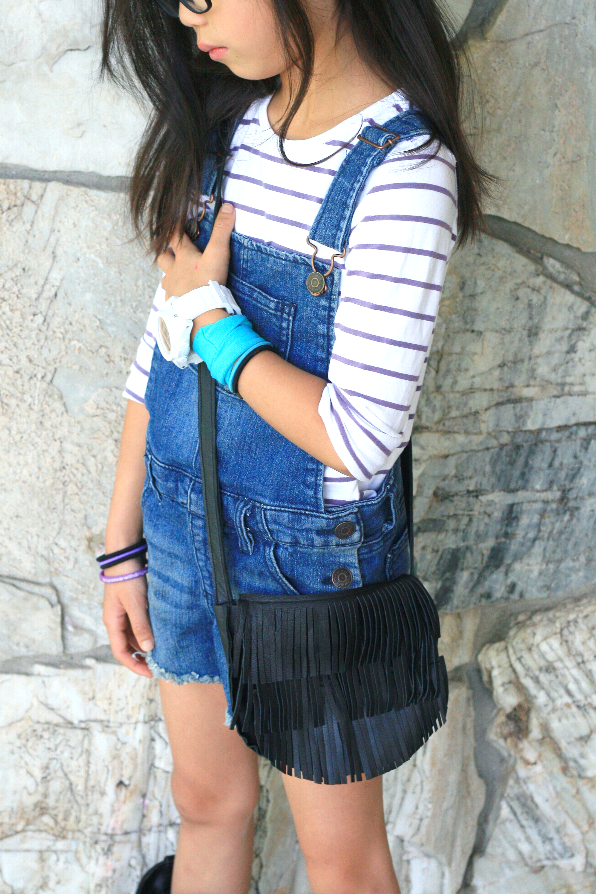
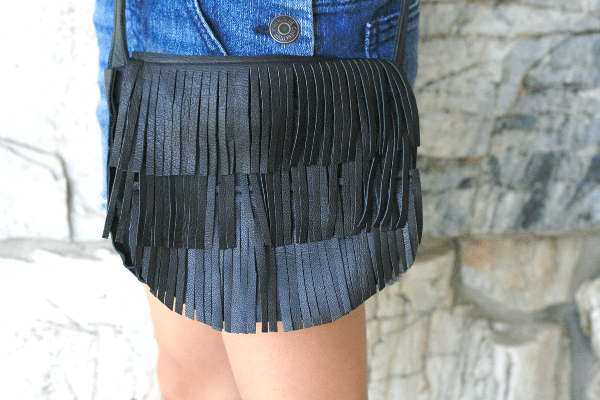
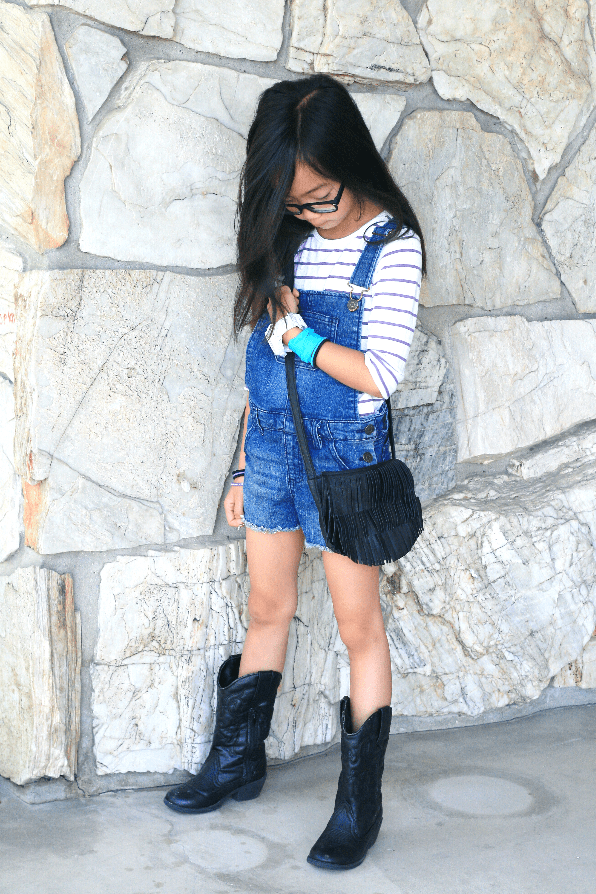
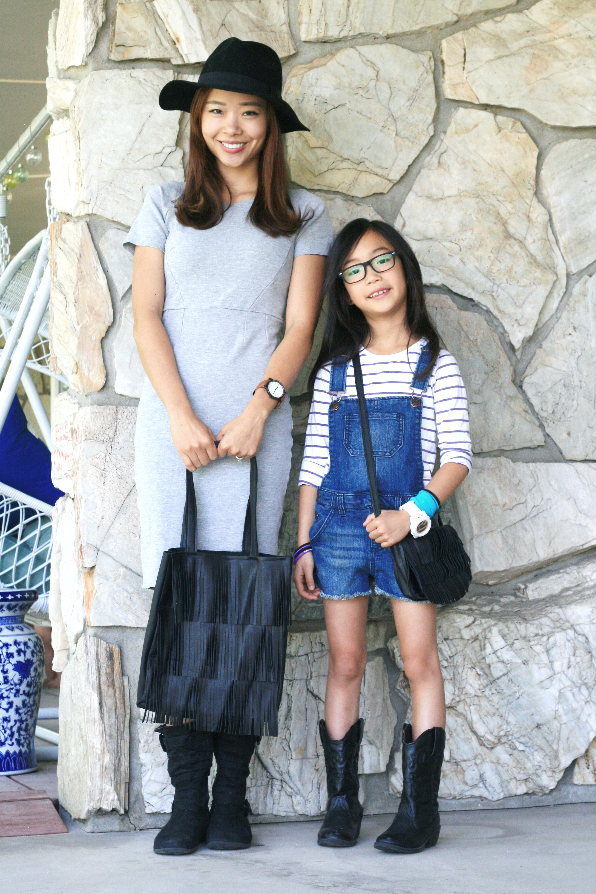
and thread, and that’s it! After making my 3-tier fringe leather tote bag,
I realized I still had a ton of left over leather from the jacket so I made
one for my little girl. And she absolutely loves it! It’s a hit and miss
whether my girls will like what I make for them or not, so I was so glad
she loved it.
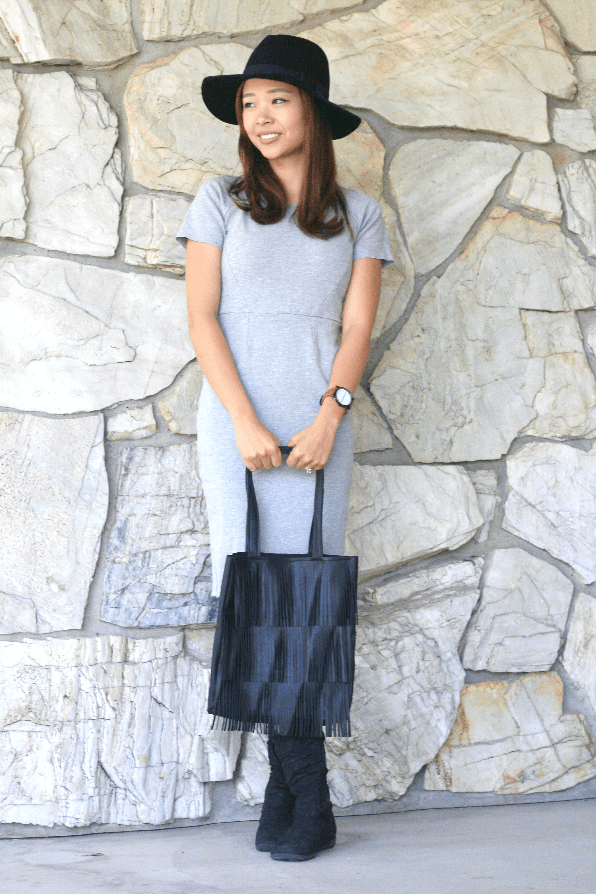
AFTER:
*What you’ll need*:
-A leather jacket(bigger the better so you have more to work with)
-leather thread
-leather sewing needle
-scissors
*Estimated time*: 1 1/2 hours per purse your first try, 30-45 mins. after
your first.
*Budget*: $15
*Skill level*: A confident beginner to an intermediate
I am so happy to be in this wonderful competition that’s been stretching my
creativity and comfort zone. Thank you for your votes that are letting me
stay in this competition, it means so much to me. I hope to be here again
for the Week 4: Maxi Skirt or Dress, vintage dresses are by far my favorite
clothing item to refashion!”
“I’ve never refashioned anything before to even remotely match a handbag or
tote or anything of the sort. They say it’s relatively easy but for a first
time it was all scary.
The only thing I visioned to be remotely close to the assignment was one
skater skirt that was thrifted and too tight at the waist, even for my tiny
statuesque waistie. (I like to think it was children’s skirt.) And so it
was under my refashioning wheels.
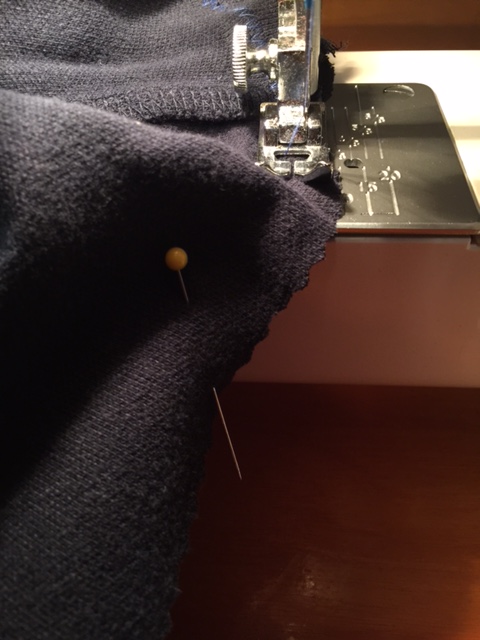
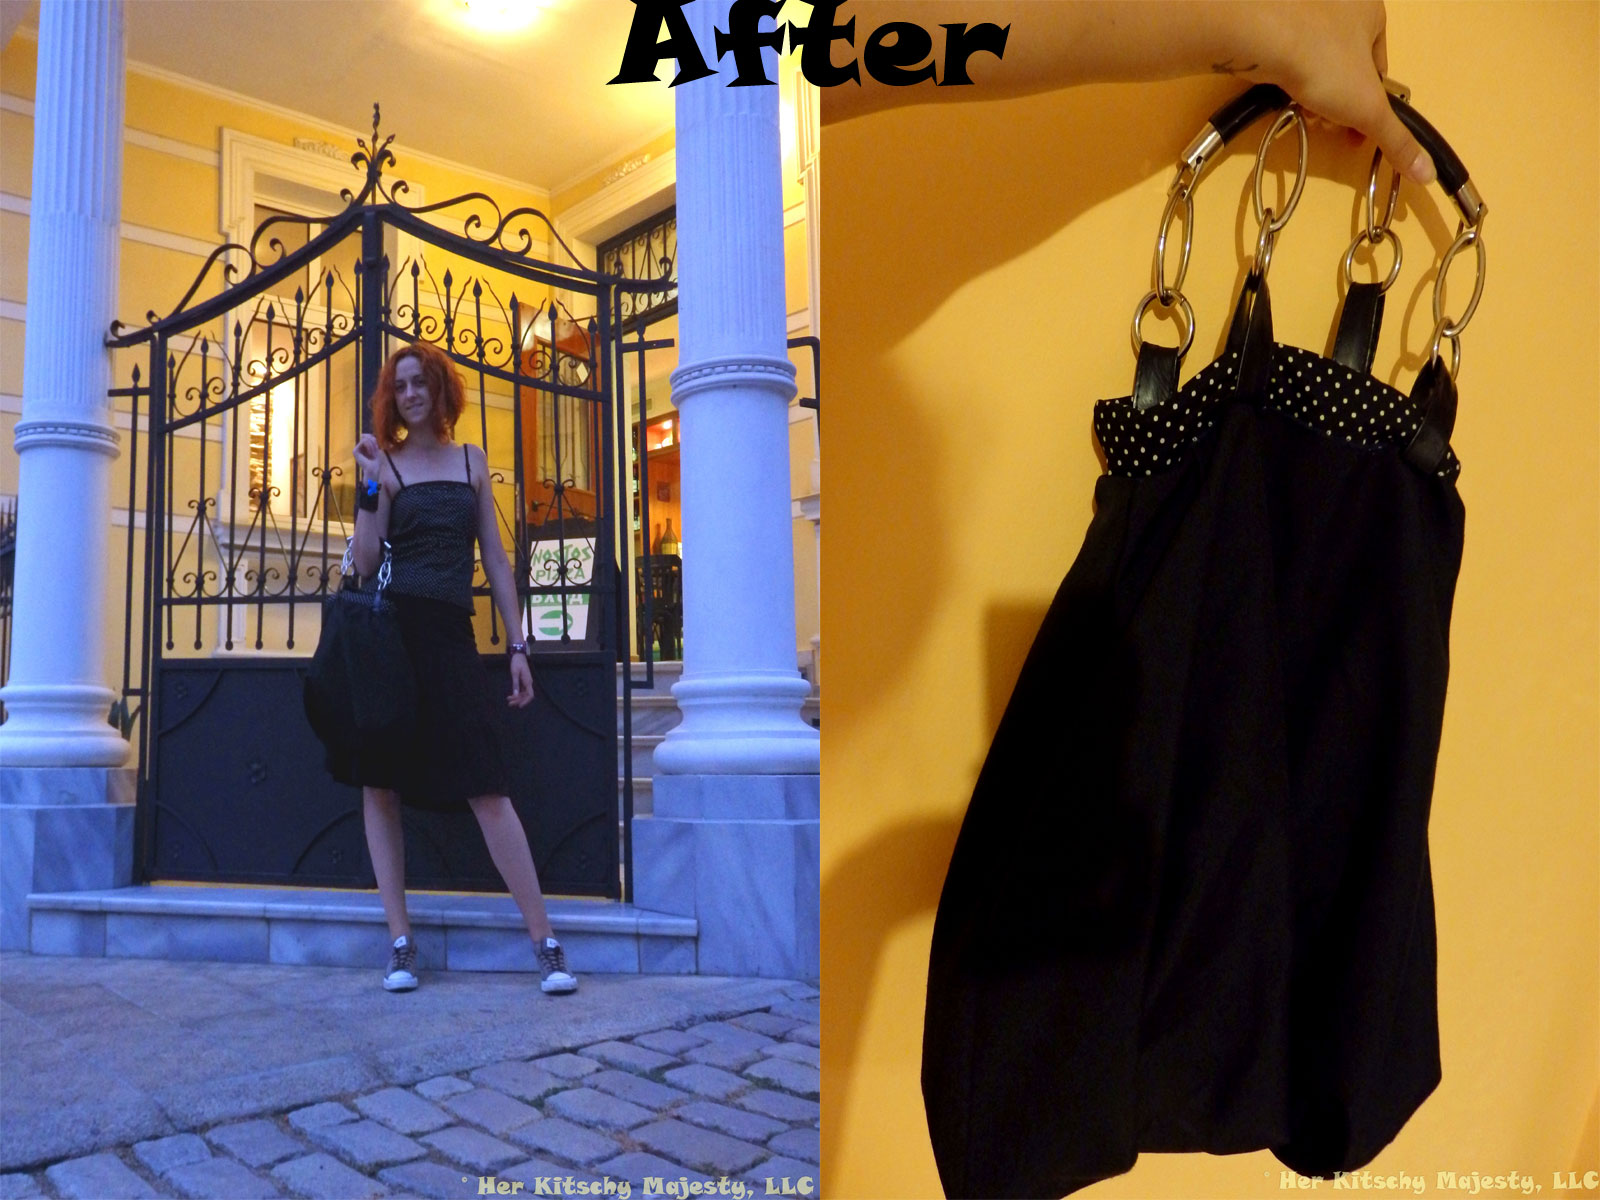
I cut off the belt loops and the zipper and sew it all together. Next I sew
the bottom shut in the pictured way – I just turned it inside out, folded
the lower seam three times at the edges, pinned it and sew through it. Then
I also sew the lining shut, sew a bias tape of a polka dot pattern at the
opening to decorate it a bit, hand-sew faux leather straps and added those
handles rusting in my stash for years – they were reclaimed from an old bag
that went gutless but the handles definitely rose to a new life.
Since the polka dot bias tape was taken from the remains of an old dress
turned into a strapless top, I decided to pay it homage by wearing it and
pairing it with my brand new duffle/handbag eclectic creation. That polka
dot pattern with the Converse I’m wearing definitely brings me to a modern
rockabilly vibe, and it’s very contageous!”
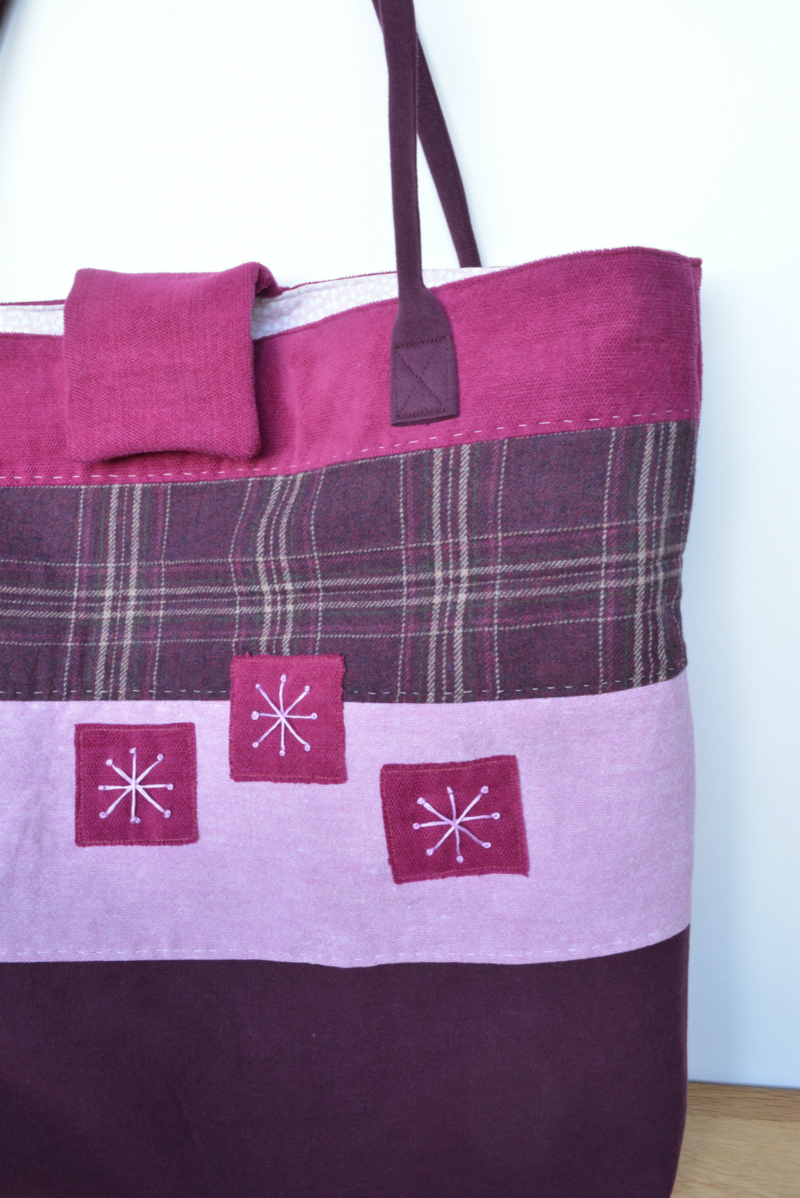
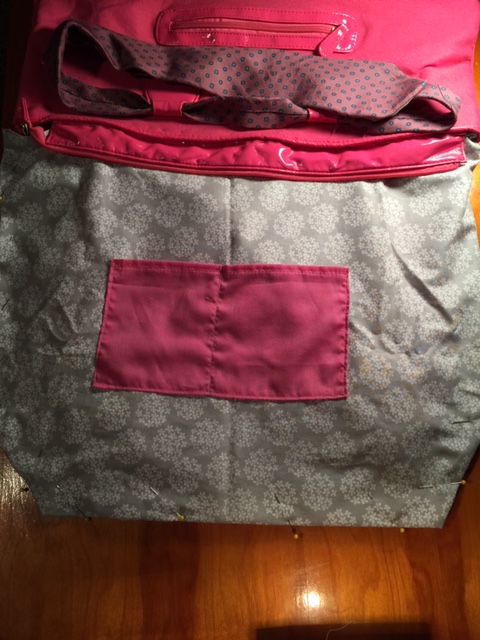
“For this week’s challenge, I took one of my dad’s old Suit Jackets and turned it in
to a tote. He actually donated it to my husband, but when it didn’t fit him right I
decided to take matters into my own hands 🙂 No piece of clothing goes to waste when
you’re married to a refashionista… I had to be strategic with my cutting because I
wanted plenty of pockets for my phone, lipstick, gum, etc. So I cut around the
existing pockets of the suit jacket.The small houndstooth print didn’t translate
very well in some of the pics, but there’s definitely a “fall” theme in the
coloring. To keep with the fall look, I found some maroon handles that I stole off a
previous purse that I wore out (I seriously never throw any usable clothing away).
To give it a little pizzazz (I found some coordinating scrap fabric in my stash), I
cut out a letter “L” & appliqued it on the front panel. I’m really quite fond of
applique. I use it a LOT. I used other scraps in the same fabric to attach all my
handles; a zipper foot made that job easier.
I sewed it all together and voila: I have a new Fall purse (Fall will be here before
we know it..).
This tote cost me nothing to make :)”
Laura
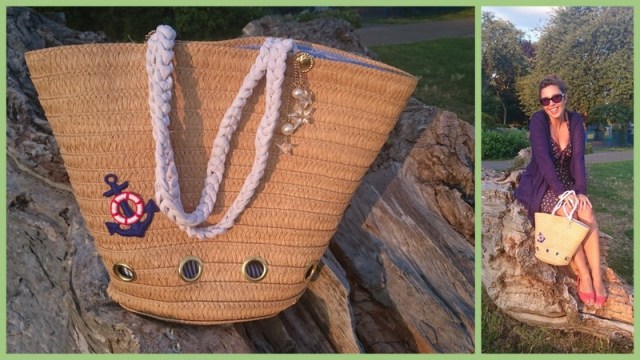
“Again – on the EDGE OF MY SEAT waiting to see what everyone else made this
week! I started with a hat I’ve had for a while, that I just don’t wear any
more… I deconstructed the hat, until it was almost all strips of
wicker… I pinched the base to make it flat, glued it…
And then sewed it back on itself, in a different shape – to make the basic
bucket bag shape.
I then thought about the lining, and made the inside from an old shirt,
adding a yacht-print pocket, and trimming with bias binding…
Before attaching the lining I made rope handles, from a t-shirt I turned
into yarn, before crocheting…
And after sewing the handles on, and adding the lining, I also added
magnetic clasps – and small details to the outside, like an anchor motif,
and bag charm…
I also made a tiny coin purse to match from the yacht print fabric, and
lined it with the same stripy fabric as the bag itself…
SO! What do you think..? I took it to the park, and felt very happy to have
a bag that goes over the shoulder, but also is comfortable to carry by my
side (and doesn’t skim the floor).