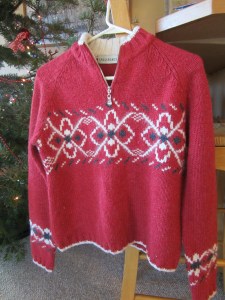
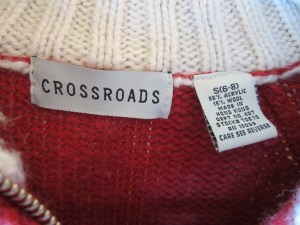
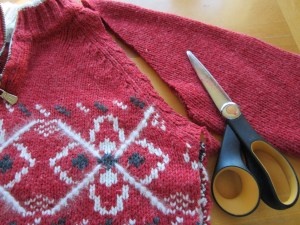
Start with a thrift store sweater. This one was 50 cents on Wednesday at my friendly neighborhood thrift store. It’s mostly acrylic and a little bit of wool. Kind of itchy and way too small for me.
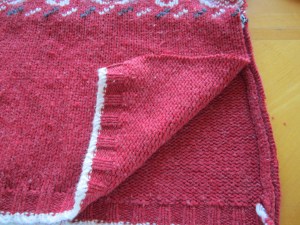
Cut up one side of the sweater.
Cut off the sleeves.
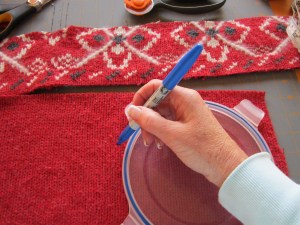
Cut a rectangle 1 inch larger than the circumference of your head (this allows for a half inch seam on each side)by 4 or 5 inches tall. (Depending on how tall you want your hat. I cut mine 23in x 4in. I might go a little taller next time by perhaps a half inch).
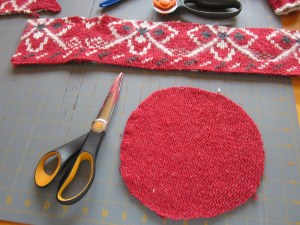
Next I used a lid to trace the top of the hat. This one measured 7 inches across.
Then cut out the circle.
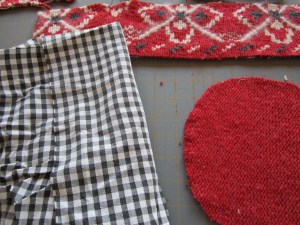
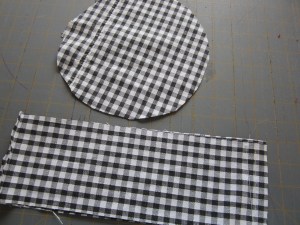
Next choose some cotton fabric for the lining. I used the black gingham from an old tablecloth I bought at the Salvation Army, years ago.
Cut out a circle and rectangle with the same dimensions as your sweater pieces. Mine were 23×4 and a 7 in diameter circle.
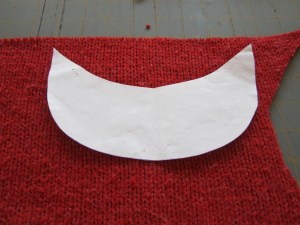
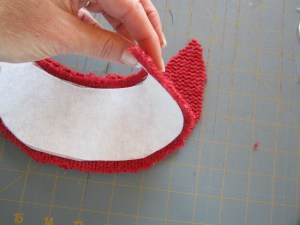
Make a paper pattern for a brim. I copied a brim from another hat. I made the brims too big on my first hats and had to rip out the seams and make them smaller. It was so much work but I liked the smaller brims much better.
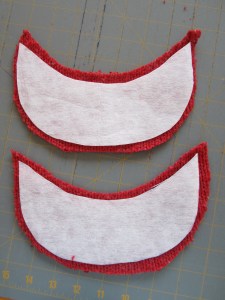
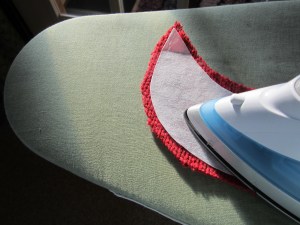
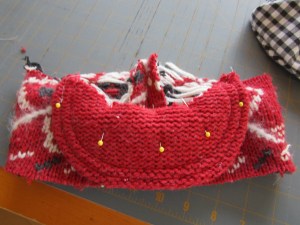
Cut 2 with about a half an inch around each side. Then cut two pieces of heavy fusible interfacing the same size as your pattern and iron on the wrong side of your sweater.
Place right sides together and pin in place.
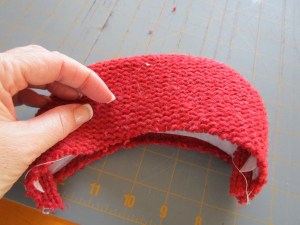
Just sew the convex side with a half inch seam. (Now I’ll see who is really reading this and see if I used the correct word there. It’s been so long since I’ve had an opportunity to use that word:)) Leave the concave side open.
Turn it right side out.
Topstitch around the convex side. I put 2 rows of topstitching next to each other. You could do as many as you like.
Fold your sweater rectangle in half right sides together.
Stitch together starting with a bigger seam at the top and angling the seam down so the top with be smaller than the bottom.
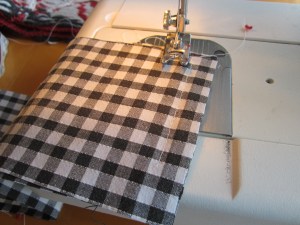
Do the same with you lining fabric.
Right sides together, pin your circle piece onto the smaller side of the sewn rectangle piece.
Sew around the circle.
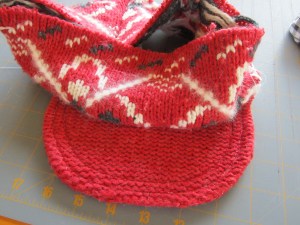
Next pin and sew the brim onto the larger side of the sewn rectangle. Right sides together.
Now it’s finally starting to look like a hat.
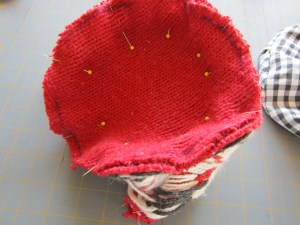
Pin and sew the circle piece onto the other side. Right sides together.
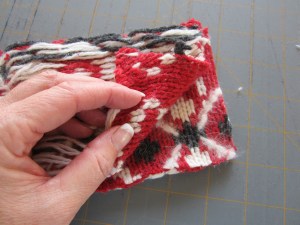
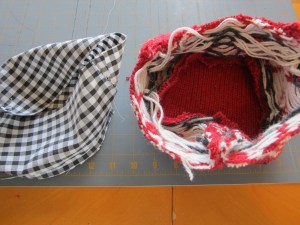
Now turn your sweater part right side out and the lining wrong side out.
Place the sweater part inside the lining part. The right sides should be together and the brim should be between the lining and the sweater part.
Sew all around the edge leaving a 4 inch opening so you can pull it through and turn it right side out.
Pull it through the opening so it’s right side out.
Fold the raw edges under and pin all around the hat. Topstitch around the entire hat.
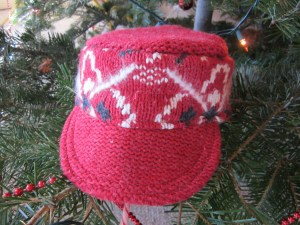
And “Wah Lah”! You’ve got a sweater hat!!!!
You might also like:









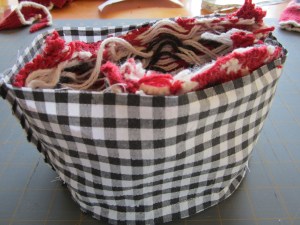
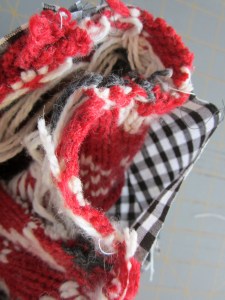
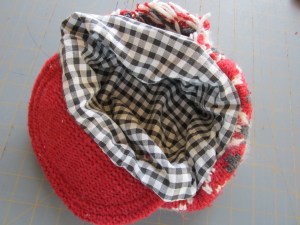
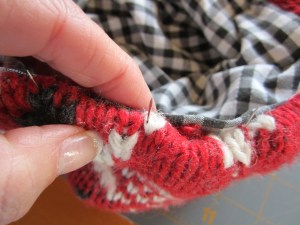


I love it…but it looks way to complicated for this chica! I’ll leave the sewing up to you and stick to scrapbooking:)
I am not a sewer (although I did take a beginners class in college) but I am going to try this, I just love all the hats you post, they are so cute! Your instructions are really clear!
Oh, I’m so glad you’re going to try it. They are fun to make. Call me if you have any questions. I was thinking of having a class/get together to make hats or mittens. I’ll call you if I end up doing it.
Skylie says, “I like your hat!”
Star says, “That’s AMAZING!”
Thanks so much Sky and Star! I saw some of the things you been making on facebook. Keep up the good work. Creating is such a great thing to do!
Welcome to blogging. Love the hat and the projects for your daughter. Great tutorial. Looking forward to more. Happy New Year.
Hi Trudy,
I LOVE LOVE LOVE your blog. You are one talented and beautiful mama! Thanks for your words of encouragement! I added your blog as a link. I’m still trying to figure out how to grab a button and post it in my sidebar. I’m also trying to figure out how to be a follower of your blog. Some blogs are easy for me and others aren’t so straight forward. I’m wondering if having different blog hosts make it harder. I’ve only been doing this since Tuesday so I still have loads to learn. But it is FUN FUN FUN!
Beth
Also, I forgot to mention, that I feel very honored that you took the time to comment on my blog.
Love hats!!!!
Very nice! Love this hat!!
Pingback: Sweater Mitten Tutorial | chic envelopements
So cool!! You are amazing!! thanks for linking up to our blog hop linky party!
Leanne
Oh yes, such fun!
Just brilliant! I LOVE this and am going to pin it to try myself sometime!
Thanks for linking to a Round Tuit!
Hope you have a fabulous week!
Jill @ Creating my way to Success
http://www.jembellish.blogspot.com/
Oh I hope you make one! I’ve made several this winter and they’re fun and easy to make. Send me a picture, I’d love to see it when you’re finished!
Great idea and tutorial!
Thanks so much! I checked out your blog and I’m your newest follower.
This is getting bookmarked right now. Thank you for sending me the link to this…when I get one made, I’ll post pictures on theREmissionary and let you know. I love it!!
Great tutorial! Thank you so much for taking the time to write and share this. The hat is adorable and you make it look so easy!
Pingback: Another sweater transformation | The Renegade Seamstress
Love the hat and mittens. Could you give some measurements for the brim pattern piece. I have a couple of sweaters ready to go. Thanks
Hi Robbie,
Sorry it took me so long to get back to you with the measurements. But the finished size was 7 inches on the part of the brim attached to the hat. So when you cut it out, leave a half inch seam allowance on each side, so when you cut it out, it should be 8 inches.It is 11 inches around the the front of the brim. When I made this I looked at a hat with a brim I liked and copied the measurements. It took a few tries til I got the size I liked. Good luck and I’d love to see your finished hat.
Beth
Hi I love this little hat tute. I am not understanding the part about sewing the rectangle on a bigger seam and angle down. Any possible way you could embellish on that a smidge, please? Thank you “SEW” much!
Hi Erin,
Sorry I didn’t get back to you right away. When you fold the rectangular piece in half and are going to sew the two short sides together, don’t make a straight seam, just start in about an inch and a half at the bottom of the seam and as you sew angle the seam so it ends as a half inch seam. You need to do this because the bottom of the hat is a little bigger than the top. This will angle the side piece a bit. Please let me know if this isn’t clear enough. Have fun with this hat. I’d love to see it when you’re finished!
Beth
Beth, thanks you “sew” much for clarifying this for me! I appreciate it and I will definitely send a picture when I get it done! Thanks again!
You are so welcome! Anytime!
Beth
Pingback: A Giveaway to Celebrate my One Year Blogiversary | The Renegade Seamstress
Pingback: Another Peplum Refashion Tutorial: This Time a Shirt | The Renegade Seamstress
Pingback: A Happy Birthday Renegade Ruffle Refashion | The Renegade Seamstress
Pingback: The Envelope, Please…. | The Renegade Seamstress
OH my goodness… you are so creative. I’m so impressed! Love it
Thank you, Rhonda!
.I sew on a casual level. I am so inspired by ALL of your sewing tutorials that I am ready to run out and get a dress form. It looks like having a dress form would make things so much easier. Do you recommend getting one. Thank you for the inspiration
Hi Melinda! I LOVE, LOVE, LOVE my dress form. It has made things much easier to refashion old clothes. My form is from Joann Fabrics. They don’t go on sale very often, but I watched for a sale and pounced. You still have to try things on every once in awhile because the dress form isn’t shaped EXACTLY like me but still a good investment! Enjoy your weekend!
Beth
Pingback: Monday Mentionables: Transitional outfits, Refashioning sweaters & Warm Bodies « 2 Square 2 Be Hip
do you have a pattern for the sweater hat…I just love it! Thanks so much for all your creativity, it truly inspires me to think outside of the box. God bless you!
Hi Janice,
Thank you for your nice comments! I’m sorry I don’t have a paper pattern for this hat, just the step by step photo tutorial above. Please let me know if you have any questions if you give this fun project a try. Have a beautiful Sunday!
Beth
You make such creative things! I love your posts on repurposing clothing and I found this hat tutorial because I needed it. I recently had high-dose chemo and lost my hair. I bought two cotton sweaters at a thrift store for $1.99 each, and each one makes 2 hats easily. I’ll donate the duplicates to my oncologist’s office for others to enjoy. Mod: I lined mine with soft cotton knit from repurposed t-shirts. Tip: If you have traveling yarns across a sweater knit pattern (like the white/red/black in yours) you can place a piece of printer paper (or junk mail paper) on top before sewing, so the yarns don’t catch in the presser foot.
That’s such a great tip. Thank you! I’m sorry you’ve had to go through chemo. We’ve had some bouts with cancer in my family over the last few years as well. It’s not an easy time, but it sounds like you are keeping positive. That makes all the difference in the world!!
Love the hat, it looks like a great project for Christmas gifts. FYI, it’s actually Voila! – a french term meaning “Look there!” 🙂 No disrespect intended, just a pet peeve of mine.
No disrespect taken, Melissa. That’s why I put it in quotation marks, I was just spelling and pronouncing it in my Eastern Oregon accent. 🙂
Pingback: Sweater to Hat and Mitten Tutorial | The Renegade Seamstress
I shall afford will disagree with you
At you abstract thinking