We were so lucky to get one more Refashion Runway sponsor a couple of weeks ago and I totally forgot to include them in the prizes yesterday.
Soooooooooooo…….
I thought it would be fun to have one more vote to decide who should get this prize and since we had so many sew alongs this season how about we give it to one of them?
Marnie Keith was kind enough to offer 10 free greeting cards from Send Out Cards
Vote below for your favorite sew alongs.
(After you click next to a name be sure to click on the vote button at the bottom so your vote gets counted.)
Well, here we are already at the end of the fourth season of Refashion Runway: The All Stars Edition.
It’s been a fun season of transformations and I’m going to miss opening the emails of all of these talented women to see what they’ve created each week.
Thanks so much to everyone who participated this season, from the competitors to the sponsors to all of you who voted and commented.
It always warms my heart to see a community full of such kind and encouraging people. I’ve truly enjoyed every minute.
Let’s get to the part you’ve all been waiting for.
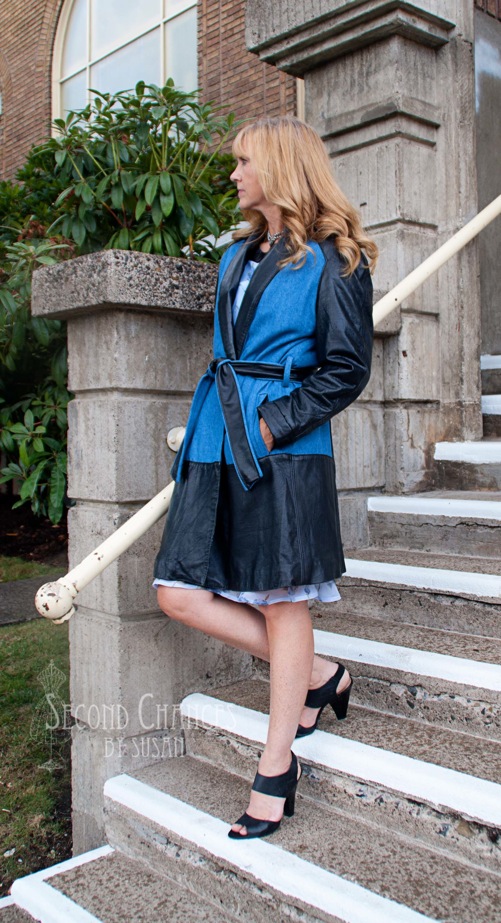
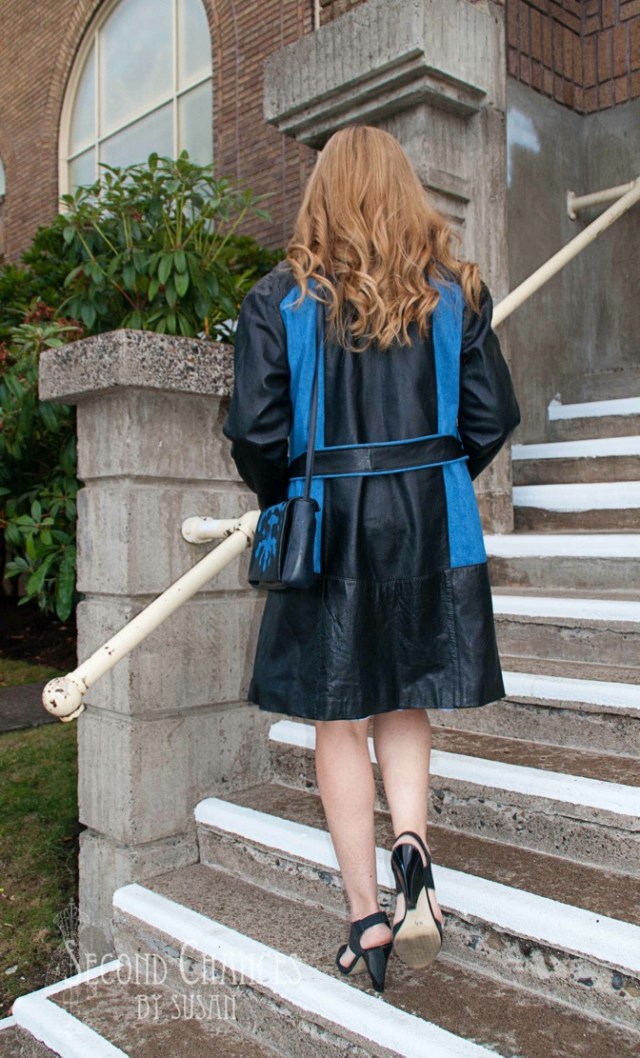
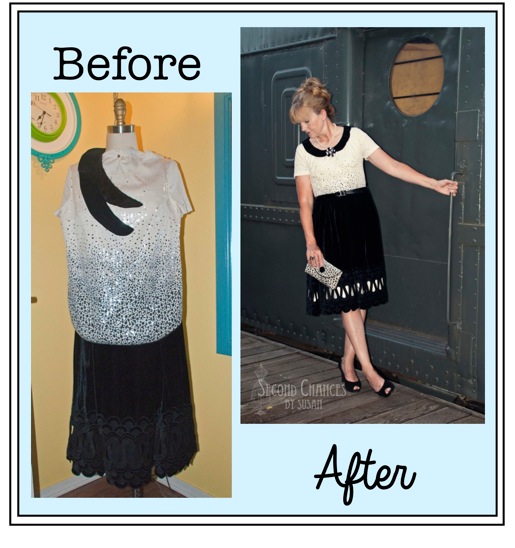
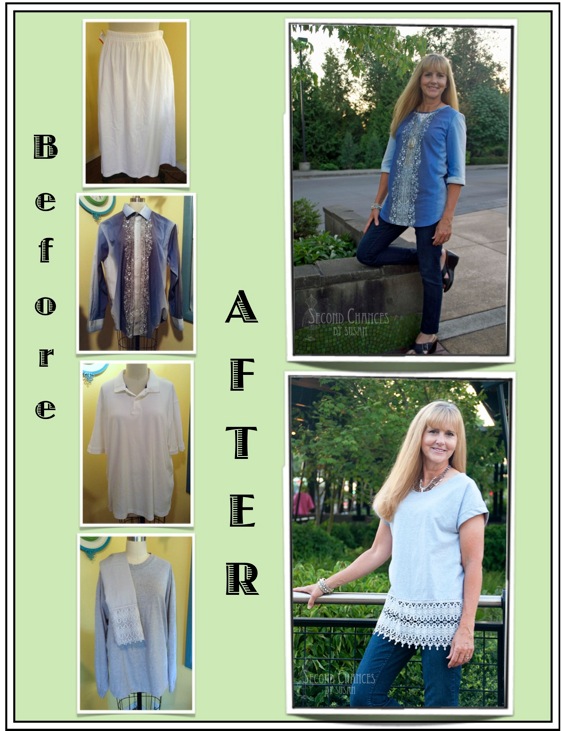
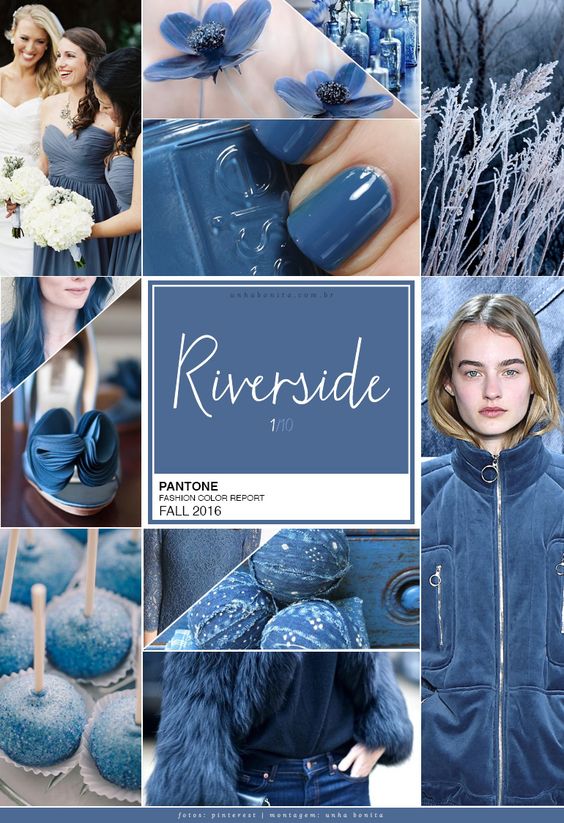
Congratulations to Susan of Second Chances by Susan the winner of the Pantone: Riverside challenge. You, once again, blew us all away with your coat, purse AND dress refashion.
“A white T-shirt with lace front ind size XL. It dyed just as I had hoped.
I put it around my lower body and measured, and pinned, and stitched, and pinned,
and stitched, untill it was just the way I wanted it to be.
A white top, I never used,
also got the blue treatment. It turned out fine, except that the lace became an
odd pale red. Off it went. l I replaced it with the upper part (neck,
shoulders and sleeves) of a striped dress I once refashioned. I love the
result.”
“I had another whirlwind week. Fabric Mart selected me to compete in their
Fashion Challenge that they run on their blog this year, and I’m also
working right now sewing new garments from recycled materials for a local
boutique here in Denver. The challenges start on Wednesday for me, so I’ve
been sewing like mad to get all of my collection put together before I put
it up for sale. As luck would have it, 2 of the t-shirts I made fit the
challenges! I didn’t get before pictures because things went straight from
the thrift store to the cut table my time is so crunched right now!
The first one is my un-tunic tunic. As I mentioned, the denim trench coat
that I was working on last week took away my time to make a tunic, so I was
glad to have found a little this week to throw it in. The purple and navy
tee was made from a plus sized purple tunic with the really cool beading
and pretty classic tunic slit neckline. Tunics are often proportionally a
difficult length for my short frame–too long to be a top, too short to be
a dress, I usually end up looking pregnant or just really as short as I
am. I knew pretty quickly that I would cut it down to a better length for
me (approximately at my high hip). When I went to cut it, I realized that
I could cut everything while keeping the neckline entirely intact. It sure
saved me some time to not have to finish the neckline or shoulders. The
sleeves came from a long sleeve navy tee, and I trimmed the sleeves with a
strip of striped jersey from another tee. To top it off, I added some hand
embroidery with a vivid mossy embroidery floss around the beading.
I loved the Riverside challenge. I happened upon a long sleeve tee that
was pretty close to Riverside. I cut it up into 2 t-shirts. In addition
to the Riverside sleeves, the first has a brown ponte yoke, a navy stripe
cut from a maxi dress, and a big floral applique cut from my vast
collection of vintage napkins. The 2nd tee has a yoke cut from the same
navy striped maxi dress, the body of the tee is the Riverside tee, and the
sleeves are from another navy tee. I added strips of a fun orange and grey
home dec fabric that I used for a project for my best friend some time ago.
Thanks again for organizing this challenge. It’s been so fun to work
through the challenges these last few weeks and see my brain taking things
apart and putting them back together in ways I wouldn’t have thought to do
before!”
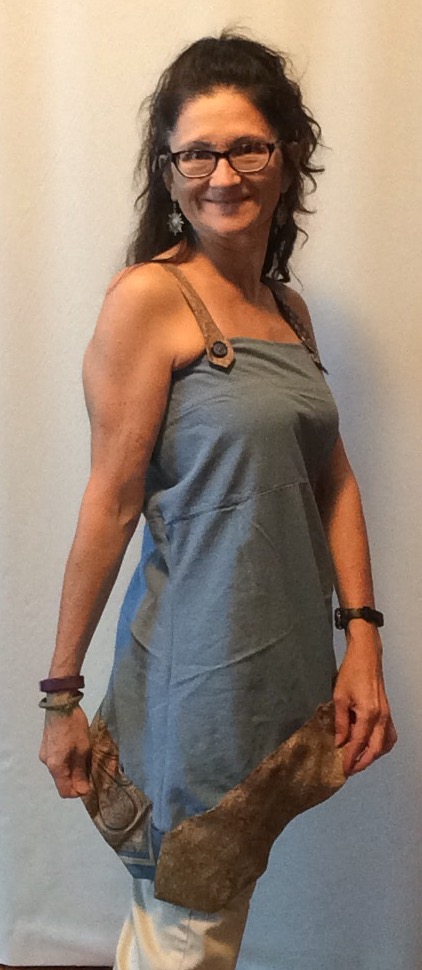
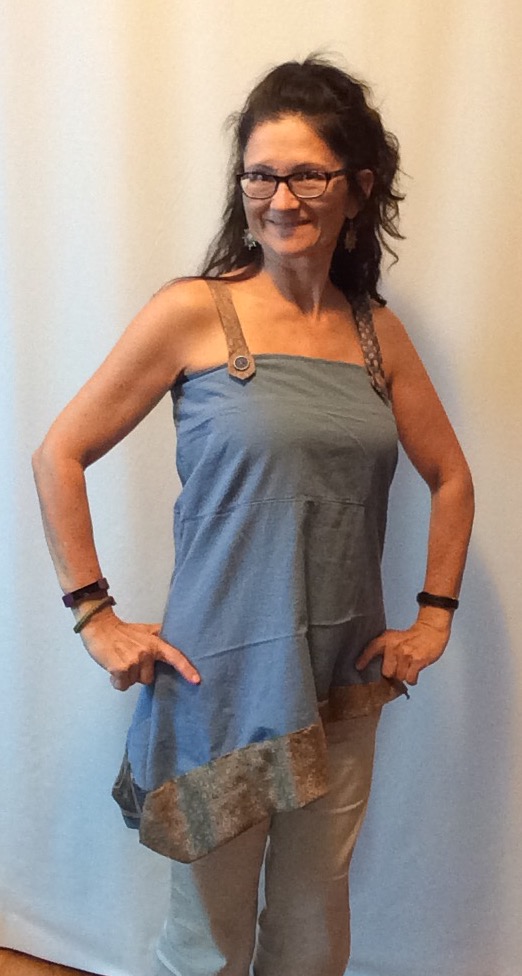
“Hi there. Last one this year ! It has been a blast and I can’t believe I kept up
with all of the themes ! I love to push myself with hard challenges, which this one
was for me… I don’t particularly wear blue so I was taken aback with this week
theme… Riverside blue ? I found an old pair of pants that my mom has given me
YEARS ago, which were SO ugly but the right shade. Once I cut the legs, open them
and put them on myself, horizontally, I knew what to make. I did not have enough
fabric for sleeves so, tank top it is ! Of course, WAY too simple and easy for
me… So I grabbed a couple of more-or-less-matching ties from my stash and
proceeded to decorate my new asymetrical tank top. It really turned out as a tunic
! This fabric is SOOO confortable, perfect for the last days of summer ! Peace.
Claudia
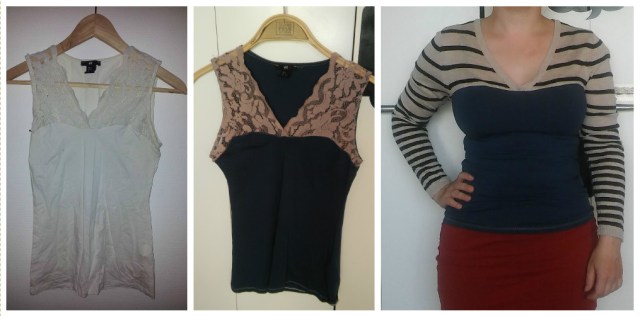
“In capturing the Riverside Blue, I have refashioned a few different items
(including some faded denim).
I cut up the silky top and made a scarf, using the cuffs of the blouse as
the ends of the scarf. I layered the lace top over the blue tank, changing
the buttons on the lace top with some darling Riverside Blue buttons. I
fit the jeans with a couple of darts in the back, and “distressed” them
with my cheese grater and some 40 Grade Sandpaper. (That was messy, but
fun!)
For the XL Men’s shirt, I removed the sleeves, took in the sides and also
the sleeves, then re-attached the sleeves. I removed the button down
collar to create just a stand up collar.
I turned the jean skirt into a denim purse by sewing the bottom closed and
giving it width. I went into my stash of fabrics and made a lining and some
pockets. I used a denim belt (from another item in my stash) to make the
handles.
In one of the photos, I removed the scarf and tied it through the belt
loops of the purse.”
******************************************
Thanks to everyone who sewed along with this season’s challenges.
Up next, the winner of the Refashion Runway Pantone Blue Challenge.
Wow! I’m so blown away by this week’s challenge. These ladies are crazy good at what they do. I can’t wait for you to see what they’ve created for you this week!
So I present to you, the last challenge of the Refashion Runway: All Stars Season.
“I had quite a difficult time finding something in the right blue hue to fit
this challenge, but eventually stumbled on this 1980s beauty. It didn’t
look too terrible to begin with, but who thought a wrap dress that buttons
in the back would be a good idea? I had to get my husband’s help just to
try it on for the before photo! The cool cotton fabric screamed swingy
shift dress to me, but I knew the skirt wouldn’t quite be long enough to
make a knee-length dress. So to supplement the printed fabric, I pulled a
“silky” tank top out of my refashion stash. Using a self-drafted pattern, I
was able to cut all the pieces for the main part of the dress from that
fully pleated skirt, including facings for the neck line too. Then I cut
the tank top into strips to add a bottom border for modesty’s sake. I also
added some narrower strips of solid blue to the sleeves’ cuffs for a
consistent look.
Since I still had the entire bodice of the original dress left over, plus a
couple small pieces of the tank top, I whipped up a quick little bag to
coordinate with my new dress. I added fusible interfacing to both the outer
and lining layers for stability, popped in a zipper salvaged from a
previous refashion, and made a wristlet strap for easy carrying. I’m
looking forward to using this bag as a bright pop of color with a more
neutral outfit too.
And finally, a girl’s gotta have some accessories! I grabbed a seldom-worn
necklace – already refashioned once from an 80s necklace of my mom’s – and
took it apart to make a new necklace, bracelet, and earrings using some
jewelry findings from my stash.
This season of Refashion Runway has been such a blast and a real challenge
at the same time. Some seriously steep competition! Thank you, Beth, for
organizing this once again! And thanks to everyone else – for reading, for
voting, and for sewing along!”
“Hello!
For the last time then… here’s my refashioned outfit. These past few
weeks have been so much fun; I’ve loved pushing myself – and seeing all the
different interpretations from everyone else, for each week’s challenge!
This week? Pantone Colour of the Season, Riverside Blue…
The challenge for me? Finding anything in a charity shop in that colour…
The solution? Look at it in the same way as the ‘Buttons’ challenge!
No-one wanted to wear one big button (!) – that week was all about
accentuating an outfit using buttons. And that’s what I used as the driver
for my piece this week – using accents of colour, specifically Riverside
Blue, to highlight the refashioned outfit.
I found a VERY long white skirt, lined (which is just as well, as it was
quite sheer cotton) – the perfect blank canvas!
My plan was to buy paint in the right colour blue, and flick it at the
skirt at regular intervals! I saw it done in a catwalk show once… I will
try to remember the name of the famous designer who did it, to add to my
post, but it was such an avant-garde way of changing the garment, it really
captured my imagination. Thing is – I wasn’t sure of how the fabric would
react – to paint, or to washing (after the fact) – and surely the point is
to make something I’ll wear again? My mind was made up when I found out how
long it would take for the paint to arrive in the post (nowhere nearby
stocked the right shade)… SO. Back to the drawing board. Meanwhile,
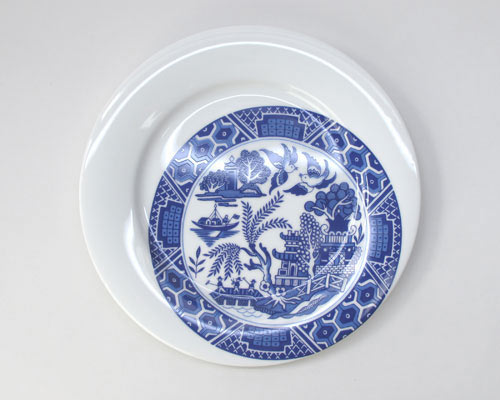
struck by the thought of China cups…
…I found a men’s Hawaiian shirt, with the perfect blue running through
the design – result!
By taking the shirt in, with darts and through the side seams, and adding
bias binding to the new armholes, I created a blouse that goes well with
jeans. And Rod.
But it also works without Rod… 🙂
As for the skirt, I painted buttons with nail polish I found in the right
hue, before sewing them onto the skirt in such a way that tailored it to
fit better. I also took it up to a more reasonable length, hemmed it, and
used one of the decorative stitches on my sewing machine to add a final
detail to the hemline.
I think it will be a very wearable outfit… when we get some sunshine. And
yes, I am still hopeful – even though Autumn seemed to arrive on Thursday!!
As I think I’ll get wear out of the blouse over jeans, I didn’t want to hem
it any shorter – so I tied the front, just to style it in a way that would
work with the skirt…
I’ve had such a great time, with all these talented ladies, I feel so
grateful to have been a part of the Refashion Runway All Stars Edition!
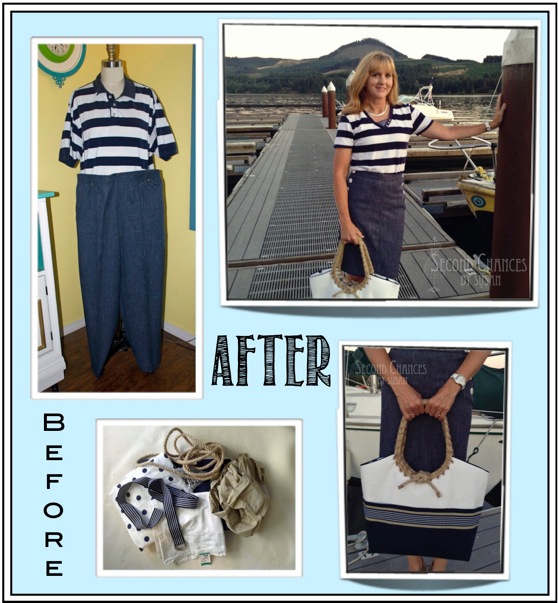
“Having grown up around water all my life I have always been attracted to the color
blue. When I looked up what shade Pantone’s Riverside Blue was, I was in love! How
lucky am I to get to work with such a beautiful shade of blue!
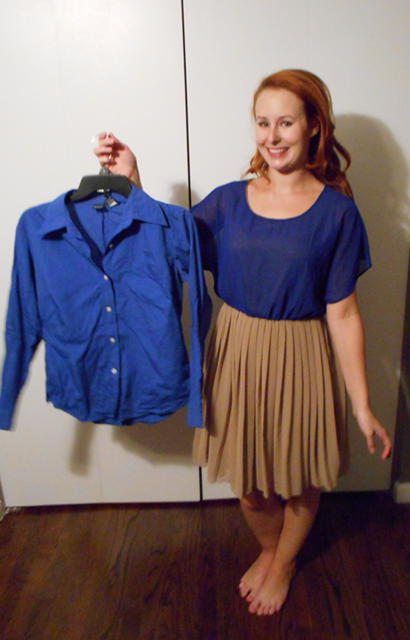
While scouting around for the perfect Riverside blue shade I found this perfect
button down shirt! I also I found this beautiful 2-tone dress (I just love the
pleated bottom).
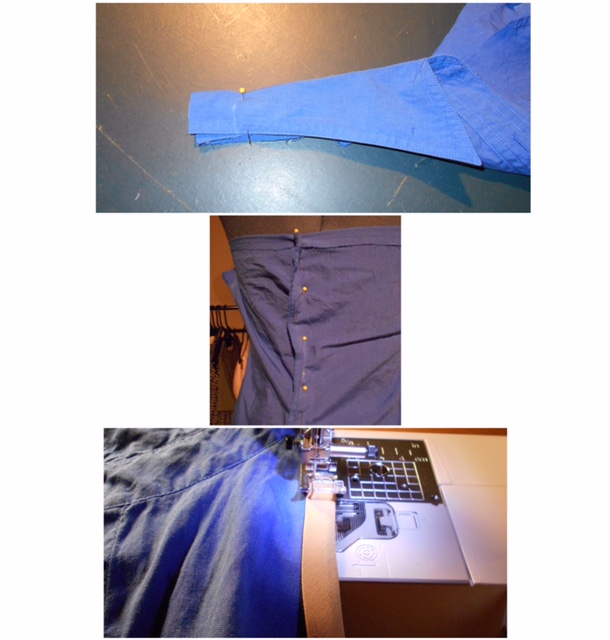
First, I separated the bottom from the top of the dress.
Removed the sleeves from the button down shirt.
Cut the back of the shirt off to make it into a halter.
Swapped out the white buttons for tan buttons.
I cut the collar down it’s middle, cut off 1 inch and then sewed it back together.
Took in the back seam by 1 inch at the top and down to 1/2 inch in the middle.
To finish things off I added tan bias tape along the arm holes and the back of my
dress top.
I sewed a casing for elastic on the bottom half of the dress. Fed through elastic
that was measured to my waist. (Trust me, with the pleats it was NOT an easy task,
actually quite annoying)!
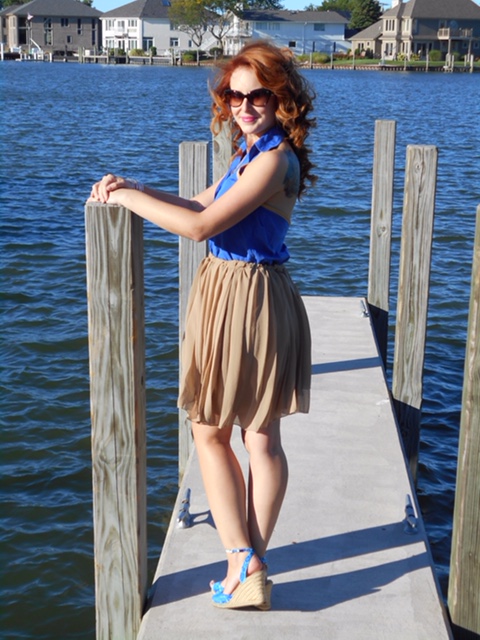
Lastly, I sewed my blue halter top to my pleated dress bottom to make a whole new
dress!
Accessories:
For the last month I have been saying to myself that I am going to sew a tote to
cart my stuff off of our boat and to the pool area. When we are at our boat I always
have my hands full of chapstick, sunscreen, sunglasses, magazines so I really needed
a small tote with organized slots for all of my stuff. I just haven’t found the
time, until now! I took a reusable wine tote from the grocery store and hand sewed
it into a small purse (luckily for me it was blue!) I used fabric paint to paint a
damask print in blue. I also wrapped the handles with brown and blue ribbon!
Remember these wedge heels from my Tunic Challenge? Whelp, I snipped off the button
I sewed on and began again. I drew a tie dye design with a blue sharpie, squirted
rubbing alcohol onto my design to make it all blend together and let it dry in the
sun.
“Of all the challenges, I feel that the ones that have to do with a certain color
seem to be the most challenging. As soon as you walk into a thrift store, a very
large percentage of the clothing is eliminated from consideration due to the fact
that its the wrong color. Fortunately, though, Riverside lends itself well to faded
denim and that’s a little easier to come by.
My refashion actually started this week when I found a whole tub of leather items in
storage that I had kind of forgotten about. I like to buy up leather items when I
can find them on $2.00 Thursdays. I pulled from the tub a very soft black leather
coat that was rather large on me, but had possibilities. I immediately envisioned
adding some faded denim panels to the coat, so off I went to the thrift store.
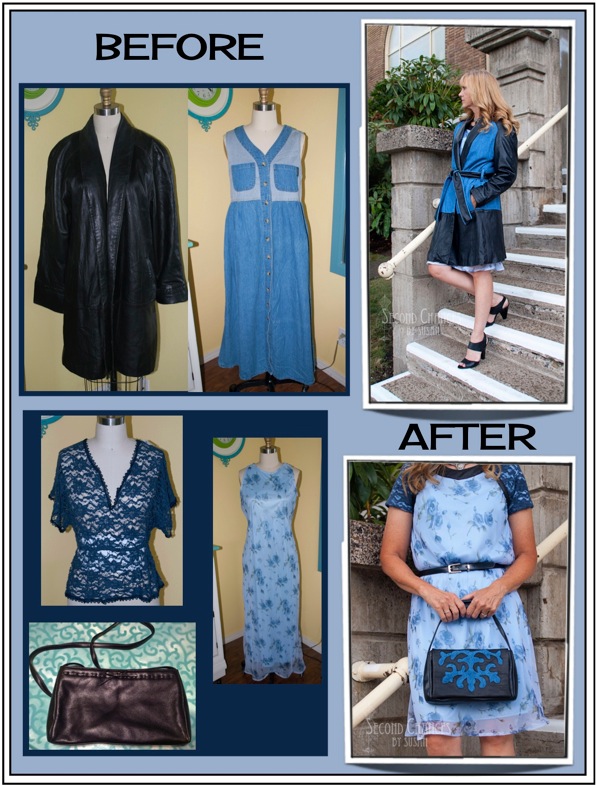
While I was there, I also found a blue chiffon dress. The roses were the right
shade of Riverside, and the background color reminded me of another color in the
Pantone fall pallette, Airy Blue. On a different trip, I found a darker blue lace
top, and a small leather purse. I was now ready to get sewing!
I detached the lining from the coat and carefully cut away the leather front and
side/back panels from the coat. I used the cut pieces as a pattern for the denim
inserts, cutting extra around the edges for seam allowance.
Before I cut the denim, though, I consulted the RIT Dye color chart and found that
by mixing 1 tsp. of Evening Blue, and 1 tsp. of Denim blue in a quart of water, I
could get Riverside blue. And, lucky me, I just happened to have both colors in my
cupboard! So I dipped my denim jumper in a dye bath, then rinsed and dried it
before cutting my pieces. It didn’t change the color drastically, but it did deepen
the shade a bit and I liked that.
Before adding the denim panels to the coat, I added new pockets with welts.
I took in the sides, reshaped the shoulders, added belt loops, and made a belt from
the leftover denim and leather.
For the dress, I needed something to put under the lace since I didn’t want it to be
see-thru. I found a simple t-shirt and began with that. I cut away part of the
bodice, including the sleeves. I then deconstructed them, covered them with the
lace, and put them back together.
I cut a round collar from the leather. I used the portion of t-shirt that was left
after cutting away the bodice/sleeve pieces and used it as a pattern for the bodice
of the chiffon dress, adding extra for seam allowance. I retained the original hem
of the dress. After a lot of pinning and fitting to my dress form, I was finally
able to sew it all together. I added some leather trim around the bodice/sleeve
pieces.
I attached a loop and button at the back of the neckline.
The design detail on the purse was something I had originally wanted to do either on
the back, or around the bottom of the coat. After careful consideration, though, I
didn’t want to limit what I could wear the coat with, so I decided to put the design
element on a purse instead.
Since I didn’t have enough leather to make a purse, I decided to refashion one. I
layered a piece of leather over the right side of some of the denim. After cutting
my design from paper, I traced around it onto the leather with a chalk paint pen. I
stitched the design, wiped away the chalk pen markings, then carefully cut away the
leather, exposing the denim beneath. I then lined the purse flap, turned it right
side out and secured it to the purse. In doing so, the layers of leather and denim
were too much for my machine, so I punched holes across the top edge of the purse,
and the top edge of my new flap and “stitched” them together with a running stitch
using thin strips of leftover leather.
If you would like to see more details of the process, you can visit my blog, Second
Chances by Susan, where I will be posting the tutorial soon. Thanks!
This has been a fun challenge and a fun competition! I can’t believe we are at the
end! Thanks again to everyone who has had a hand in this…Beth, the sponsors, the
ladies in the competition, and the ladies sewing along. And, thanks to everyone who
has voted and left sweet comments of encouragement…it means a lot! Good luck to
each of the contestants, they are all so very talented!”
She won the Tunic Challenge with her clever, adorable, and flattering reversible tunic refashion.
And good news!!
Sarah Gunn and Julie Starr have graciously given a copy of their new book The Tunic Bible to the winner of this week’s challenge. (In which I have a cameo appearance) 🙂
“I can’t believe we’ve made it to the fifth and final week of the Refashion
Runway Challenge. This season has been so much fun and also incredibly
challenging.
I was lucky enough to find a king-sized sheet set at a dollar-a-pound
Goodwill in the very color I needed! While at the Goodwill, I had googled
an image of the Pantone Blue: Riverside shade and was able to make sure the
colors matched up.
I decided to turn my sheet into a maxi dress. After figuring out my
measurements, I cut out two triangle-like shapes.
I got these shapes by adding 2 inches to my waist measurement and then
dividing that in half to find out the width. I then measured from my waist
to the floor to figure out the length. Then I added 6 inches on either side
of the bottom of my rectangle and angled up to make my front and back skirt
shapes. After I figured out all of my measurements, I cut out my pieces,
and sewed them together on the sides, and then hemmed the bottom.
I decided I wanted to add pockets, so I traced my hand, drafted a pocket
pattern and then cut out 4 pocket shapes.
I then figured out where the placement of my pockets should go and pinned
them in place and then seam-ripped the side seams where my pockets would be
attached, and then sewed them on.
Next I needed to create the top for my dress.
I found this XL floral shirt at my local Goodwill and it perfectly matched
the blue in my sheet.
I chopped the shirt in half, and then removed the sleeves and collar, and
took off the excess material at the sides.
I then sewed the sides closed and hemmed the neckline and reattached the
sleeves.
After sewing the top to the skirt, I decided I wanted a bow belt, so I cut
off the top of the sheet, folded it in half width-wise, and sewed it
together.
A big thank you to everyone who has been sewing along with Refashion Runway this week!!
*****************************************
Molly from Molly Made It has three fantastic sew alongs to share with us today.
“When I saw this dress, I knew it would be the basis for my tunic.
I needed extra fabric for sleeves, so I found a 3XL scrub top which matched the royal blue in the dress.
I took the neckline and cut some sleeves from the scrub top, made the body of the tunic from the dress, and trimmed the sleeves with dress fabric as well. Mid-stage, here is what it looked like …. sleeves too big and body too wide and too long to be flattering!!!
After taking in the sleeves, taking in the body, and bringing up the horizontal piece at the hem, I think it fits me much better, and is more flattering on my figure.
Looking forward to seeing more tunics !!!
Thanks,
Molly Lucien”
***************************************
And now on to Molly’s button sew alongs:
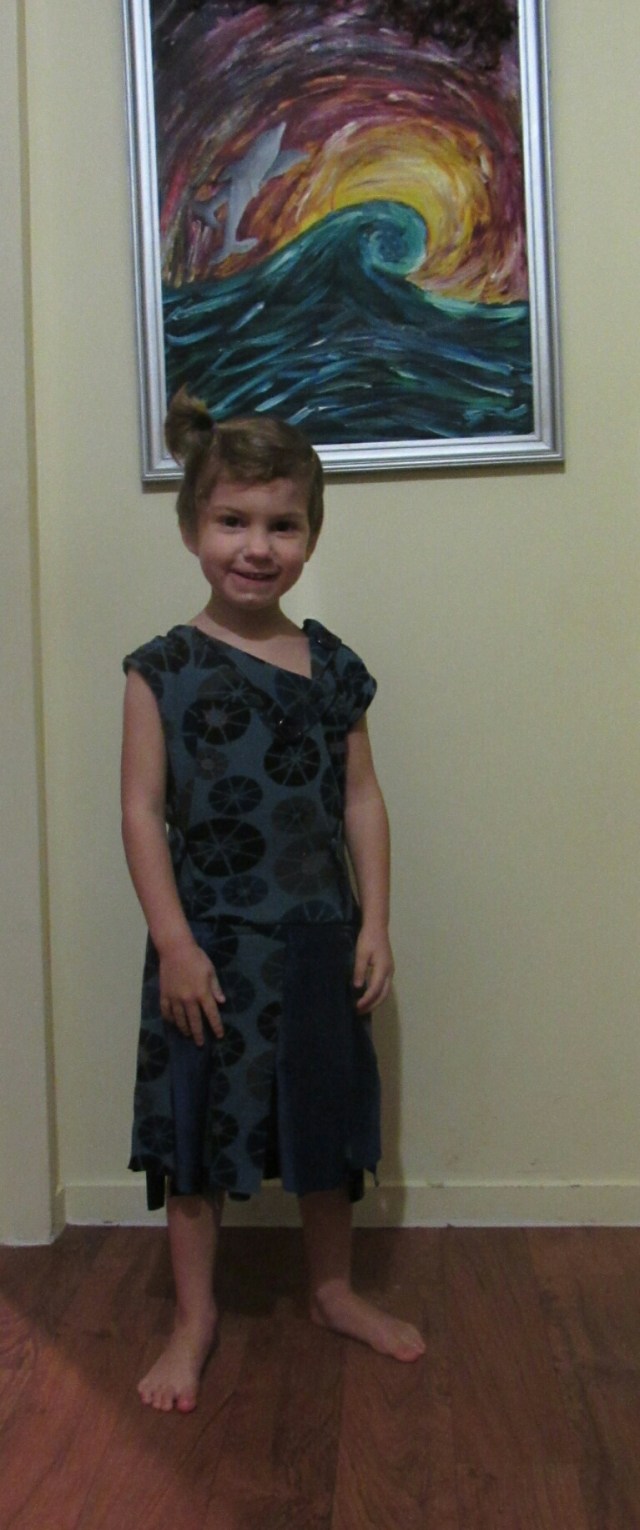
“First is a t-shirt. I added a seam down the center front, where I placed the buttons. I also took the sides in just a bit under the armpits. I even made some button earrings to match.
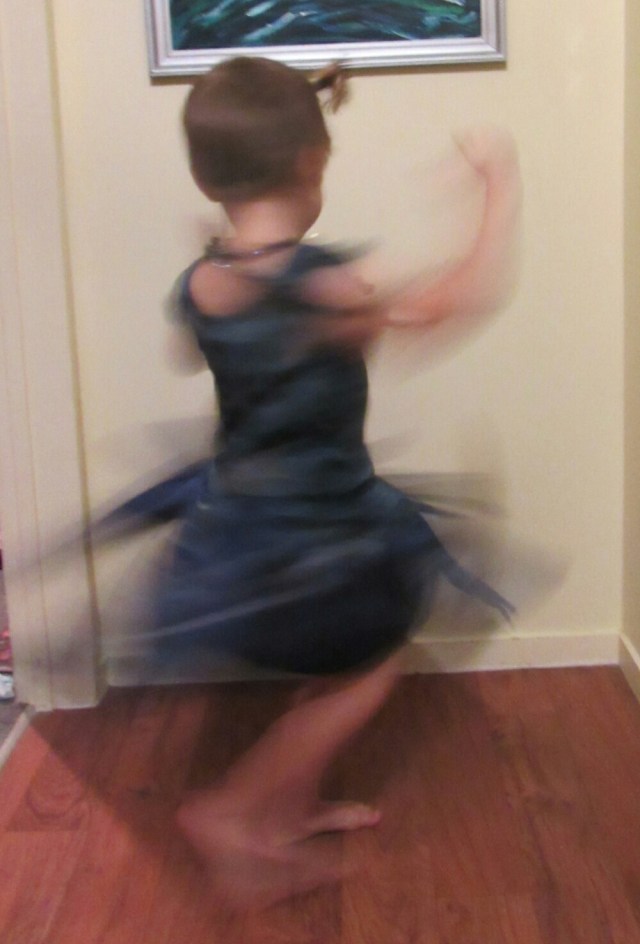
The second repurpose was a skirt made from a dress, then buttons added to accent the metallic circles.
Kristin K made a super comfortable looking tunic sew along.
“I love wearing tunics to travel in- they are so comfortable and keep you
nice and covered up too. I had this kid’s XL t-shirt and this light pink
cotton shirt that unfortunately had a large stain on the back.
I harvested the sleeves and the middle of the shirt to create a color
blocking effect, and then took the bottom hem to act as the new neck band
for extra contrast. I scalloped the bottom edges of the tunic and left them
open at the sides for ease of movement.”
Claudia from Sew Lil Time made a fun piecework tunic, something I’ve been wanting to try.
“This week, I am SOOOO Excited ! I LOVE tunics ! They are the most comfortable,
flattering and easy-to-wear pieces of clothing for women in my opinion. And they can
be as funky or as straight-laced as desired. I also have been sewing tunics for the
Fashion show I am entering. More details on my blog. So on to the tunic.
The original materials were some funky (and not always pretty…) crepe-chiffon
skirts and a blouse (80’s to 90’s styles…). I have been collecting them forever
because I like the flow of the fabric. So after having sewed one type of tunic with
a pattern, I was left with a lot of scraps, that I decided to piece. And to make
things easier and change the look, I used exposed serging. So I hope you like the
result !”
Charlotte from New Zealand is going to stay toasty warm in her refashioned tunic.
“As it’s still winter here and I wanted something warm and bright. I like
the warmth of a poncho but you don’t have freedom to move your arms , so
now I have something warm, bright and pretty for the coming spring .”
Stine has joined us again from Denmark and has been busy sewing two sew alongs.
“I bought this red and black plaid shirt tunic recently, when I was on holiday. It fit
fine in my upper body, but was too narrow in the hips. No problem, that could easily be fixed. I cut the serged sideseams off up to the waist and added to triangles made from
black jersey. And now it fits great. A black and white checked viscose (rayon) tunic. Most tunics don’t look good on me. Therefore my usual tactics, when I get my hands on
tunics, is too lengthen them into dresses. Thus also this one. I had a strip of black sateen in my stash from a previous refashion. Because the sateen strip came from a skirt, it already had the arc to match the bottom of the tunic. So all I had to do, was to stitch the sateen strip to the bottom of the tunic. Which I did. And zigzagged the edge. And
cut threads. And then I really can’t find any more to say. This is one
of the fastest and simplest refashions, I have ever done. And it makes
this garment completely different from the starting point.
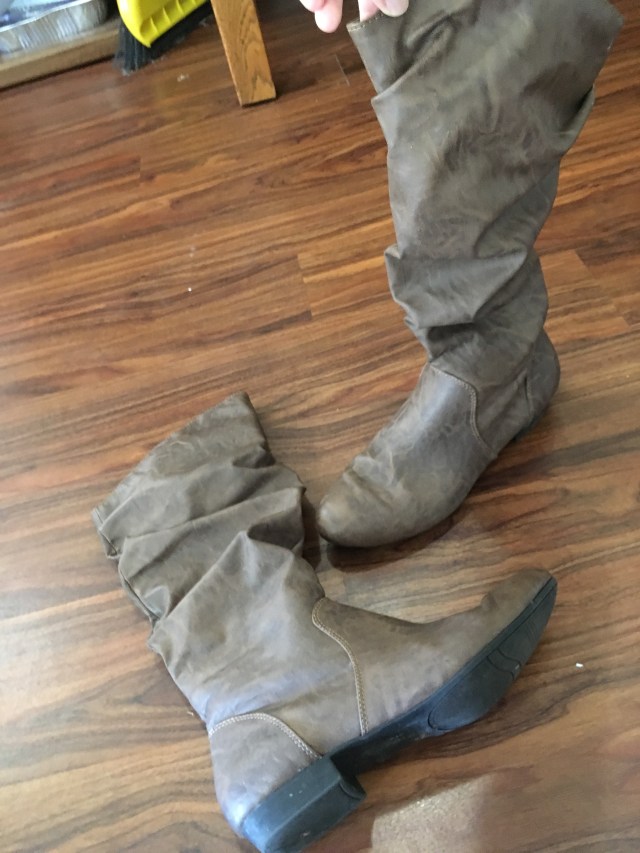
“I took this dress and gave it a dye bath and a trim for a little freshening
up. Plus a tunic just calls for a pair of boots so I refashioned those too!
And a big welcome back to Mary from Thrifty Chic !!
“I just love it when I find a maxi dress that I would never wear as it is, but with a gorgeous print. Being the border print junkie that I am, I like to let the print do the talking and not get too fussy with the details. I simply put my sleeveless tunic pattern to work and cut down that size 4 maxi into a wearable tunic.
Here is the finished product. Simply done, but so effortlessly elegant too! I get so many compliments every time I wear it.”
***************************************
Thanks so much for sewing along with us this week everyone.
Stay tuned for the winner of last week’s Tunic Challenge and for your chance to vote on this week’s Pantone: Riverside Blue Challenge.
We interrupt this season of Refashion Runway to bring you this important DIY…
New school clothes? Check!
New school supplies? Check!
New lunch box? Check!
Megabox of ziplock snack baggies? NOPE!
This year, instead of throwing away mountains of baggies each day, try out these easy-to-make reusable snack bags. You don’t even have to buy special oilcloth. You can make them from any fun fabric you’d like.
Sarah Gunn and Julie Starr have just released their new book, The Tunic Bible, and guess what?! I had the honor of being featured in the book as part of their gallery of inspirational tunic tops. So cool!
🙂
They will be graciously giving away a copy of The Tunic Bible to the winner of the Tunic challenge this week.
So without further adieu, here are our All Stars version of the Refashioned Tunic.
Be sure to vote for your favorite at the bottom of this post.
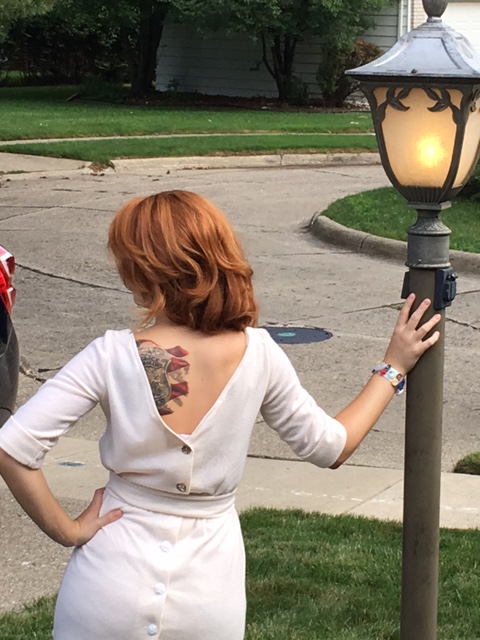
“Honestly the only thing that comes to mind when I think tunic is Robin Hood and
Peter Pan. Something long, with a sash, something worn in the renaissance period.
When my husband heard about the Tunic challenge he basically said the same thing and
proceeded to ask for me to make him a Robin Hood outfit. Unfortunately I denied him
his medieval outfit, for now at least.
I needed to take my Renaissance idea and give it a feminine and updated look.
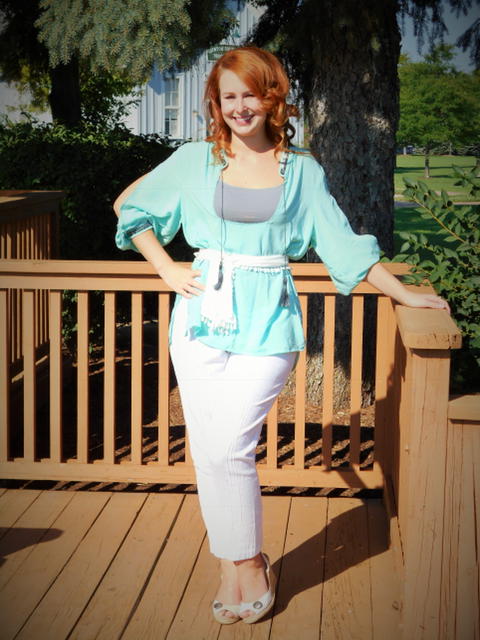
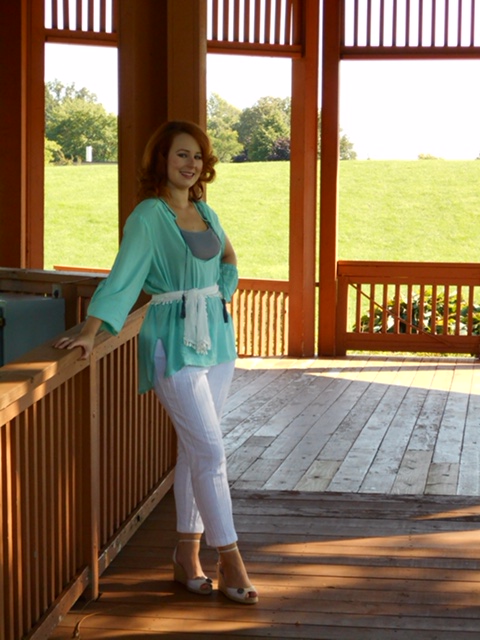
I began with these gauzy white pants and breezy button down. I just love the color
of this button down! It actually had beautiful grey metallic beading at the collar
and cuffs.
For the pants:
I began by cutting off the existing elastic waistband and pinning a new casting for
new stretchy elastic.
I threaded through my new stretchy elastic.
I used a pair of my favorite skinny jeans as a template to transform my gauzy pants
into gauzy skinny pants! I pinned and stitched up the pant legs.
For the top:
I cut slits in each sleeve.
I evened out the front of my top by sewing a straight line across. This made the
front shorter than the back (common for a tunic).
I cut out the buttons and button holes and sew the 2 pieces together.
I cut out a square neckline. I also cut 2 slits in the sides.
I outline the square neckline, arm slits and sleeve cuffs.
Finishing touches:
I made tassels out of grey embroidery floss and stitched them to the collar of my top.
I took about 4 inches from this beautiful tasseled scarf and turned it into a sash
to complete my tunic!
Accessory:
I snagged these Ann Taylor wedges for 50% off! I sewed on a decorative gray metallic
button! (You know I love buttons!)
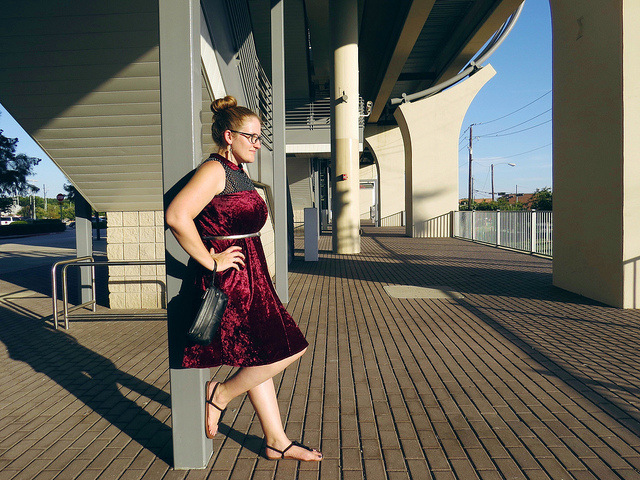
“Taking inspiration from the traditional tunics commonly worn in southern
Asia, I knew I wanted to create an easy-to-wear, loose-fitting shirt from
this coral and cream patterned skirt and top set, but the linen fabric was
just a little too transparent for my taste. So I began thinking about how
to line it for modesty when it occurred to me that I could actually make it
reversible! Two shirts in one! Enter this lovely grey cotton muumuu with a
cool geometric pattern and nursing zippers hidden under its ruffles.
I removed the waistband and box pleats from the skirt and chopped off the
muumuu’s yoke, salvaging zippers and buttons along the way. I drafted a
pattern based on my own measurements, complete with bust darts and a slight
flare to accommodate my hips, and used it to cut a front and back panel
from each of the two fabrics. The muumuu’s sleeves were trimmed down
slightly to conform to my self-drafted pattern; the coral sleeves were cut
from the center panel of the old top once I had removed its pleats as well.
After assembling the pieces of each tunic separately, I stuck one inside
the other, with right sides facing, and stitched around the neck edge to
join the layers. Once it was flipped right-side-out again, I folded in the
edges of the sleeves and bottom hem and top-stitched all around, using grey
top thread to match the grey fabric and white thread on my bobbin to suit
the coral print.
I ended up with a super comfy, versatile top that can be bright and bold or
subtle and neutral, depending on my mood. And the linen and cotton are
perfect for Texas weather!”
Yes – the hardest part of it this week, for me personally, was tuning in to
what a tunic actually is. I was thinking ‘How would I describe it to a
foreigner?!’ – (that normally solidifies my thoughts…) but no, I couldn’t
come up with anything ‘firm’.
– Does it normally have sleeves? It can do…
– Is it long or short..? Well… past the waist, but no longer than the
knee… although there is such a thing as a tunic maxi dress…
– Does is always sit away from the body, with no ‘waistline’ to speak
of? There are tunics with a princess seam that create more of an hourglass
silhouette…
I had enough of trying to find a solid description – and started a
Pinterest board instead; if it was accepted there ‘visually’ as a tunic,
I’d accept it as a tunic. And that was that! Onwards and upwards…
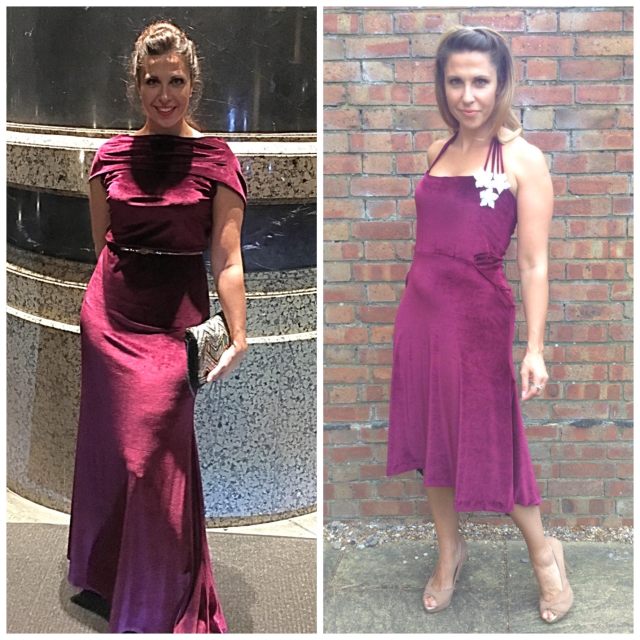
As usual I had a false start with something I changed my mind about. In the
end I turned to a dress I’ve had in my wardrobe for a few years, that
carried lovely memories for me. I wore it to my Aunty Betty’s 90th birthday
party in Mallorca a few years ago, and it was such a special day with
everyone there, including my Nan, that I think of it with great fondness.
In fact, we even went in search of some of my family history while we were
there (on the Spanish side), and found a road sign with my father’s name on
it… Obviously I wasn’t trying to steal it or anything…
Anyway – I haven’t worn the dress since. It’s funny, I associate good
memories with it – but on a sunny day I always pick something else to wear.
Having said that, it feels wrong to throw it out… so here we are, at the
fork in the road, when it’s time to change it into something else – the
TUNIC! Yeay!
After removing waist ties, reversing the ‘front’ of the dress, adding a
halter style, and creating a high-lo hem accentuated with pompom trim… I
found I was left with something I’ll actually wear again in future!
I’m as excited as ever to see everyone’s makes this week… what a fab
season this has been!!
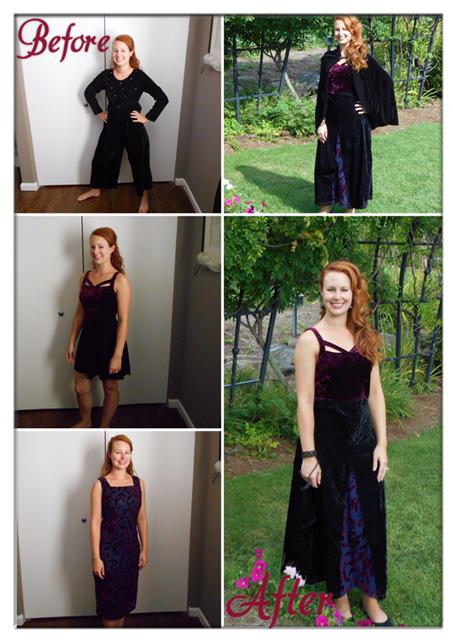
“For this week’s theme, I wanted to make a boho-gypsy style tunic. This is
a refashion that’s been brewing in my brain for a while and knowing how
time-consuming it would be, I’d been putting it off. Thanks to this
competition, I had the perfect excuse to finally get it done!
I started with this men’s vintage plaid shirt (snaps and all) and several
other shirts and scraps from my refash stash.
I cut off the bottom of the shirt at the waistline, and then removed the
sleeves and took in the sides of the shirt.
Then I spent the next few hours disassembling the shirts from my stash and
cutting and draping the pieces onto the waist of my shirt, using my dress
form. Once I was happy with the drape of each piece I sewed everything
together. Unfortunately I decided I didn’t like the way the back pieces
looked, so I started over and spent the next day redoing the back, using
the same technique but different clothing pieces. Once I was happy with the
back, I decided I didn’t like the way the front center of the tunic draped,
so I seam-ripped the front open, added a few more layers and was happy with
how it all looked. Now I was finally able to move onto the next step.
I needed to redo the sleeves, so I took them in, and shortened them to my
elbow. I then drafted a bell sleeve pattern. Using some plaid shirt scraps,
and my new pattern, I cut out the bell sleeves, and sewed them all together.
To finish my tunic, I handstitched some navy-blue trim onto the waistline,
around my sleeves and onto the collar.
I’m very happy with my new tunic and I can’t wait to see what my
incredibly talented competitors came up with this week!
If you want to see the full tutorial check it out on my blog, Diary of a
MadMama.
“One thing about the weekly challenges I enjoy is that it gives me new fashion
avenues to explore. For instance, before this week, the only tunics I had made were
for my youngest son, as he has always enjoyed dressing up as Link from the Legend of
Zelda. Thanks to this challenge, though, I am excited about the many possibilities
of the versatile tunic!
I began with a men’s XL shirt. When I first found it on the rack, I really liked
the pattern, just not the price of $8.99. I put it back and walked away. After
unsuccessfully finding something I liked better, I went back to the store about a
week later to see if it was still there. Lucky me, it was! And, it was half price!
Woohoo!
I began by removing the sleeves, collar, and button band, allowing a seam allowance
for the new center front seam. I cut the shirt down to size and added bust darts.
I cut a new neckline and added a lace insert. The neck was bound with self-made
bias tape from the sleeve scraps.
Whenever I refashion something, I really like to use as much of the original details
as possible in the new garment. In this case, there was a running stitch adorning
various parts of the shirt, including the back yoke.
I retained the back yoke and carried that theme into the new tunic by adding a
running stitch to the sleeve bands and the new hem.
The tunic is great with skinny jeans for a casual look.
I really liked the colors of the tunic and thought it would be great dressed up with
more of the contrasting white.
I made a pencil skirt from a men’s polo shirt. Since fabric had a lot of stretch
already, I kept the skirt simple with a yoga waistband.
I found a cotton knit skirt that I used to make a long, flowy vest. It has a rolled
shawl collar…
…and a yoke with pleats in the back.
The whole outfit is 100% cotton and so comfortable to wear!
Sometimes refashioning can be labor intensive and hard to replicate. I figured I
would add one more look that took about only about an hour to complete. I started
with a men’s long sleeved t-shirt. I cut the sleeves off about 1 3/4” from the
seam. I removed the neck ribbing. I took in the sides to fit, continuing the side
seams all the way through the armscyes, making the armscyes smaller and creating a
dropped shoulder effect. After turning the neckline to the inside and topstitching,
and turning the sleeves to the inside and stitching, I cut off some of the length
and added wide lace that once adorned a pillowcase. That was it! Simple.
Comfortable. Fun.
Thank you to everyone who has been following along, sewing along, leaving comments,
and voting! And, thanks to Beth for once again leading us on a new fashion
adventure!
If you would like to see more details of the steps involved in creating these looks,
you can check out my blog, Second Chances by Susan. Thank you, and happy sewing!”
Wow! Just Wow!!! Who knew the tunic could be so beautiful! Once again, great job ladies!!
Now it’s your turn to vote for your favorite tunic refashion. After clicking by your favorite’s name, be sure to scroll to the bottom and click the vote button so your vote will be counted.
The winner will be announced next Saturday, September 3.
If you’re sewing along this week, send a before and after picture to bhunting@eoni.com.
Well the ladies have done it again!! We have a another tie for first place in the button challenge. You all loved Carissa’s handmade buttons from tree branches and her amazing dress transformation.
And you all loved Susan’s nautical look and the crazy cool bag she made.
But, on to the hardest part (sniff, sniff), I’m so sad to say we have to say good-bye to Miche this week. I always love her fun, youthful vibe and her creative take on all the challenges.
But, we aren’t going to send her home without some nice prizes though. Nosirreebob.
She’ll get 15 free sewing patterns from Lekala…
…and a free class of her choice from Annie’s Online Classes.
Let’s see what treat Miche had in store for us with the tunic challenge this week:
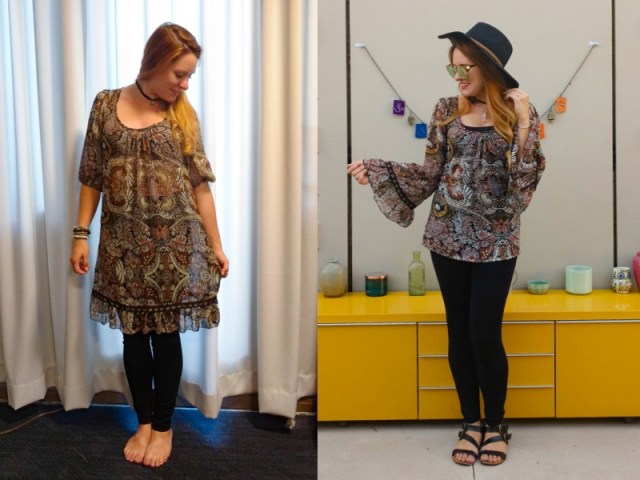
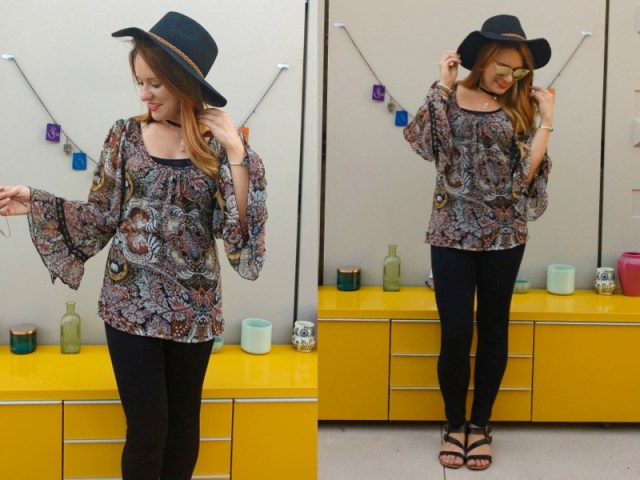
“I found this dress a few weeks ago at Goodwill, and fell in love with the
pattern. I normally don’t pick busy patterns, but something about this
dress stood out to me. For the challenge this week I took it in a little on
the sides and in the back to create a more flattering fit. I also chopped
it to tunic length and after removing the elastic from the arms, used the
extra fabric from to create bell sleeves.
I’ve been obsessed with flared sleeves for..let’s just say awhile. If I
come across something with belled sleeves in a store it’s pretty difficult
for me to pass on so I thought it’d be a fun challenge for me this week –
and man, a challenge it was.
I’m not sure if it was the fabric, or just my lack of experience or
knowledge in how to craft those beautifully shaped sleeves but I struggled
a bit to get the right shape. I had to take them off and put them back on a
few times,so I guess it’s good thing I recently replaced my seam ripper. :)”
A big thank you to everyone who sewed along with us this week on the Button Challenge!
*************************************************
Vicky Myers from Vicky Myers Creations
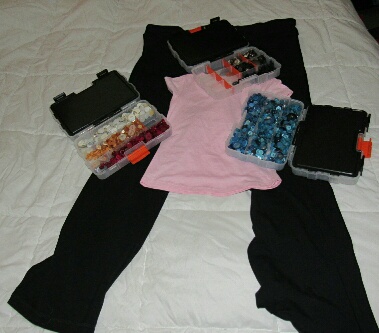
I have been lucky to inherit my Gran’s and mother-in-law’s button boxes. I
have designed a bag which shows off many odd buttons. The bag is perfectly
sized for a purse, mobile phone and keys. Each side has different buttons.
Idea: Make something larger and something smaller with the aid of buttons.
First
a homemade dress, that had become too small around the chest. I added a
button placket, that contributed a few much needed centimeters (or
inches).
And a too large skirt. I took it in with a pleat off center,
that I embellished with ribbon and buttons. I also shortened the dress
and altered its shape.
(I swear, it really is a complete coincidence that both garment are houndstooth
patterned).
This week, I put together a button yoyo wristlet from a jar of yoyos in my
sewing room, a whole lot of decorative stitching on buttons that I added to
the bag. The yoyos are backed with some turquoise faille I cut from a
skirt that I made and never wore. I’ve wanted to make this kind of little
purse forever, and I’m glad to have had the inspiration of this week’s
challenge! All the details of the bag are at Elizabeth Made This http://elizabethmadethis.com/button-yoyo-wristlet/
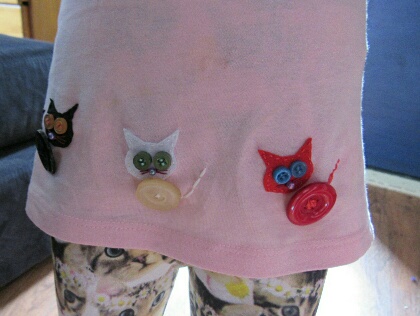
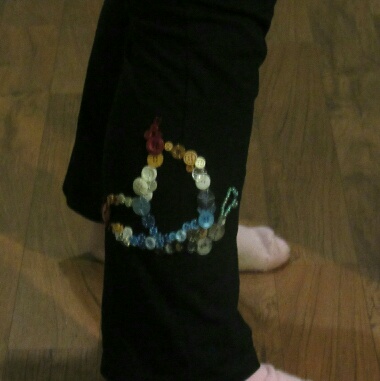
This week for Buttons, I thought I would do something different. I did not want to
make another dress and I have tons of jeans at home. So I thought I would make a
cropped jacket. It became a cropped vest (read my blog post to know why…) and I
trimmed it with a tie. The button part is a cat silhouette, because I LOVE CATS !!!
Enjoy !


![FullSizeRender[11]](https://therenegadeseamstress.com/wp-content/uploads/2016/08/fullsizerender111.jpg?w=189&h=300)
![FullSizeRender[10]](https://therenegadeseamstress.com/wp-content/uploads/2016/08/fullsizerender10.jpg?w=233&h=300)
![FullSizeRender[9]](https://therenegadeseamstress.com/wp-content/uploads/2016/08/fullsizerender9.jpg?w=170&h=300)
![FullSizeRender[8]](https://therenegadeseamstress.com/wp-content/uploads/2016/08/fullsizerender8.jpg?w=207&h=300)
![FullSizeRender[7]](https://therenegadeseamstress.com/wp-content/uploads/2016/08/fullsizerender7.jpg?w=167&h=300)
![FullSizeRender[5]](https://therenegadeseamstress.com/wp-content/uploads/2016/08/fullsizerender51.jpg?w=178&h=300)
![FullSizeRender[4] (1)](https://therenegadeseamstress.com/wp-content/uploads/2016/08/fullsizerender4-1.jpg?w=582&h=1024)
![FullSizeRender[3]](https://therenegadeseamstress.com/wp-content/uploads/2016/08/fullsizerender32.jpg?w=640&h=1019)


![FullSizeRender[1]](https://therenegadeseamstress.com/wp-content/uploads/2016/08/fullsizerender12.jpg?w=640)
![FullSizeRender[3]](https://therenegadeseamstress.com/wp-content/uploads/2016/08/fullsizerender31.jpg?w=627&h=1024)
![FullSizeRender[4]](https://therenegadeseamstress.com/wp-content/uploads/2016/08/fullsizerender42.jpg?w=640)