For those of you organized souls out there that like to have all of your holiday shopping completed before Thanksgiving, LaKesha, from Out The Box Creations has returned with some handmade holiday gift ideas for you.
LaKesha has been busy restocking her etsy shop and here’s what she has to say:
*****
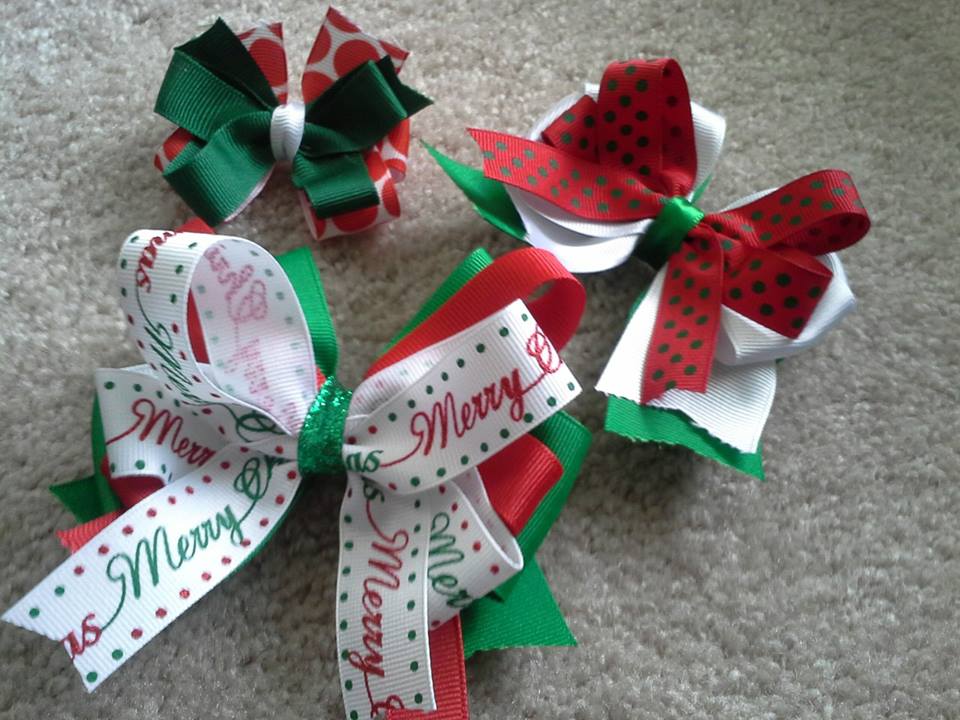
“It’s officially holiday season! Time for turkey, fall foliage, and soon enough, all things Christmas-y. If you don’t want to deal with the hustle and bustle of the holiday crowds in the mall, I’ve got just the thing (or two) for you!
For the little girls in your life, let them accessorize with a custom holiday hair bow. Available in fall and Christmas colors in sizes small, medium, and large. The small bows can be made with alligator clips to attach to headbands or fine hair. Hairbows are always able to personalize with names. Just message for custom orders.
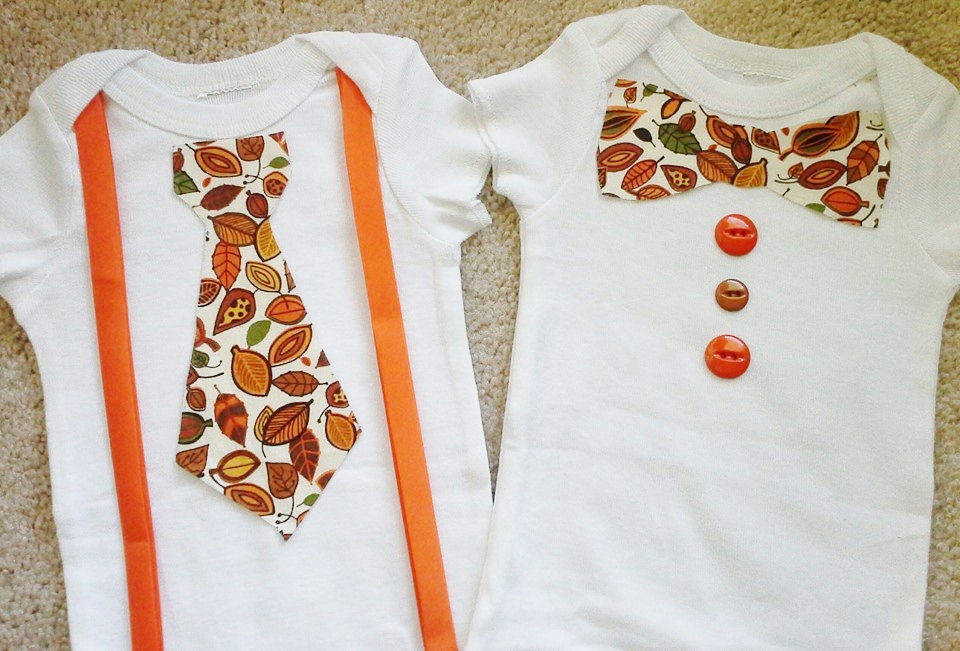
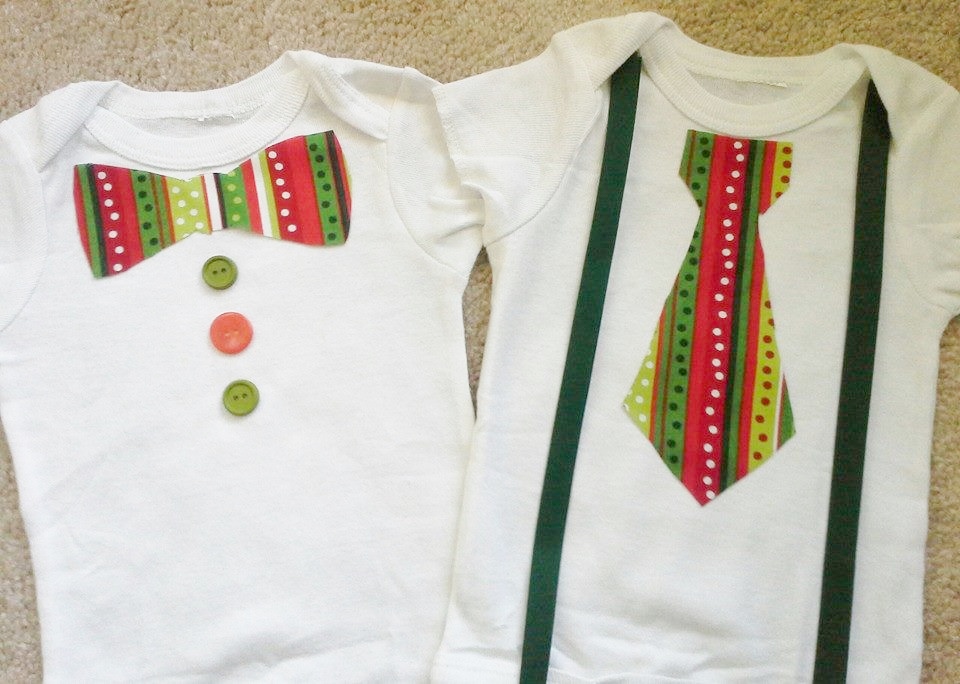
For the little guys, there’s also something to get them in the holiday spirit: Holiday bowtie/tie onesies for both Thanksgiving/Fall and Christmas. These onesies can come accented with suspenders or buttons, or without.
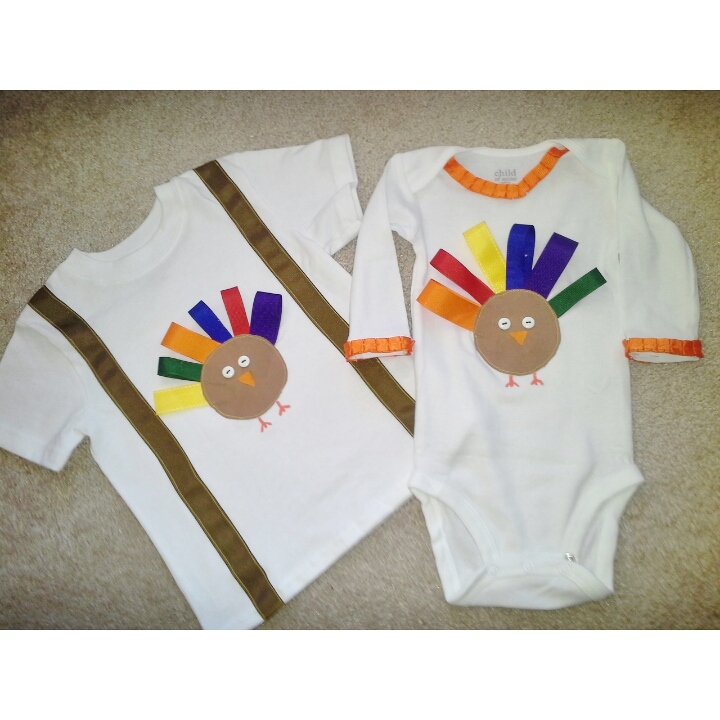
There are also special custom holiday onesies and shirts for the little ones as well. OuttheBox Creations offers these adorable turkey onesies and shirts and Christmas tree onesies and shirts for the girls. So many options, you’ll want to get something for everyone on your Christmas list! Find these and more creations at OuttheBox Creations shop on Etsy! “
*****
Here’s to supporting handmade this holiday season!!!
I just really like people for some reason. So, I don’t know why it should come as a surprise to me that I’ve genuinely enjoyed all of the wonderful people I’ve worked with so far at C&T Publishing.
They. Are. All. So. Nice!
Today, I thought it would be fun to give you a glimpse into what it’s been like in my world since my book proposal was accepted.
Of course, you remember what my face looked like when I found out the good news…
And here’s just a quick recap for those of you who missed my big news:
Last April, I was finally brave enough to “push the send button”. Off my book proposal flew through cyberspace, along with good thoughts from Katie, Jan, Linda and Karin. It landed in Roxane Cerda’s full inbox over at C&T Publishing. A few weeks later, I was thrilled to learn, they had accepted my proposal, and would be publishing my book under their imprint Stash Books. I really don’t think I’ve stopped smiling since that day.
Since then, after signing the contract in June, I got right to work, sewing, writing and photographing my projects. In the beginning of August, I was delighted to turn in the first draft of my book.
Just when I thought things couldn’t get any better. C&T Publishing flies me to a ranch in Nicasio, California to do a photo shoot for the book. Several movies have been filmed in Nicasio and it’s the location of the George Lucas Skywalker Ranch. Even Jerry Garcia lived there.
Here’s the magnificent view I saw the moment my eyes opened in the morning:
And there were plenty of these incredible longhorns staring at us wondering what the heck we were doing throughout the photo shoot.
It was a fast, furious, and fun weekend, but before we headed home, we had to check out some of the local shops.
Not only was this a perfect and beautiful location for the photos in the book, but it was a wonderful experience. Kristy Zacharias, the Art Director, Nissa Brehmer, the Photographer, and Mary Peyton Peppo, the Assistant, and I had a blast. It was so inspirational to be in the company of these creative women and watching how well they worked together was a real treat. I left there with some new friends and, I know it’s hard to believe, feeling even more excited about the book.
I just finished up working with my sweet Developmental Editor, Liz Aneloski. And last Friday, I received a nice introduction email from Alison Schmidt, my new Technical Editor. We get to go through each project together making sure all the details are perfect for you. I knew I was going to like her instantly when I saw that her photo was taken in none other than a VINTAGE CAMPER! Pair that with the fact that she used to be a key costumer for one of my favorite shows of all time, Big Love! I’m pretty sure we are going to get along famously.
I’ll give you another update when I get to start working with their amazing graphic designers. I can hardly wait to see what they have up their sleeves.
Until then, I’m off to sew and photograph some more tutorials for you to enjoy while we’re waiting for the book to come out. 🙂
Cheers!
Beth
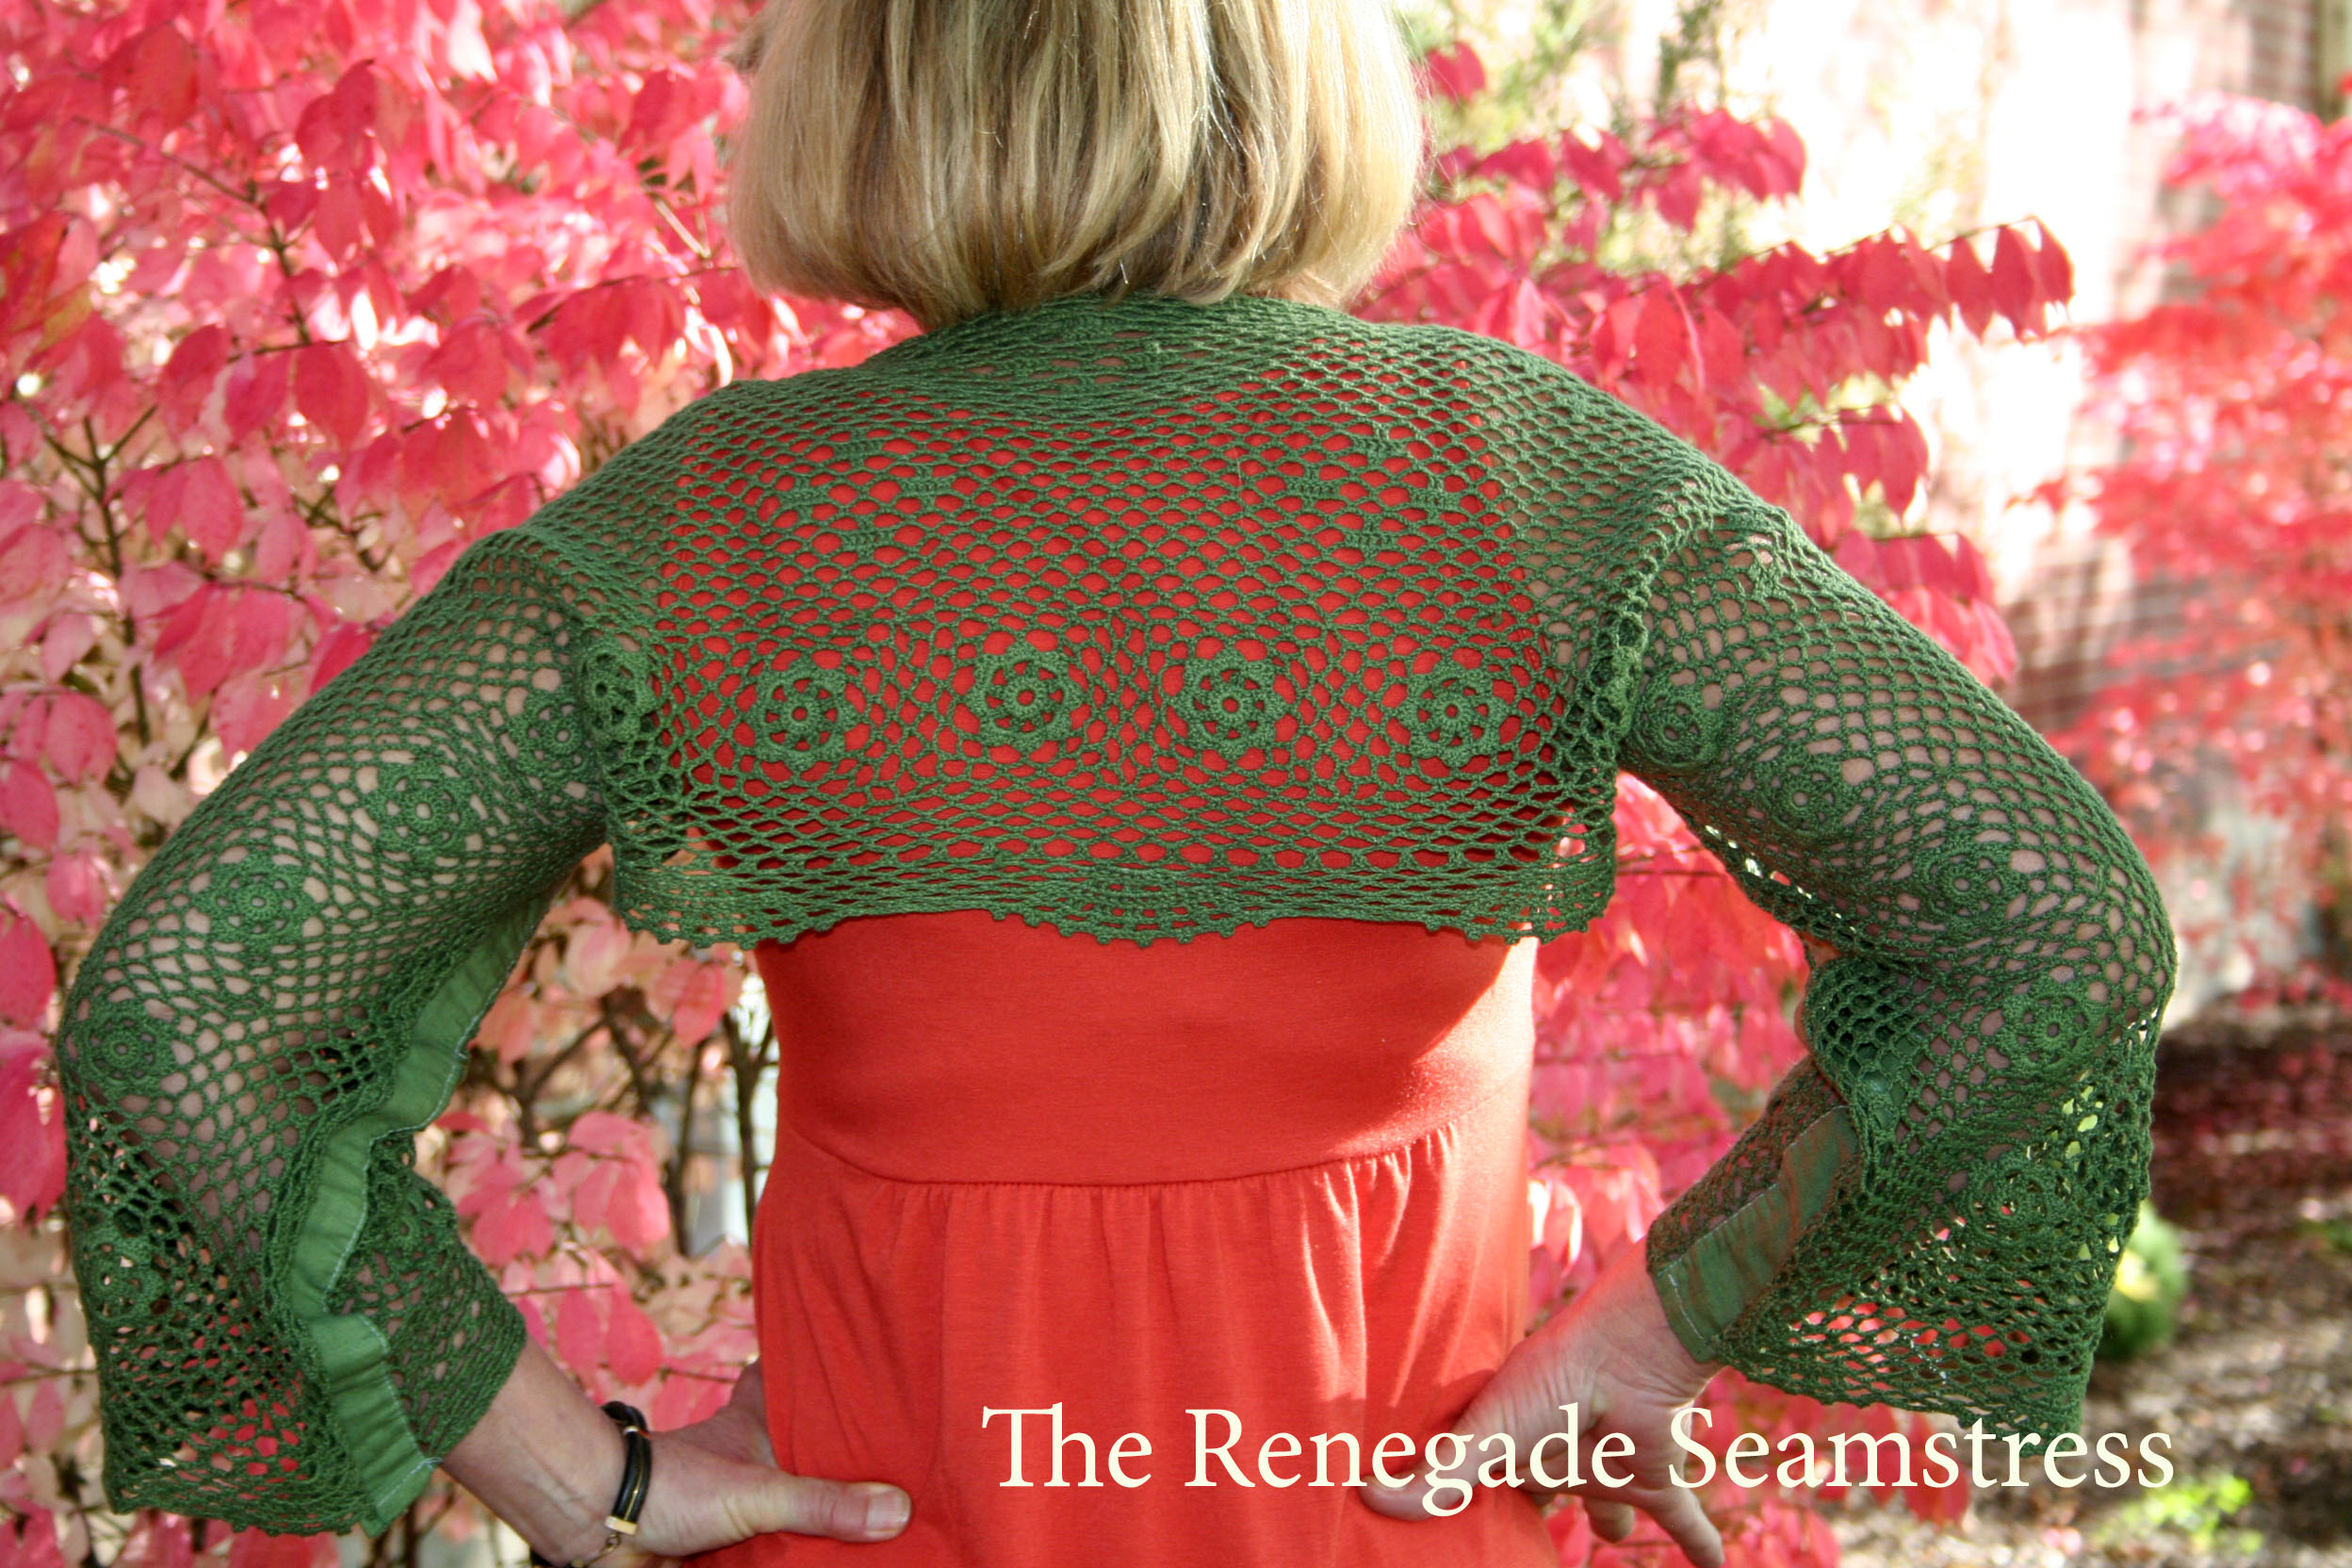
PS. There is still time to leave a comment over at my eHow tutorial for a chance to win this cute crochet shrug made by, you guessed it, moi, The Renegade Seamstress. 😉
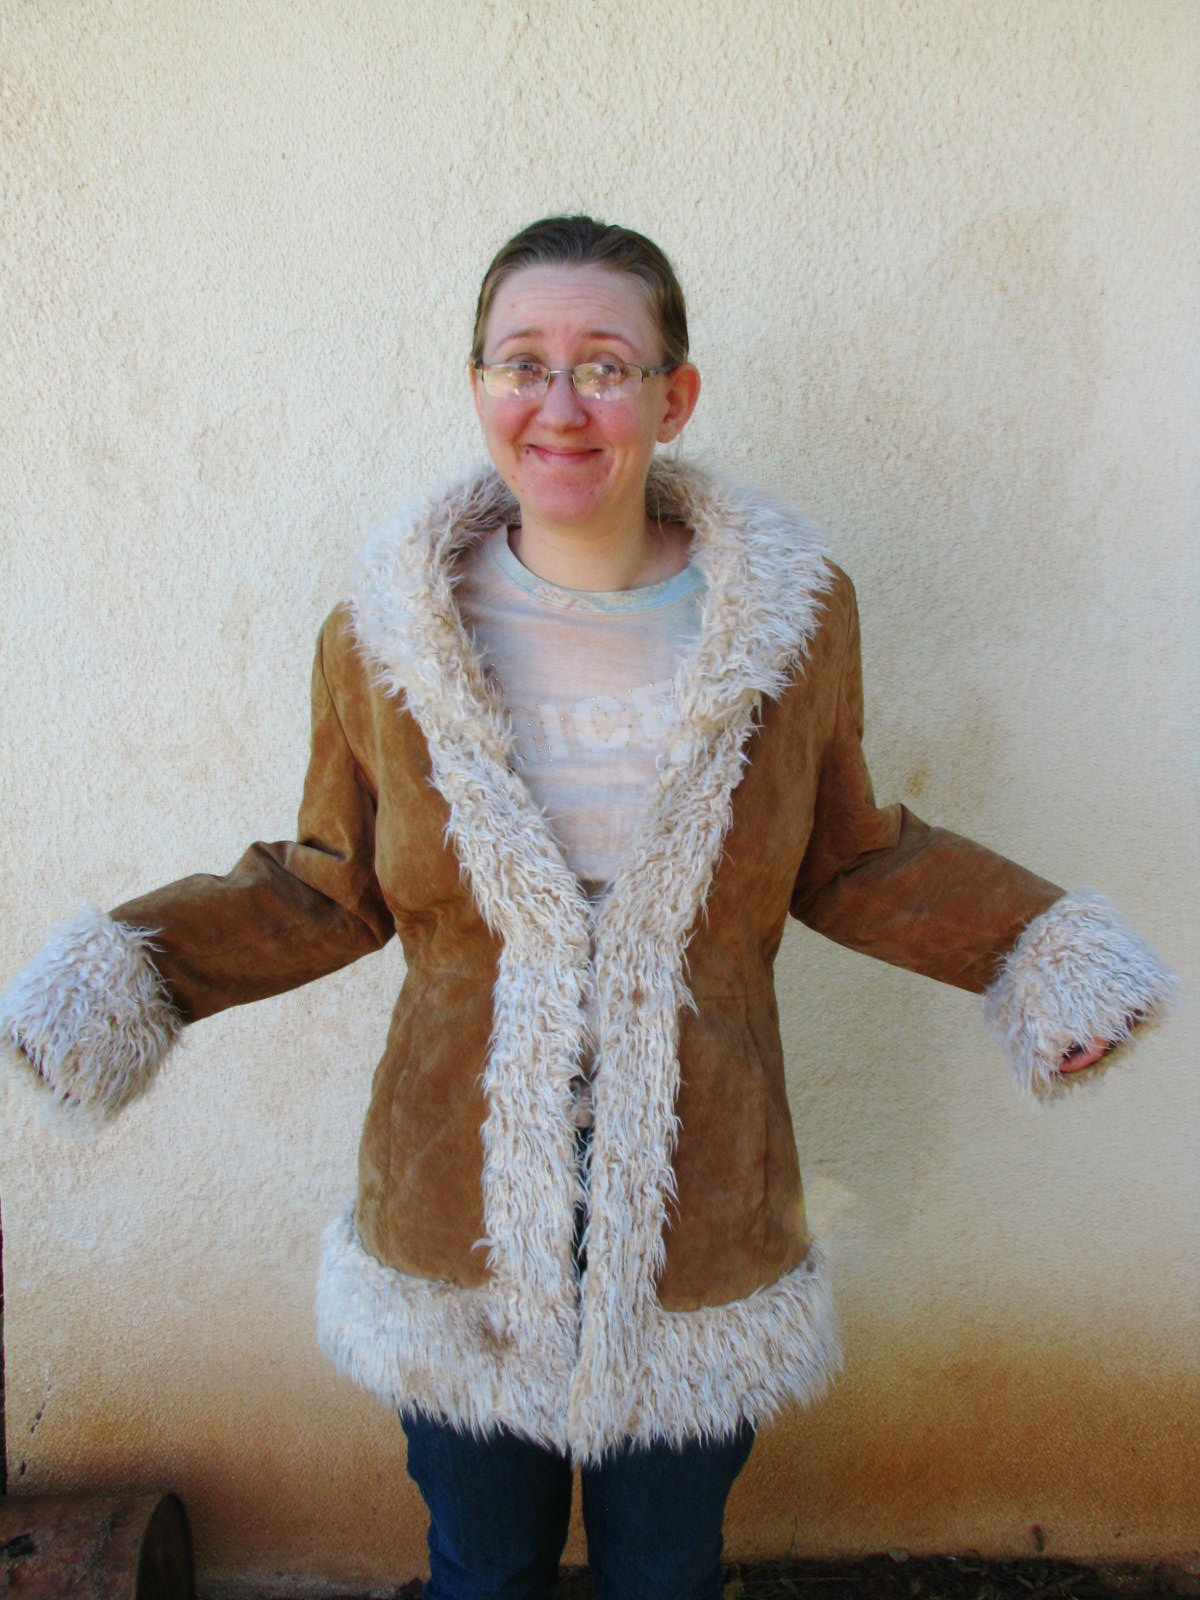
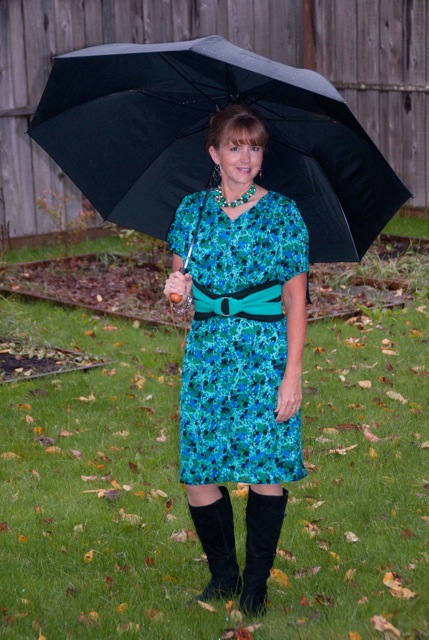
Isn’t my friend, Linda, lovely in this easy to make crochet shrug? Wearing shrugs is a perfect way to bring your summer dresses and shirts into fall and early winter.
You can actually make make one of these without knowing a stitch of crochet.
How, you ask?
Well, my tutorial for this incredibly easy shrug can be found here on my most recent eHow publication.
If you remember from one of my previous posts, the Editor-in-Chief of eHow, Jerri Farris, approached me a few months ago asking if I’d like a job as one of their sewing experts for the new crafts channel they are launching. Well, I’m pretty sure you know what I said….OF COURSE, I WOULD LOVE TO!!! 🙂
The shrug tutorial is the second project I’ve had published over there and I would be eternally grateful if you would head over to eHow, check out the tutorial, and leave a comment.
I was so grateful for all of your encouraging comments you left on my first project, so this time I’d like to give a little something back to you for taking the time to leave a comment. Those of you who leave a comment on my eHow post will be entered into a drawing to win this cute autumn crochet shrug.
I will announce the winner of the shrug on Saturday, November 16th. Good luck and thank you, once again, for being so supportive of my sewing adventures.
This last Refashion Runway: Season Two post has been the hardest one for me to write. Do you know how many times I’ve started over this morning, trying to find just the right words to tell you how much fun I’ve had hosting Refashion Runway once again and how sad I am that it has come to a close?
Let’s just say, I’ve become delightfully accustomed to waking up on Saturday mornings, drinking my coffee, watching the sun rise, and putting together these posts for you to highlight some of the most creative and talented women I know.
How about we look at today as a beginning and not an end. The beginning of new friendships, the beginning of new projects, and possibly even the beginning of new adventures for all of us.
So, let’s get to it and announce the winner of the Winter White challenge.
And now, without further adieu, and without me getting all mushy on you, (remember, this is a beginning and not an end) let’s move onto to the overall winners of Refashion Runway: Season Two.
To determine the order of the winners, the total votes received (for those of you interested in numbers, there were close to 10,000 votes cast this season) were combined with the competitors scores of each other. In my book ALL these ladies are winners!!!
We’ll start with our third runner up:
Congratulations to Desarae, from Gladness of Heart. Here’s a look back at her beautiful creations this season:
Thanks for sharing your amazing creativity with us this season, Carissa!!! I just know you have many more exciting adventures ahead of you and it’s been fun to be a part of your journey.
You will be taking home a prize package of 25 free custom sewing patterns from Lekala Sewing Patterns. Believe it or not, you just send in your measurements – just the height and girths – and within 24 hours they’ll accustom the patterns just for you. It will be sent to you via email as a PDF, so there is no shipping charges or delay. I’m totally fascinated by all of this!!
In addition, I will be sending you a $25 Jo-Ann’s gift card.
And a $50 Jo-Ann’s gift card from yours truly: The Renegade Seamstress 🙂
Thanks, Trish!!! It’s been fun getting to know a fellow teacher/refashionista from across the Pacific. Perhaps, I’ll be lucky enough to land on your island and meet you in person someday. I would LOVE that!
Susan has thoroughly entertained us with her creative projects and fun photos throughout the entire competition. Here’s a look back at her Refashion Runway adventure:
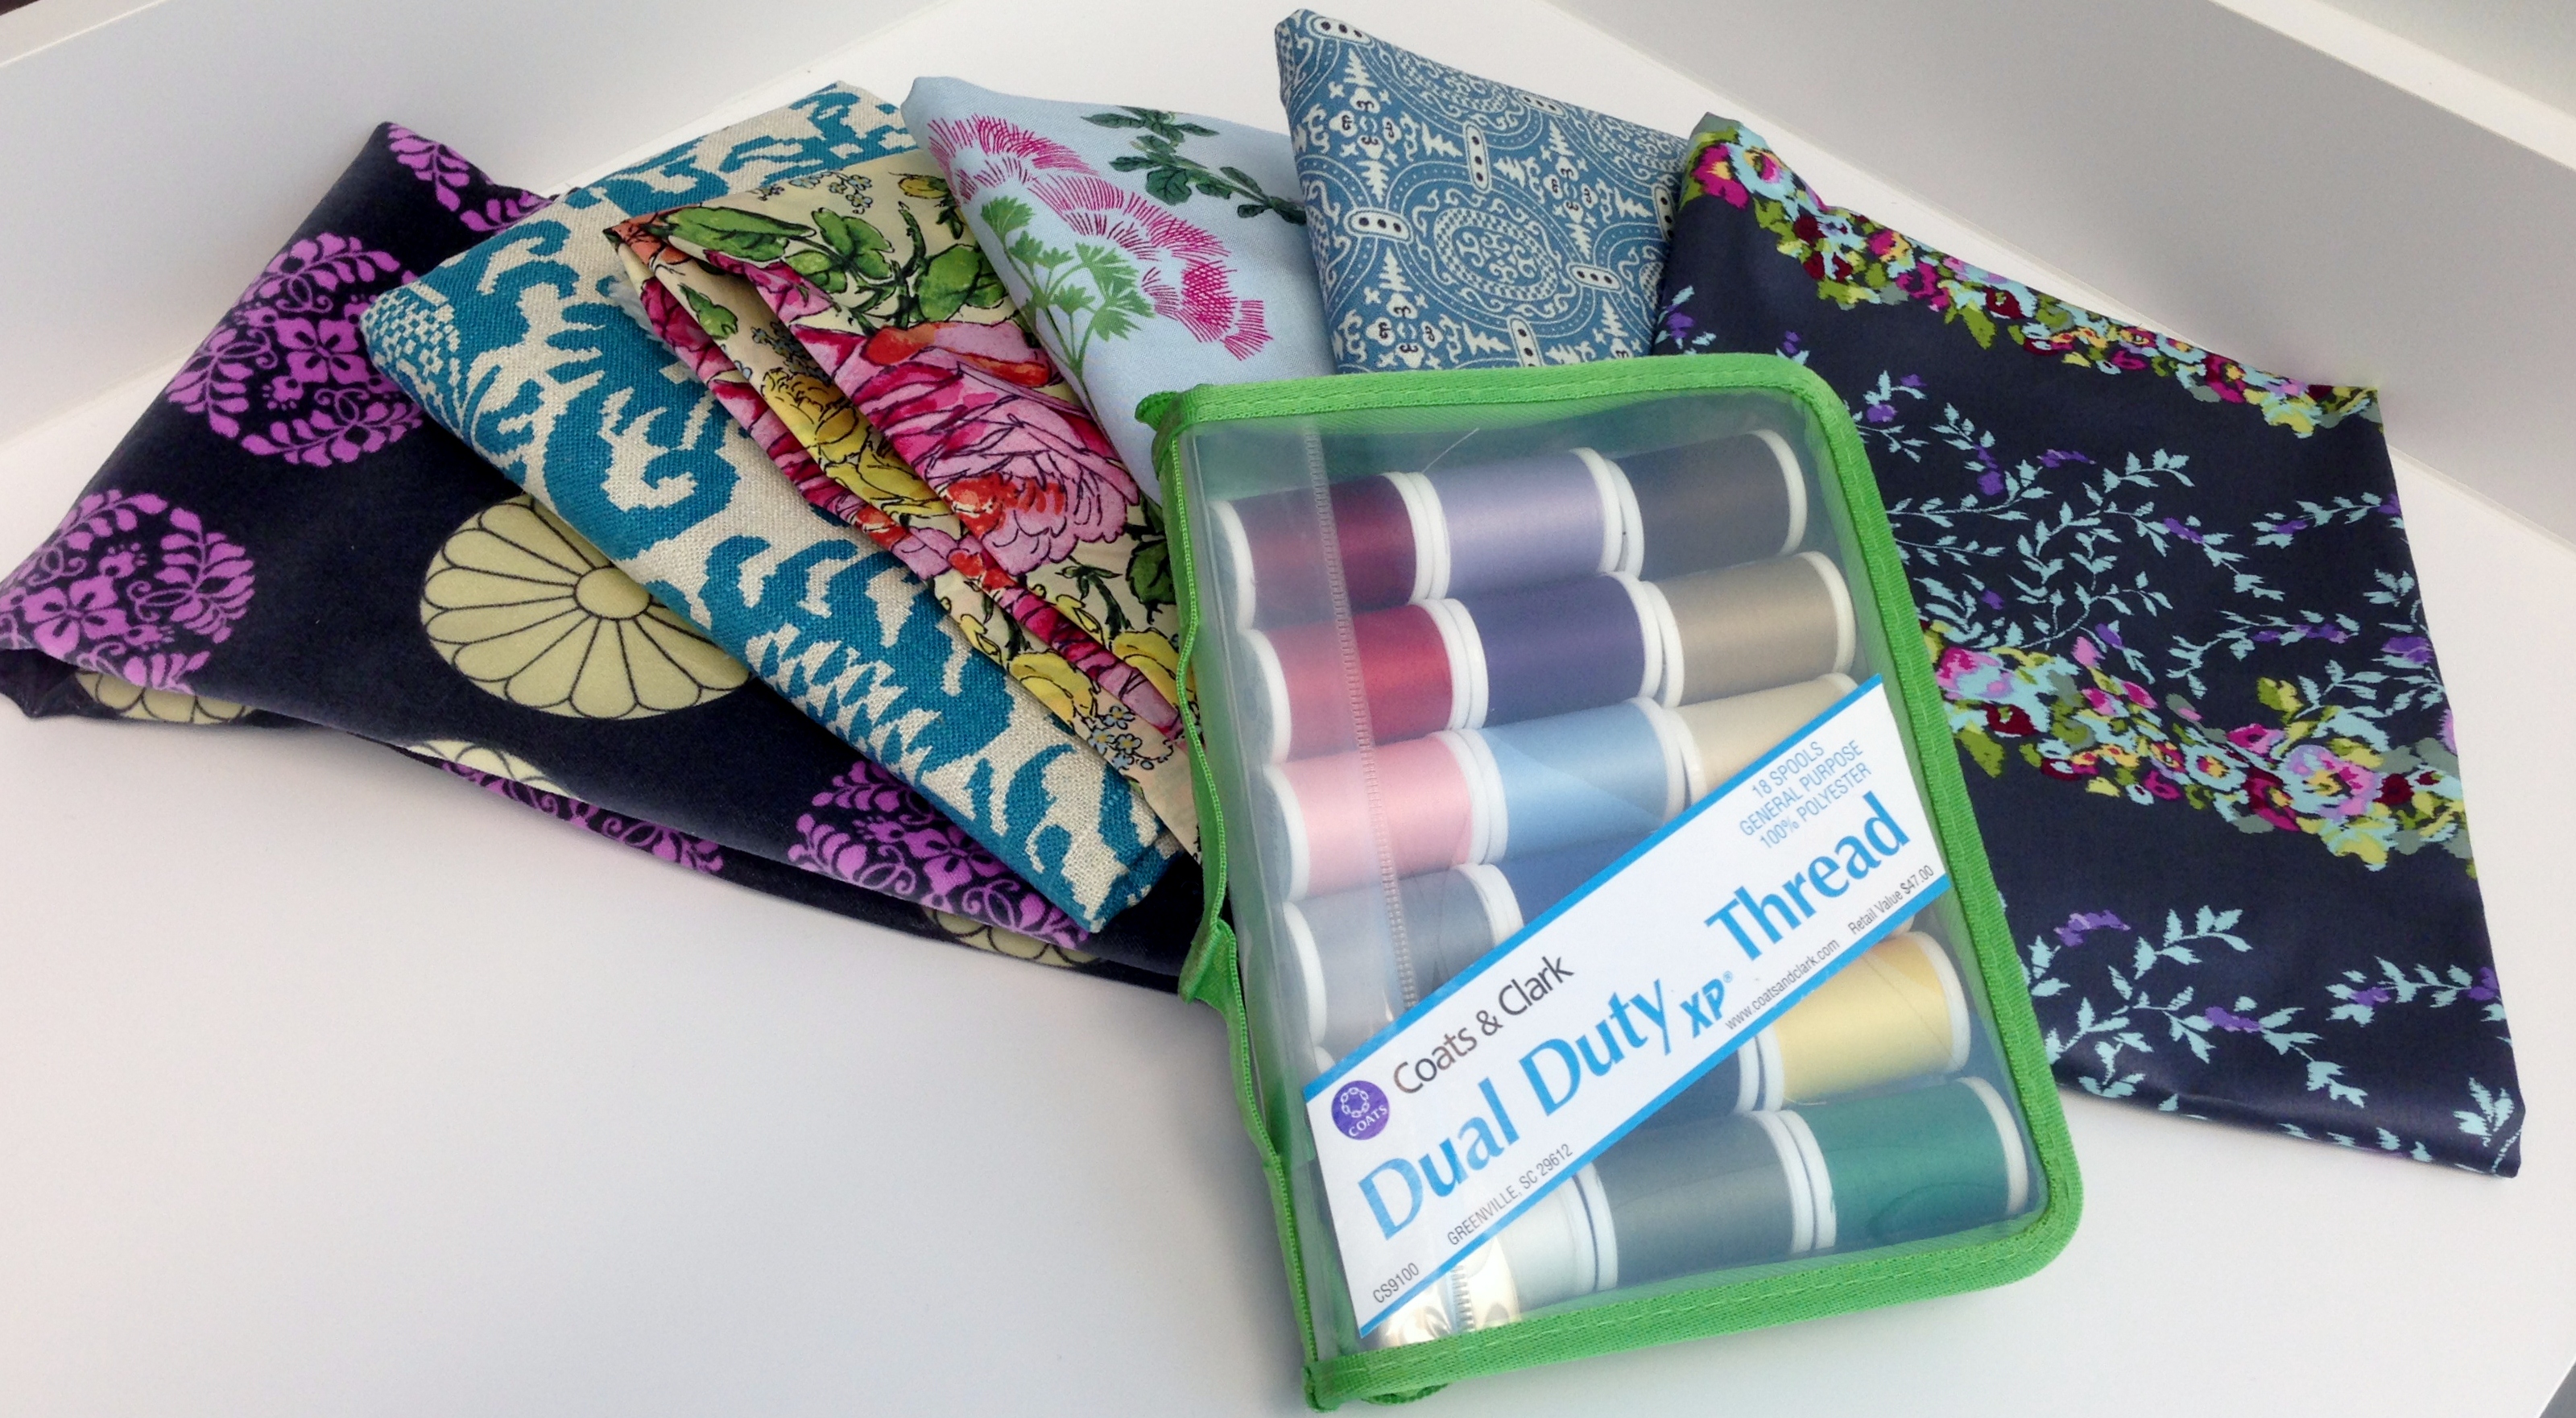
an 18ct Dual Duty thread assortment along with fabrics from Rowan Fabrics Amy Butler line.
And a $100 Jo-Ann’s gift card from moi, The Renegade Seamstress. 🙂
Thanks for all of your late nights sewing so you could bring us your inspirational refashions! I have a feeling we’ll be meeting up soon, since we’re practically neighbors and we enjoy so many of the same things.
Congratulations, Susan!!!!
*****
Well there you have it; Refashion Runway: Season Two.
A big THANK YOU to to everyone who participated in season two. From those of you who voted and left nice comments, to the generous prize sponsors, to everyone who sewed along with us, and to the inspirational contestants.
I hope you all have met some new friends, learned a bit about sewing, and been inspired along the way. I know I have!!!
Let’s look at this, not as the end of season two, but as the beginning of Refashion Runway: Season Three.
Yes, it’s true, there WILL be a third season!!
If you’re interested in being a contestant in the next season, oil up your machines, work out your refashion muscles and get ready to audition when the open casting call comes out. I can’t wait to see what you have in store for us!!!
Until then……
Here’s to more Renegade Seamstress tutorials, coming up soon!
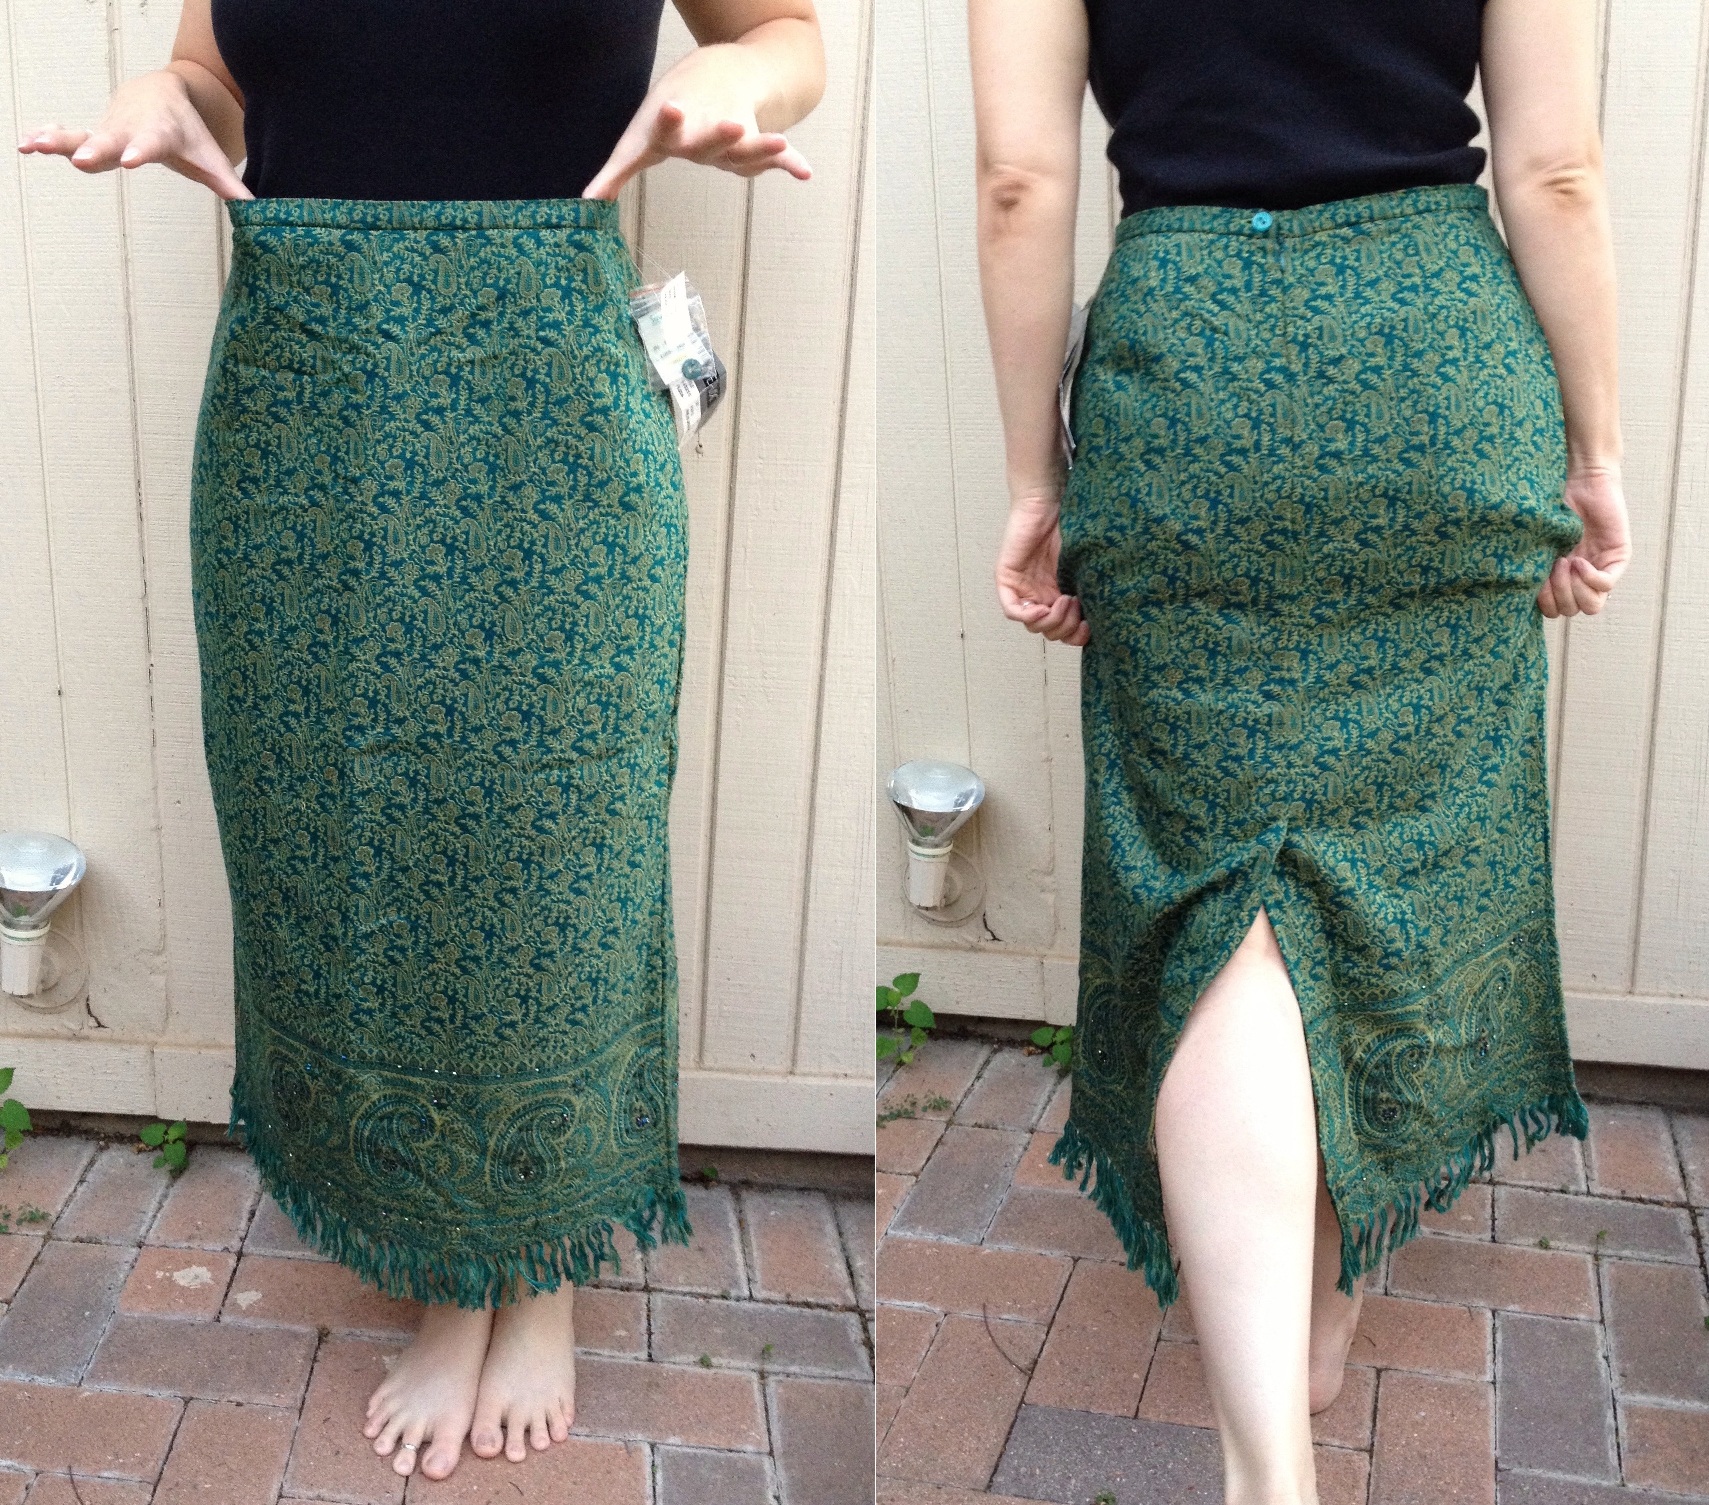
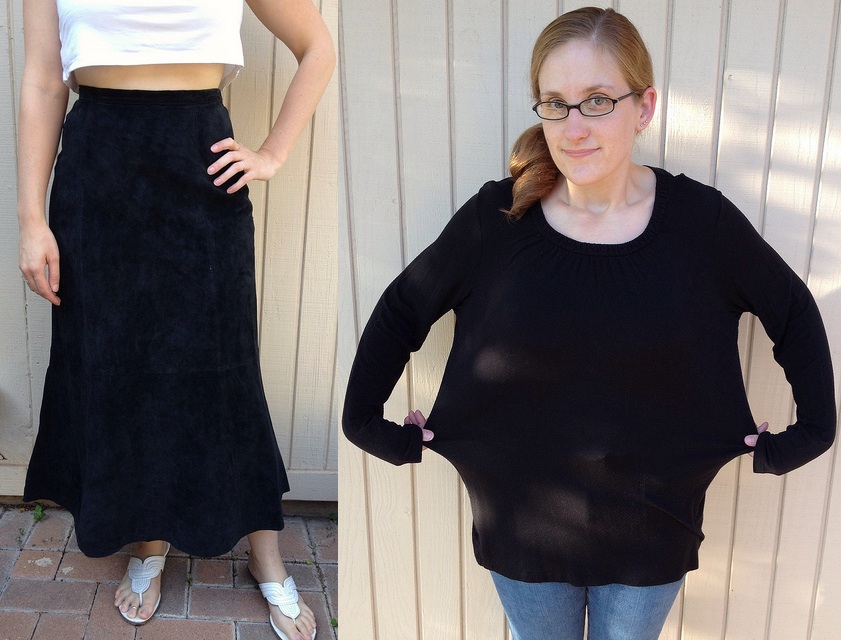
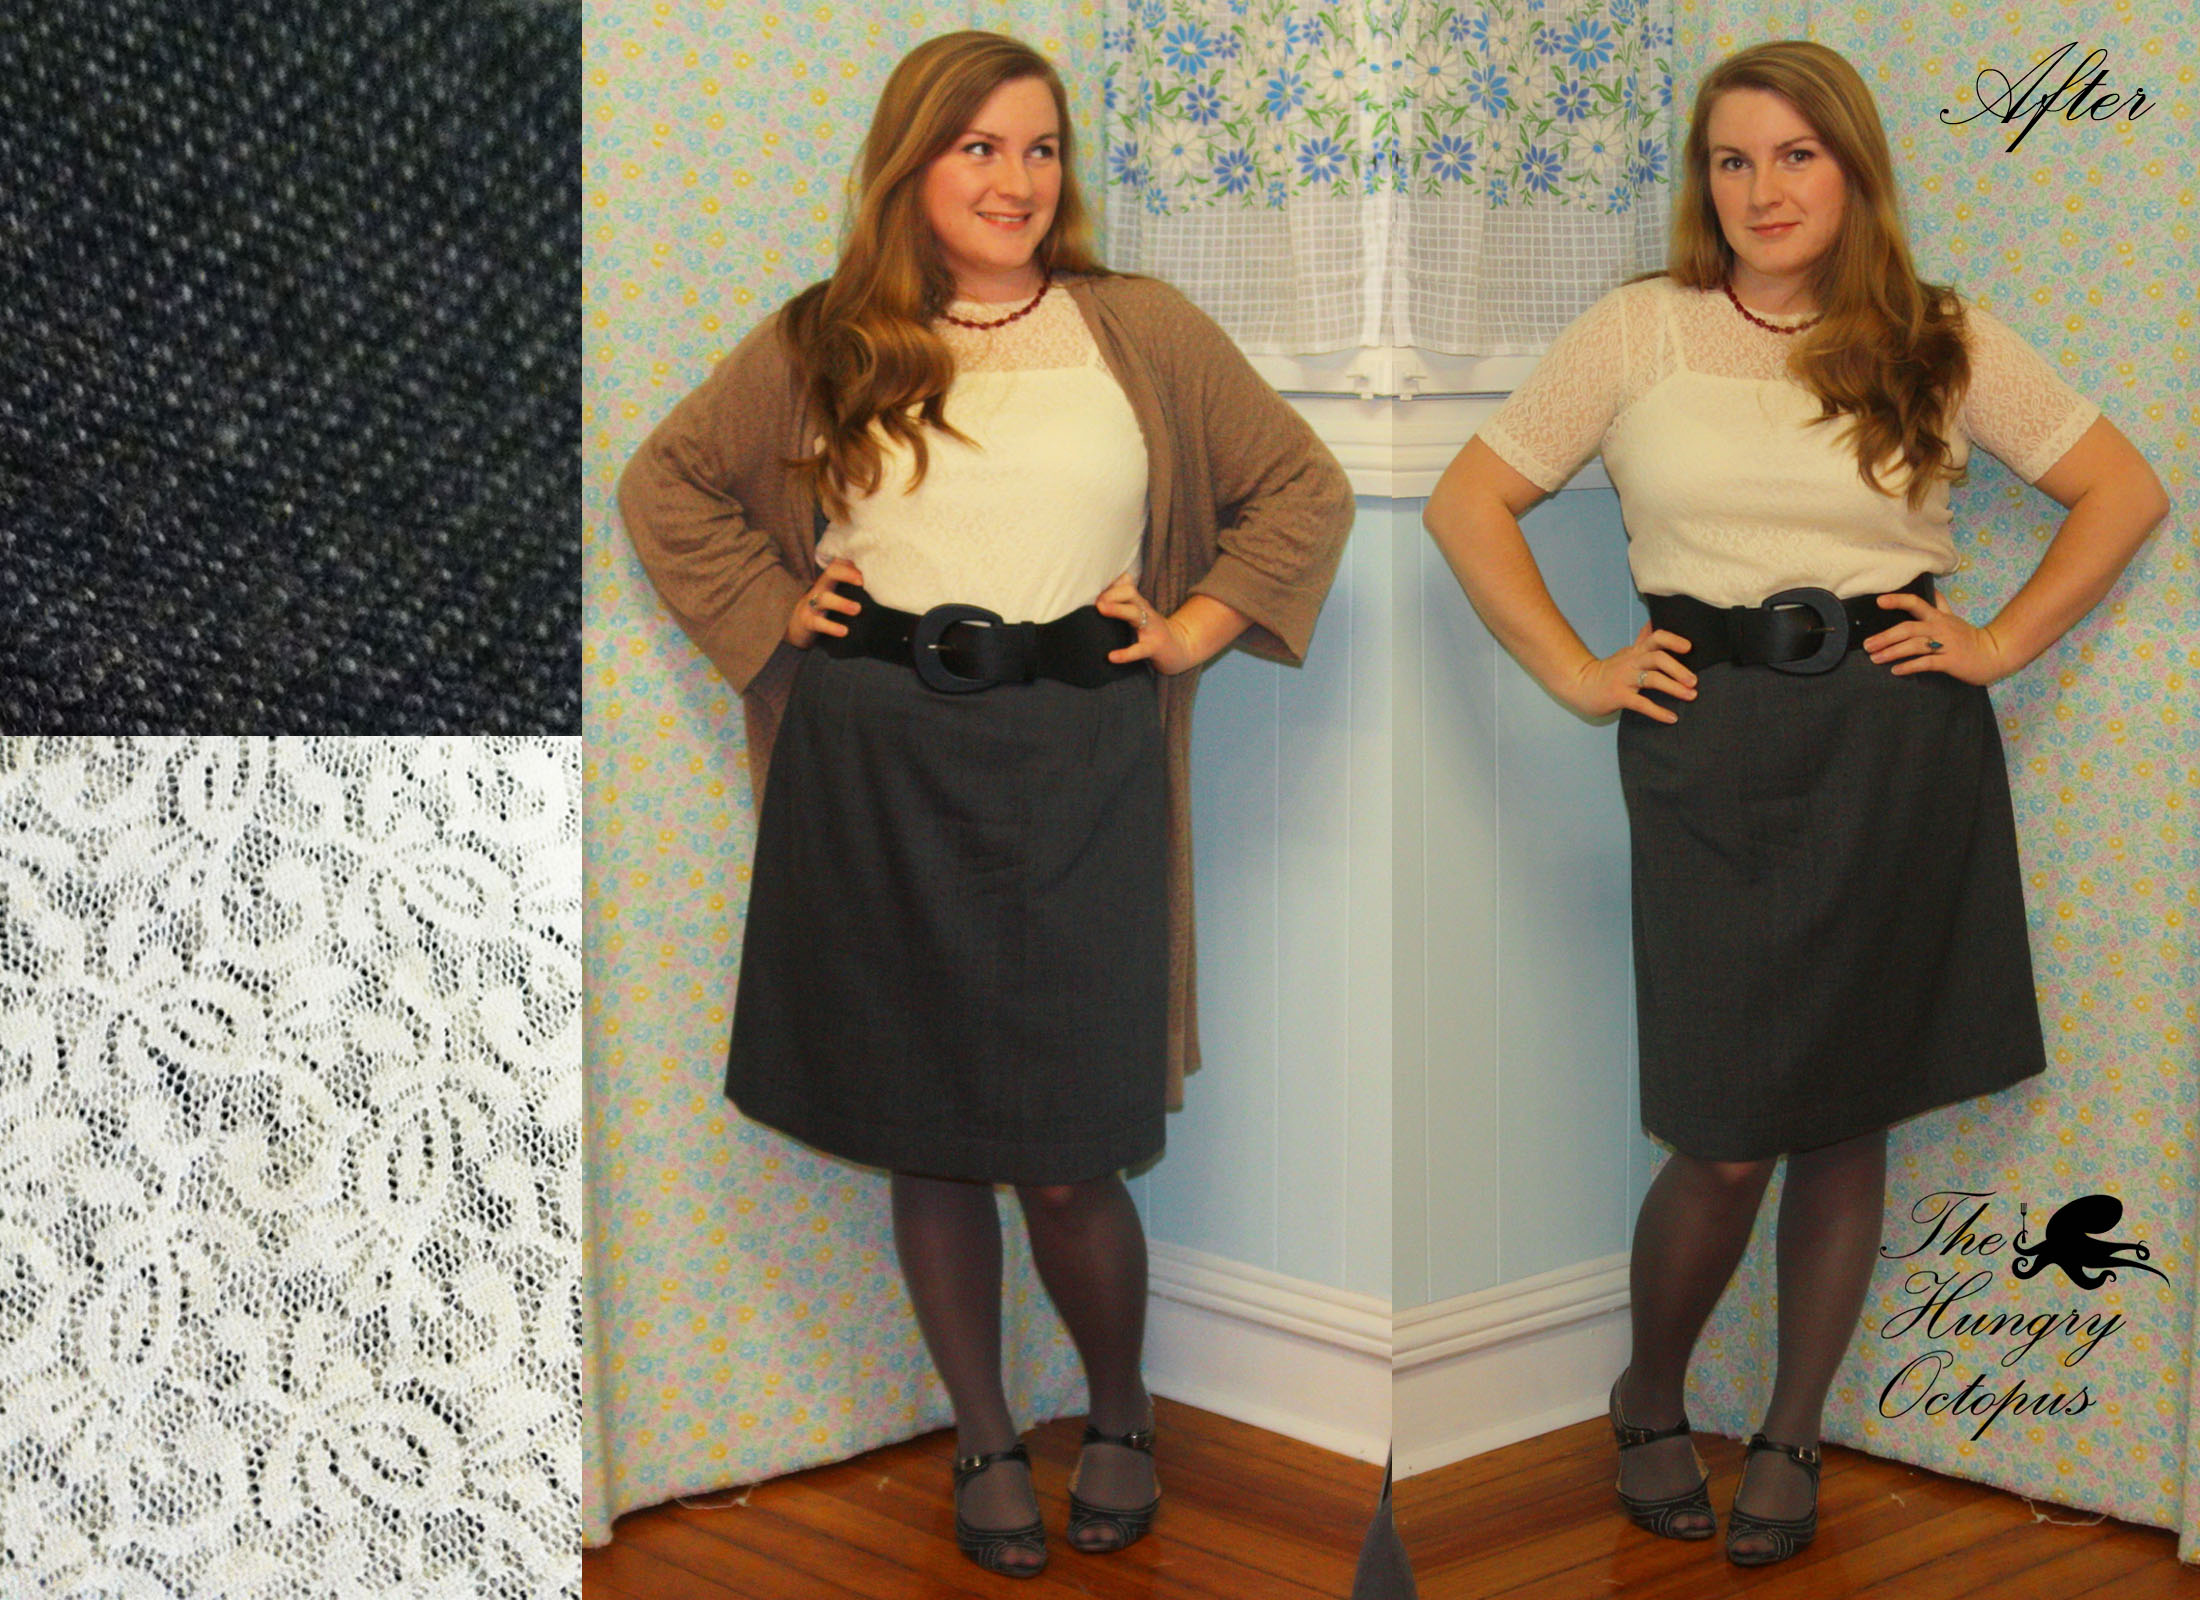
“This week’s sew along isn’t quite white, but it will have to do. I
picked up this ivory lace top and blue-gray wool skirt for $1 each. Both were
ill-fitting, outdated, and just perfect for a winter refashion.
I removed the lining
of the ivory top and took in the arms and sides for a better fit.
Then I remade the lining into an undershirt.
The skirt was a little more complicated, but suffice it
to say that it actually fits now. (You can see what I did with the skirt here
–http://www.thehungryoctopus.com/wool-winter-white.) I can already tell that these
are going to be staples in my wardrobe this winter.”-Elizabeth
Thank you, Elizabeth, it’s always a pleasure to see what you create!
*****
Here’s our new friend, Molly, with her Winter White creation:
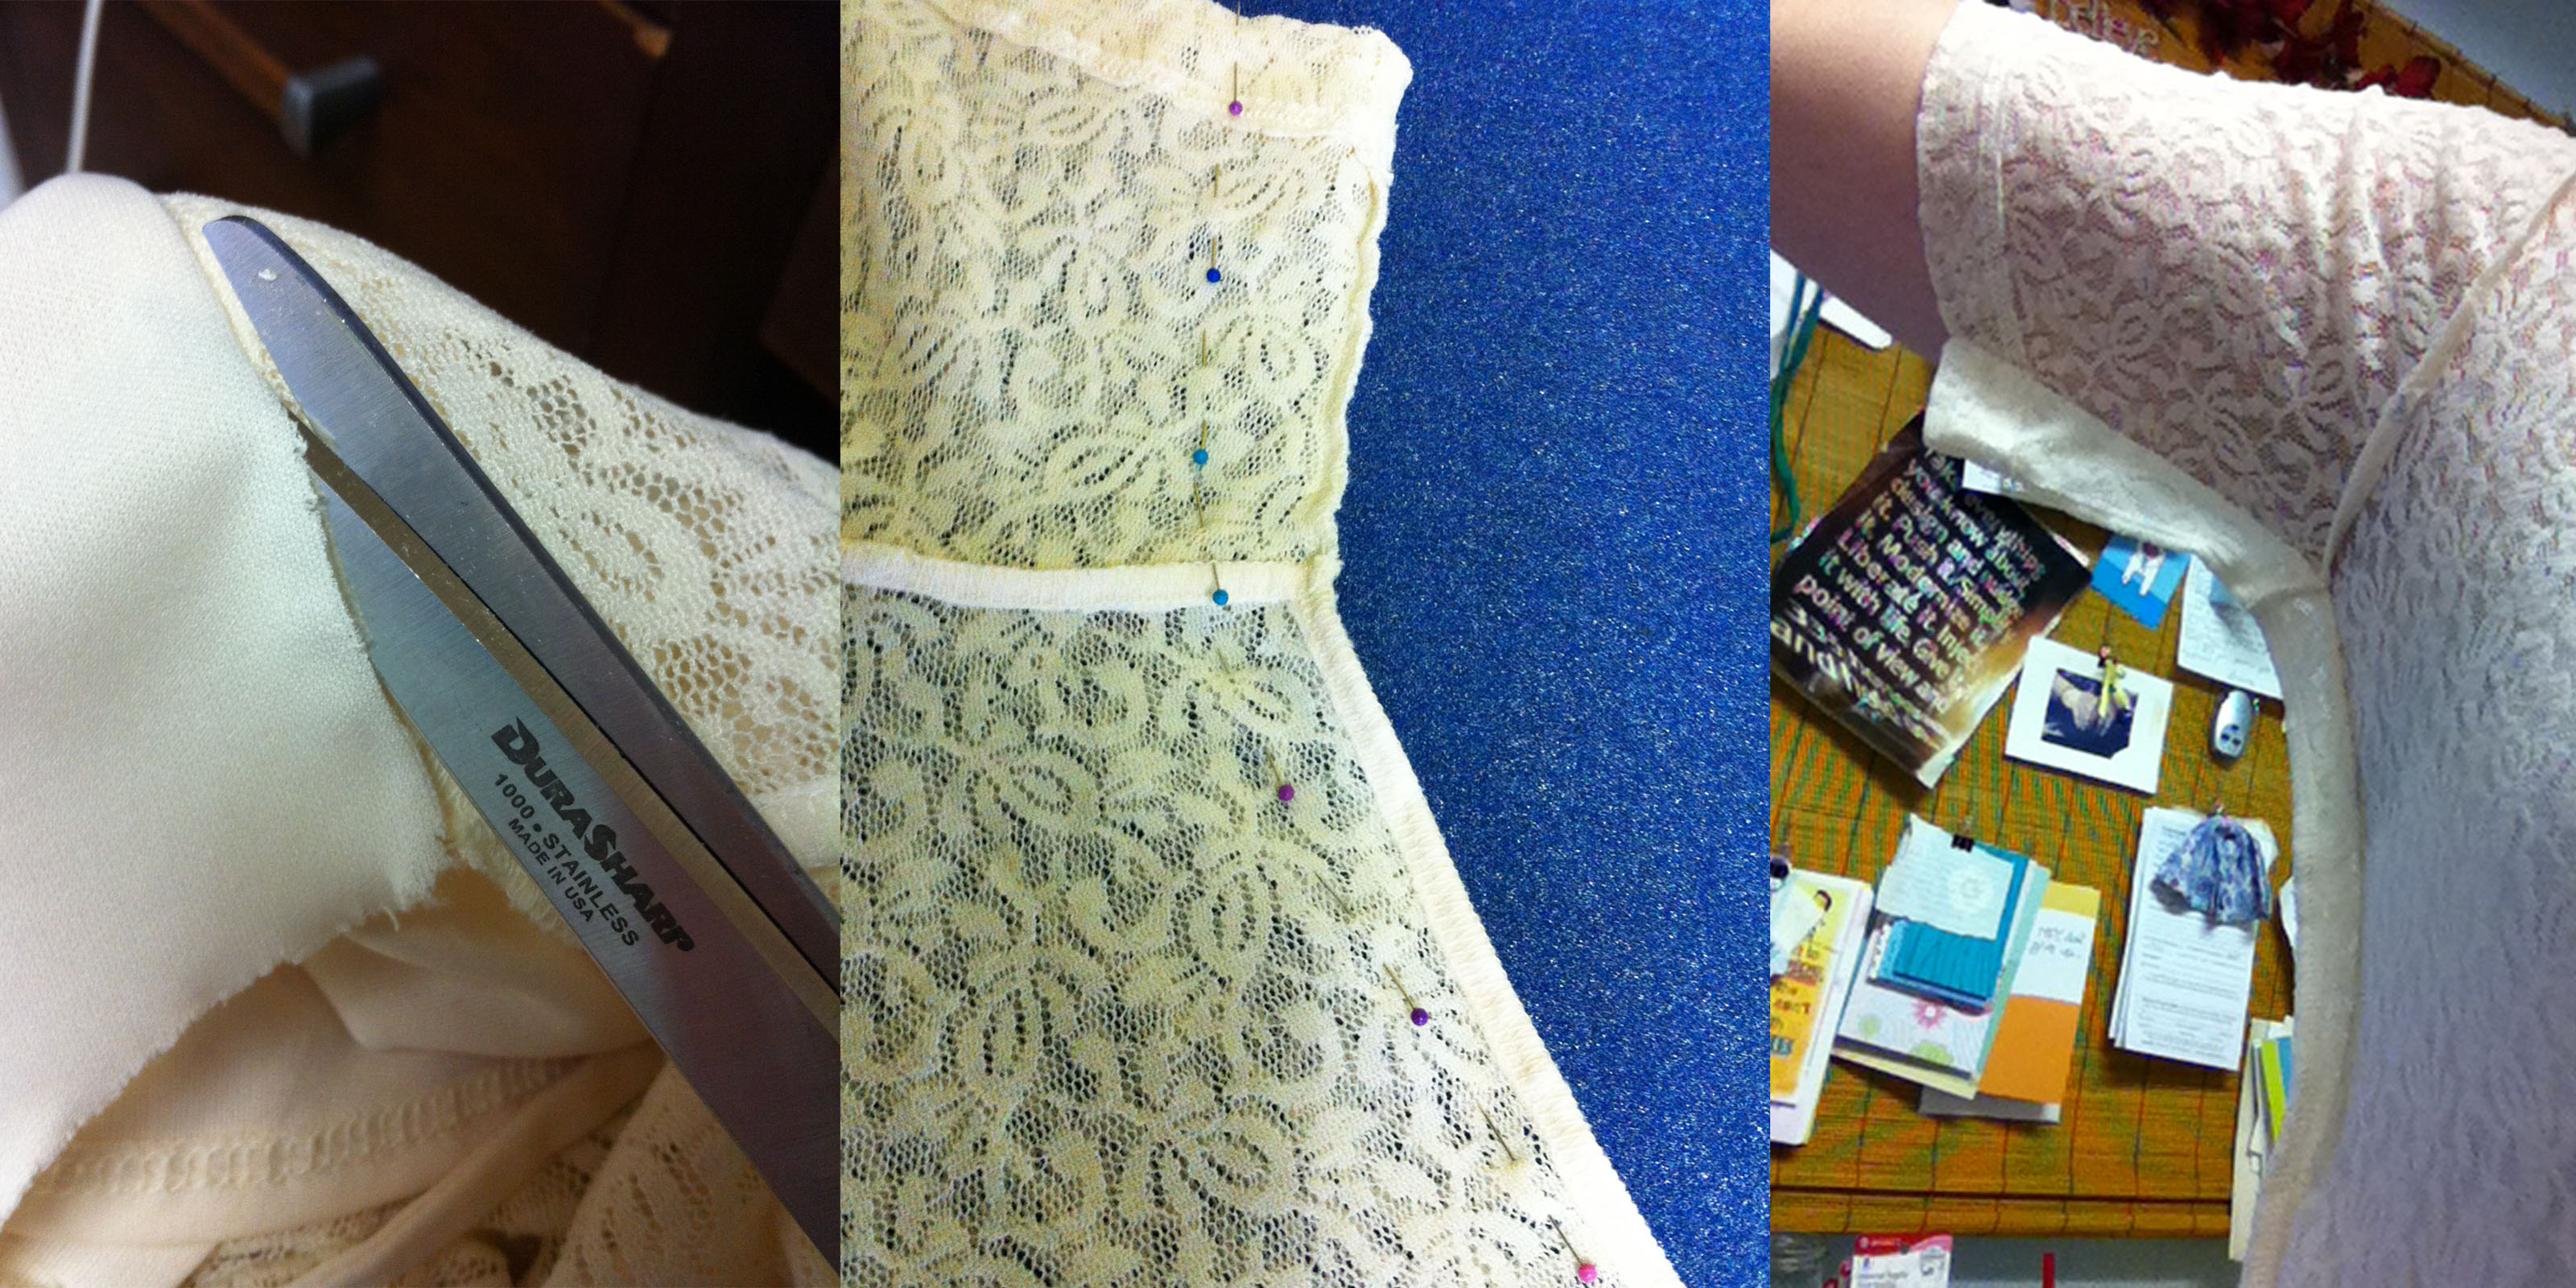
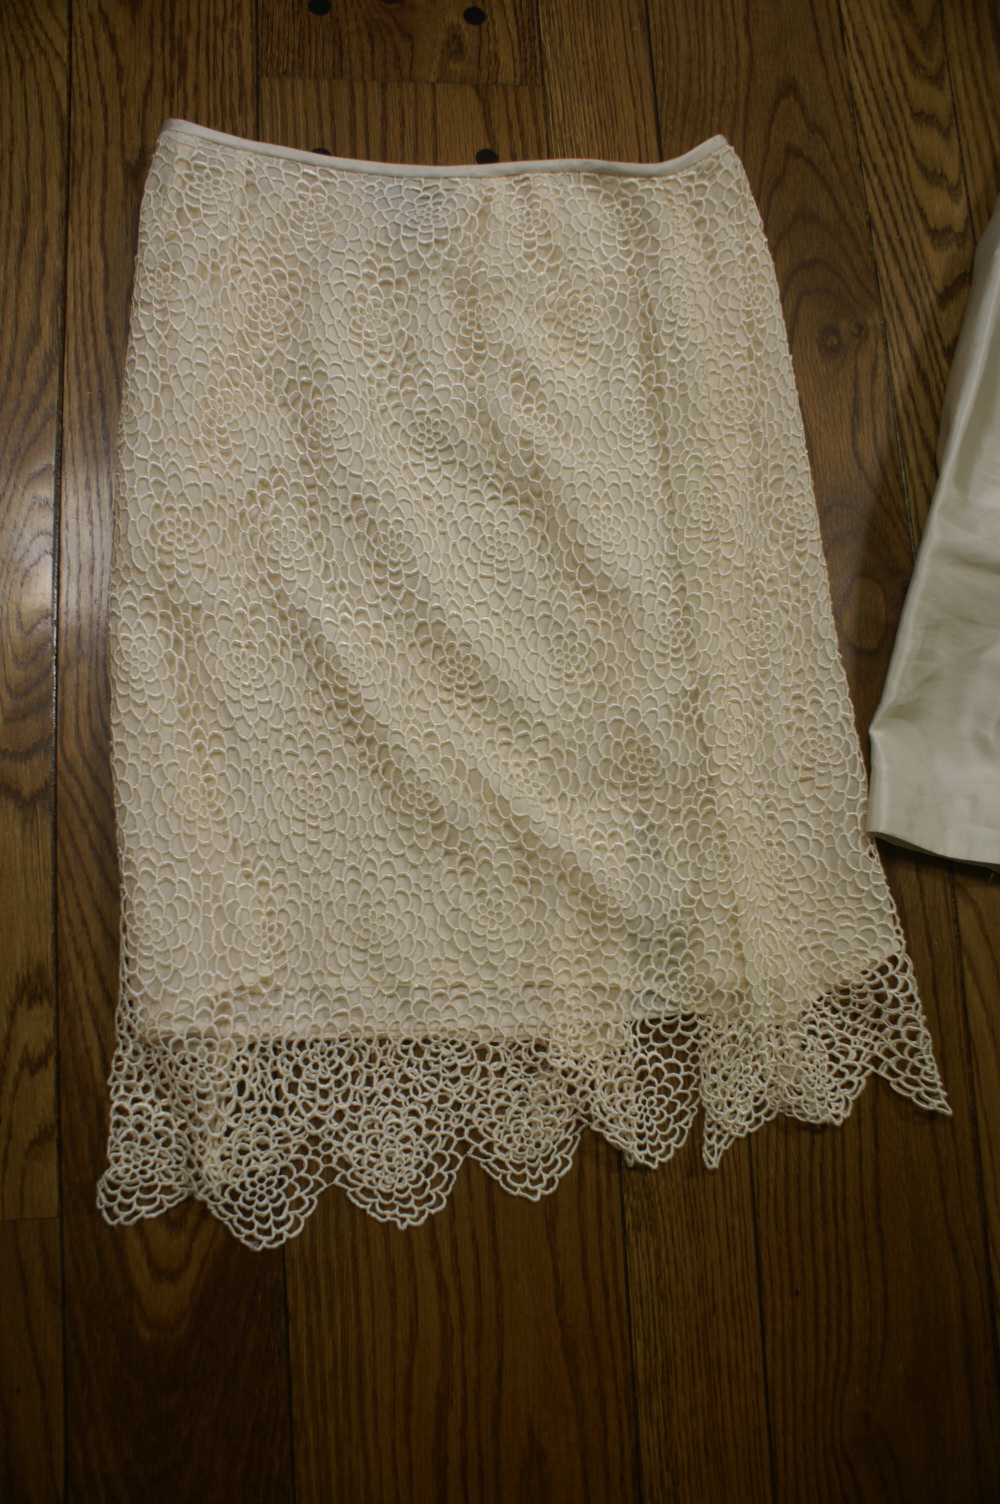
“I started with a lace skirt which was too big, too long
with a crooked hem, and it had two lining layers (neither of which fit the actual
skirt …. hence the strange bunching you may see in the photo of me in the mirror).
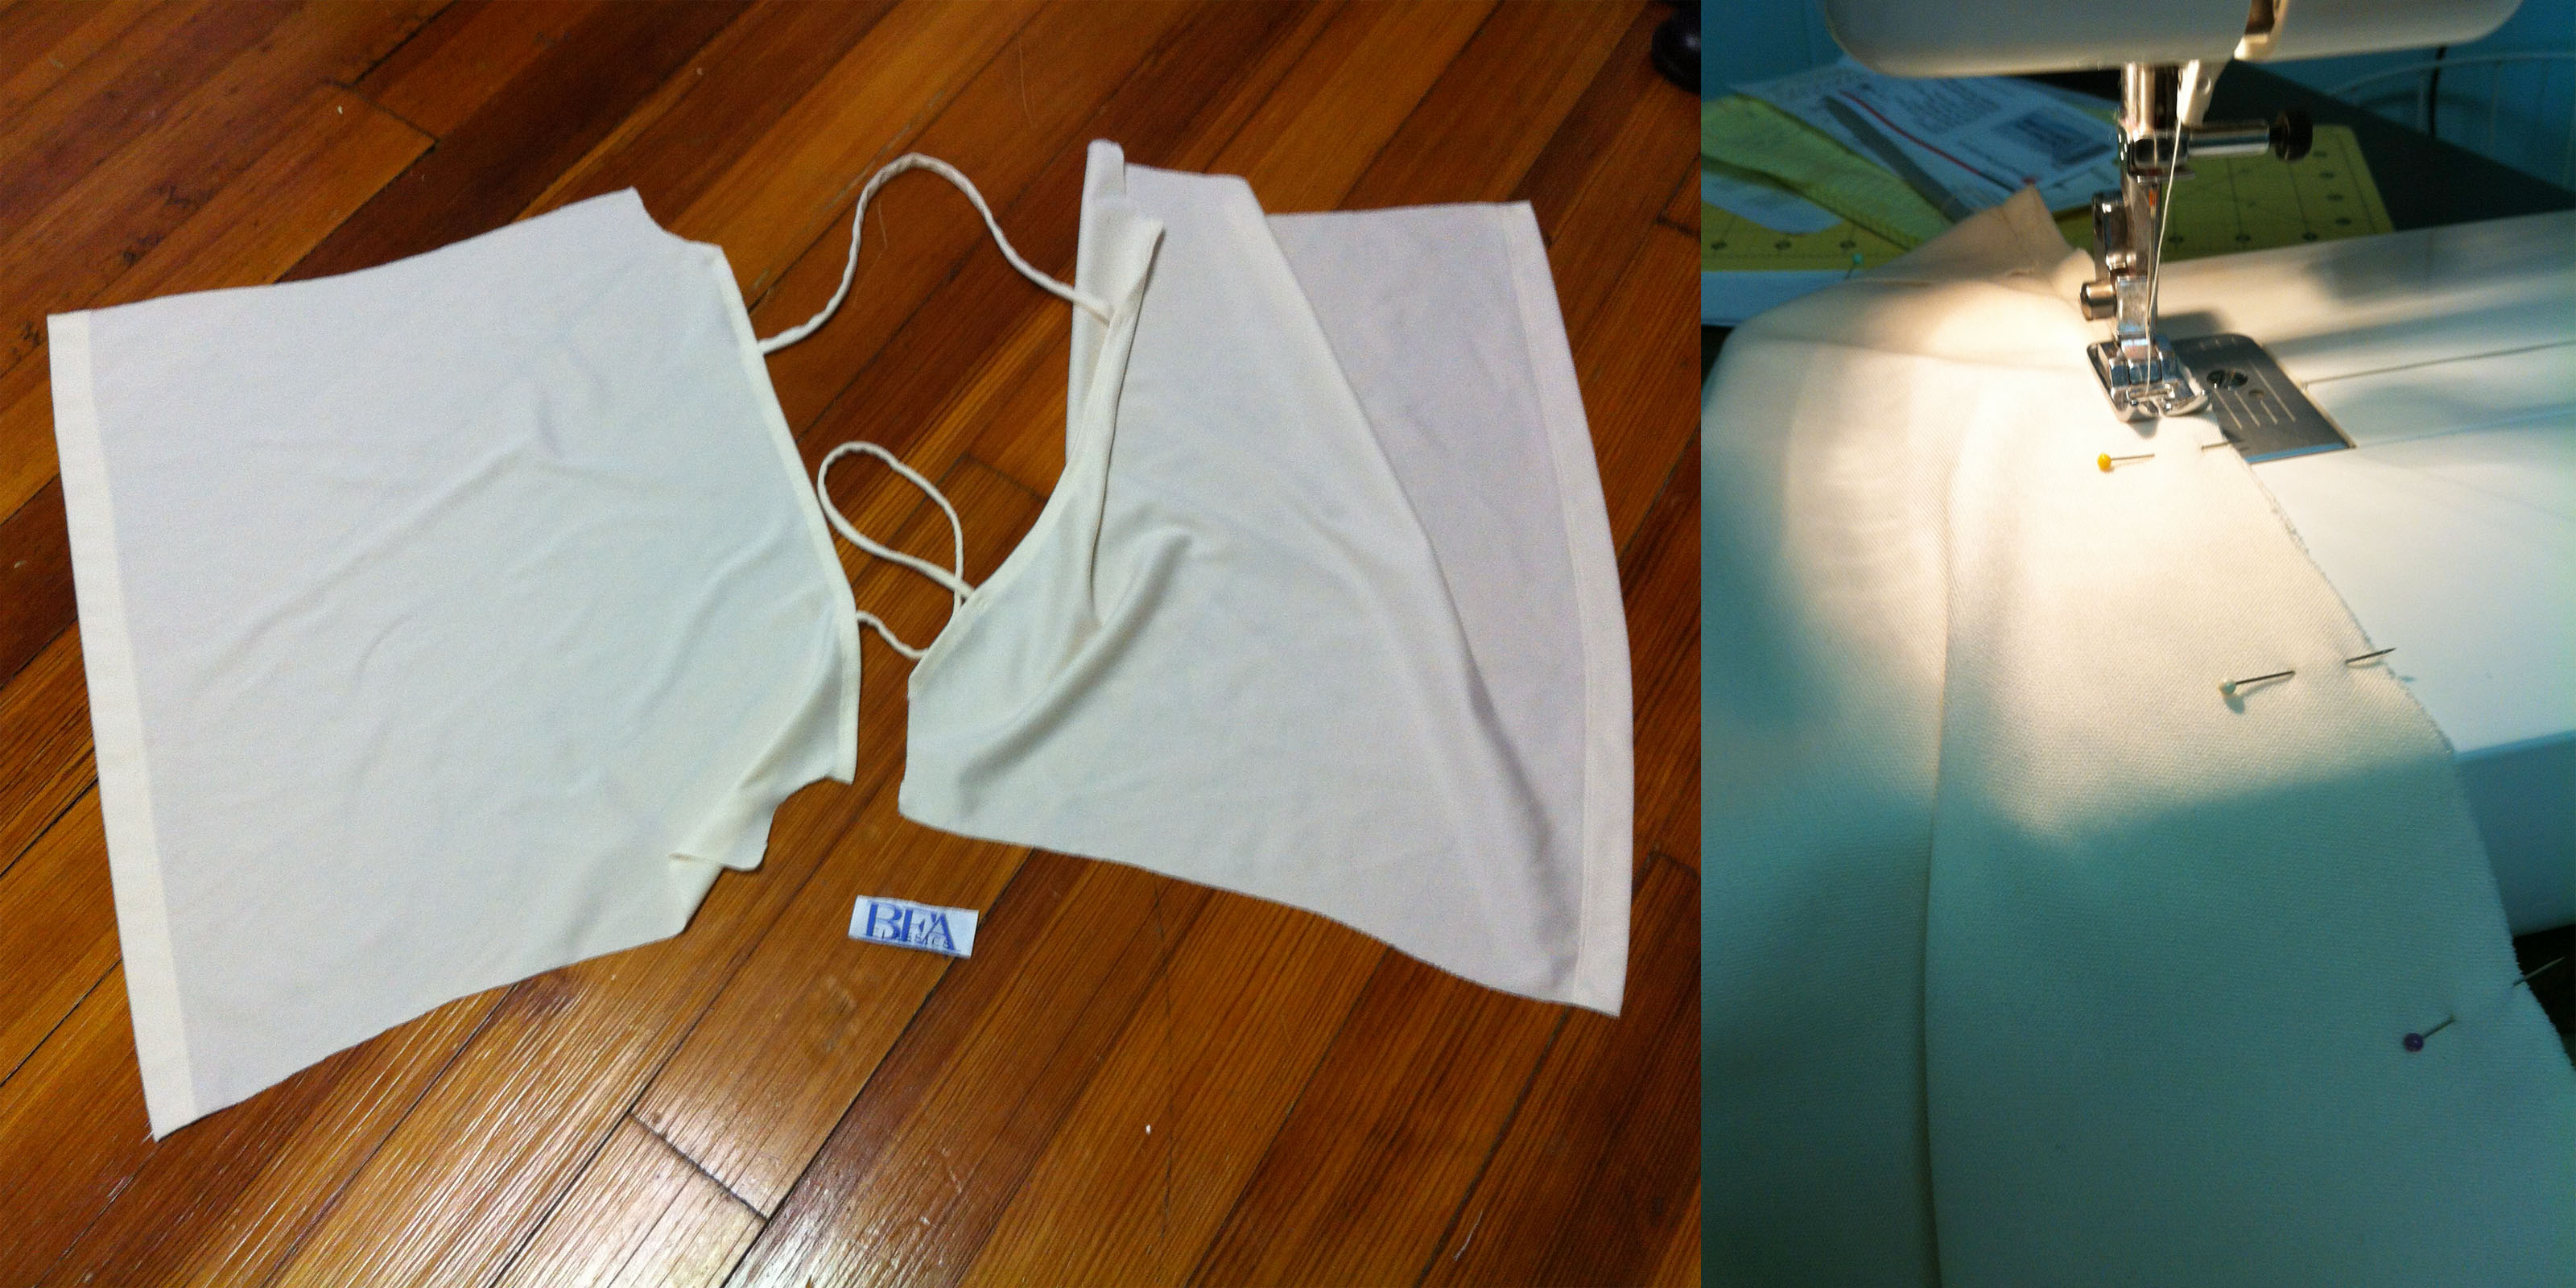
I removed both inner layers and started from scratch making a new skirt to go
underneath. Then, I pulled the lace up so that the hem was even, yet scalloped
below the lining skirt. Then, I put the zipper back in, and added the waistband.
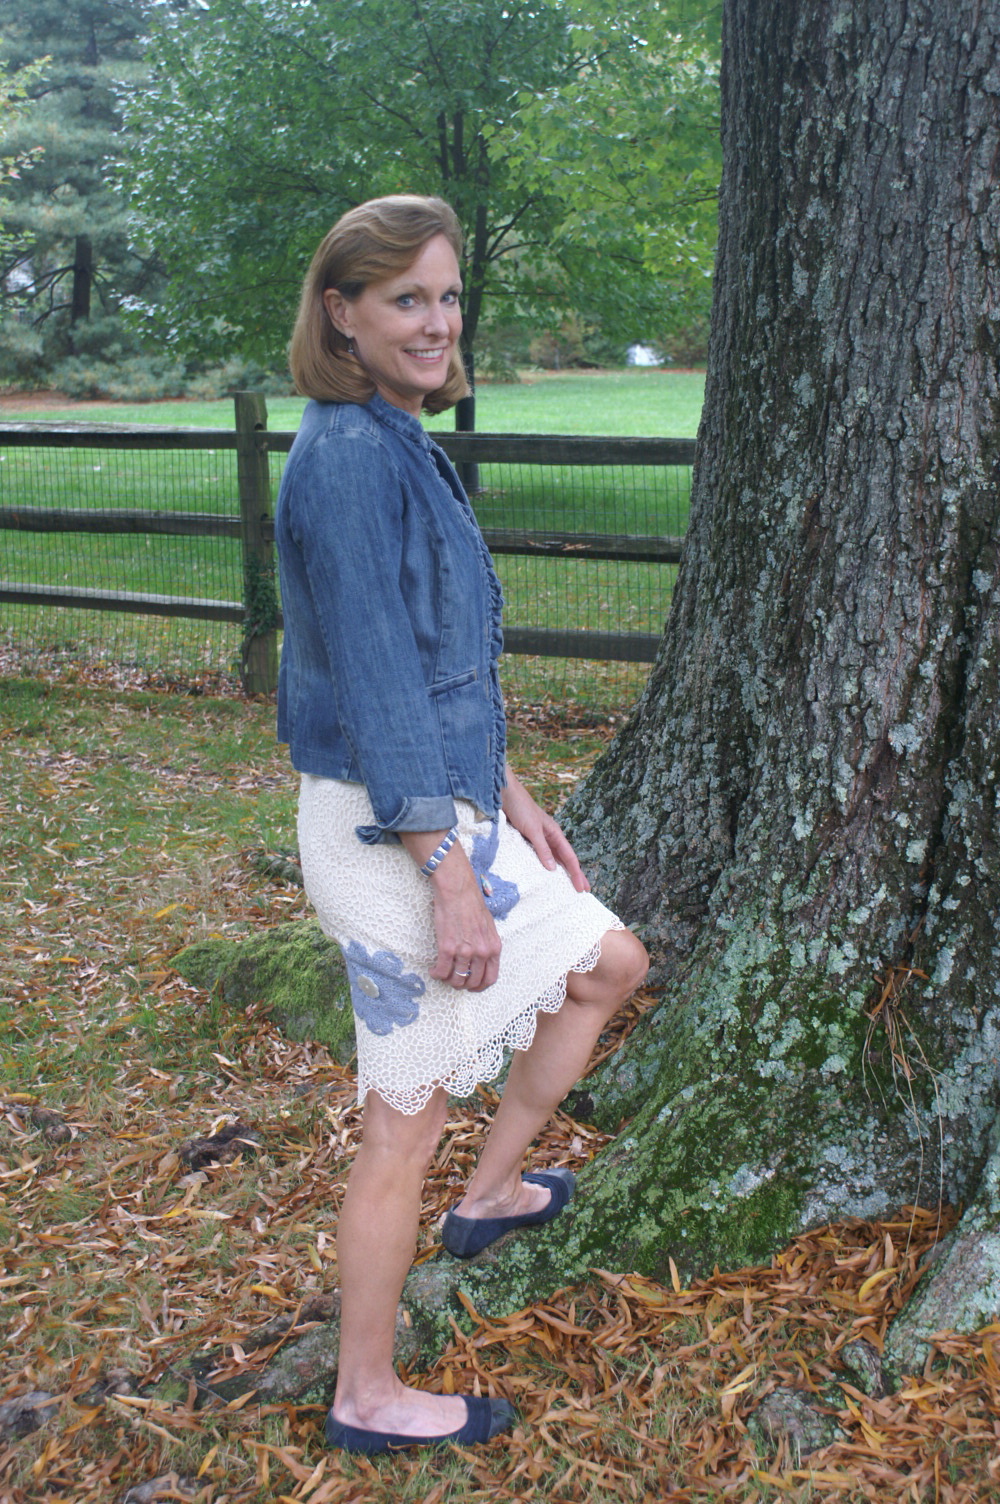
Knowing I wanted to create a more vintage/casual look to this skirt, and wanting to
wear it with a jean jacket, I decided to dye some crocheted doilies and attach them
to the skirt. I finished by adding some fun buttons to the centers of the doilies.
May not carry me into the dead of winter, but will get me part way there. Winter
White … done!
Thanks for letting me sew along ….. it has been a fun and challenging 6 weeks, and
I have loved seeing what the competitors have completed!!!! All very talented and
creative seamstresses!!!”-Molly
*****
Great job ladies! Thanks for sewing along with us again this week.
The voting will be open until midnight tomorrow night.
Stay tuned for Saturday. It’ll be an exciting day! The winner of the Winter White challenge will be announced as well as, the overall winner of Refashion Runway: Season Two. See you tomorrow……
I’m so excited, I can hardly stand myself. I can’t stop smiling and there’s nobody awake in my house to jump up and down with me. (I sure hope I don’t trip over my nighty as I walk down the hall and up the stairs to accept my Oscar…er um…I mean my award. 🙂 )
Thanks to all of you who voted, The Renegade Seamstress won the
YAY!!! You guys rock!!!!! I knew I had the best subscribers on the planet. You all make this whole blogging/sewing thing so much fun with all of your encouraging comments and support for what I do.
Thanks for voting and jumping up and down with me!
(And yes, Gaye, we will be celebrating with Sparkling Cider in the staff room today.;))
You’re still enjoying the beautiful autumn colors and the crisp fall weather.
I know. Me too.
But, to help you get in the mood for the upcoming months, our competitors have created some inspirational Winter White refashions.
(It’s just a little service we provide here at Refashion Runway. 🙂 )
Enjoy……
*****
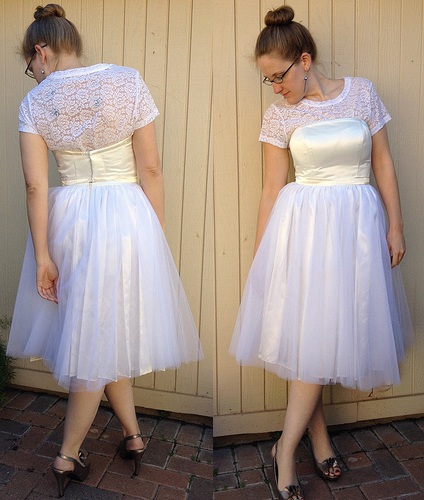
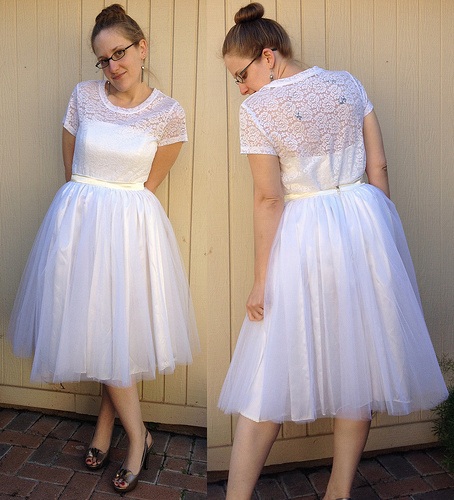
Carissa, from Carissa Knits, really showed us her versatile side this week:
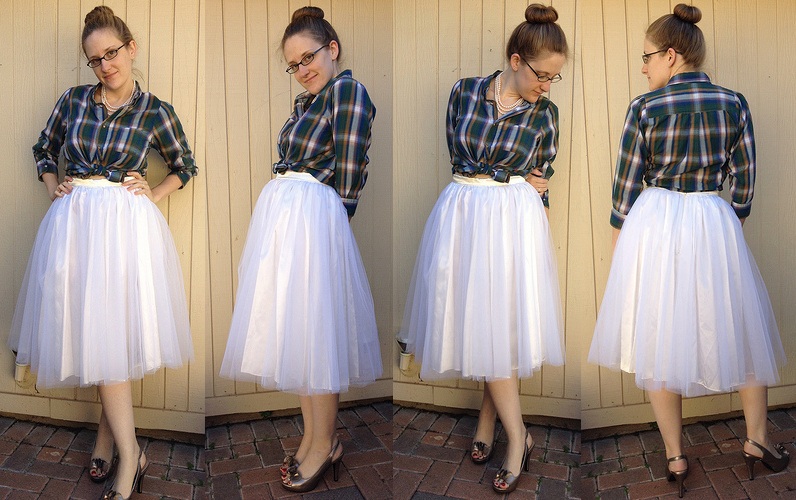
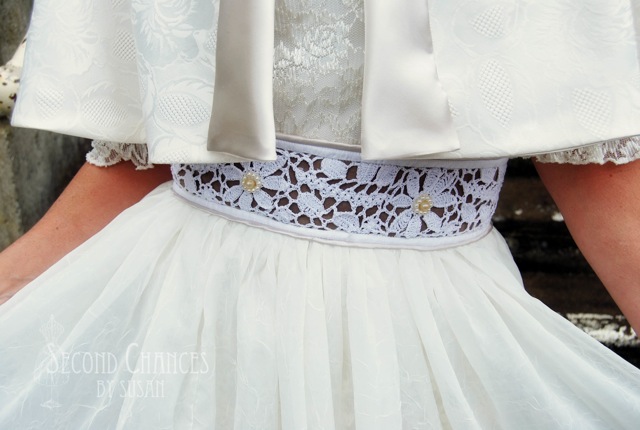
“When I saw this dated prom dress at the thrift shop for $6, I knew I had to have it. I am seeing lovely tulle skirts all over these days and have been wanting one of my very own. The bottom of this dress will do nicely. To complete the ensemble, I grabbed a stretchy lace t-shirt for $4, and I pulled the top portion of last week’s wedding dress out of my scrap pile.
I removed the skirt from that heinous black velvet bodice and used the sashes from the back of the dress to form the waistband. The zipper was also salvaged from the wedding dress. I needed a top to go with my new skirt, so I used more of the sash material to finish the cut edges of the wedding dress bodice. I also took it in a smidge and added heavy-duty hooks from one of the pink bridesmaid dresses from last week. And to finish it off, I carefully cut the lining out of my lace tee. Satin, tulle, and lace – the perfect party dress for a holiday get-together!
I debated whether to wear the lace on top of the bustier or vice-versa. But that’s the beauty of keeping all three pieces separate – I don’t have to choose!
I could even remove the lace entirely and go strapless.
Plus, I can mix and match the individual pieces with other garments too.
Oh, the possibilities are endless! For more pics and details, you can visit CarissaKnits.com.“-Carissa
*****
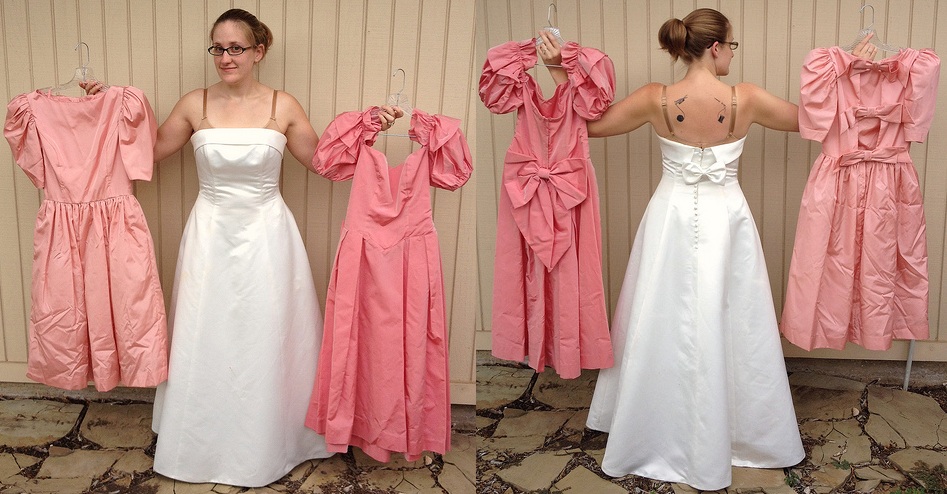
As you will see, Trish, from Feeling Kinda Thrifty was a brave, brave woman this week:
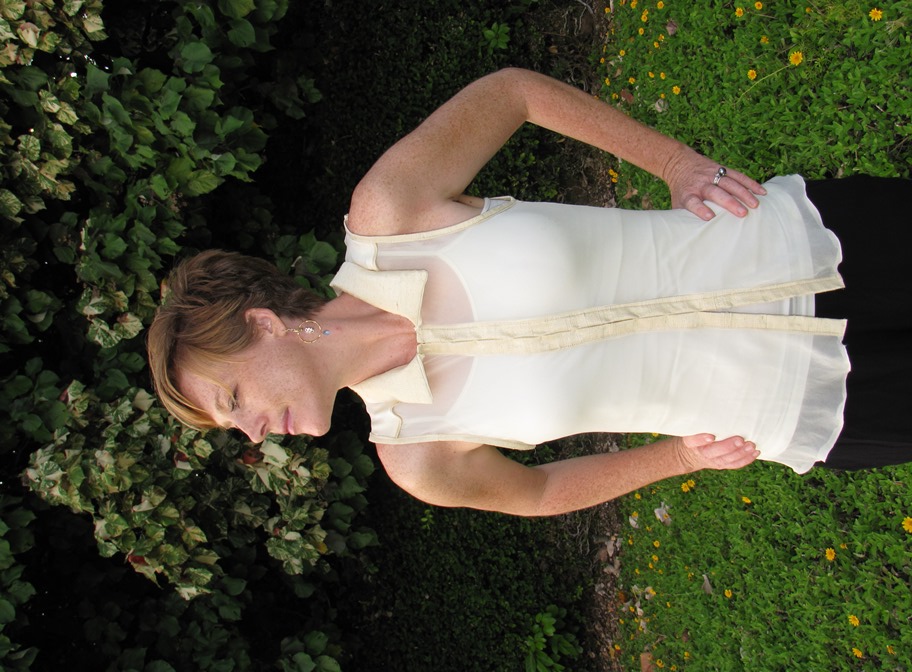
“Some women tuck their wedding dresses away, saving them for a future daughter, while others have them framed to hang in a stairwell or bedroom wall.
I refashioned mine.
My wedding was magical, complete with an ocean sunset, close friends and family, delicious food, dancing, and even fireworks! These were courtesy of a nearby hotel and totally unrelated to our wedding, but nonetheless… I loved every minute of it, especially my gorgeous gown. Wearing it made feel like a movie star, elegant and glamorous.
Yet, this gown that was so precious to me sat in the back of my closet for over four years. I guess I never found an opportunity to wear it again, and as you can tell from the before photo, it was a bit snug! When this week’s Winter White challenge rolled around, I knew that it was time to give it a new life.
Some of you may disagree with my decision. It was a difficult choice, and it took me almost half an hour to make that first cut. Before I began this refashion, I had already spent a good amount of time thinking it over. I do not regret my decision. I don’t have a daughter, and even if I did, I would want her to wear a dress that matched her own style. I don’t have space in my house to frame a rather long wedding dress. And I don’t want it tucked away forever, to be forgotten under a bed or in the back of a closet. I want the spirit of this dress to be part of my everyday life as a reminder of that spectacular evening that changed my life forever.
Using a self-drafted pattern, I created the body of the blouse using the silk chiffon overlay. To add a little detail, I created a separate shoulder and back piece using the polyester underskirt and piping (originally outlining the bodice of the dress). The placket, collar, and sleeve bias were made from the raw silk bodice. I didn’t have enough of the raw silk for the entire collar, so I improvised and used the polyester underneath. I had originally planned to add buttons on the placket, but I couldn’t bring myself to cut buttonholes in the beautiful raw silk. So, I placed hooks and eyes all the way down the front. Whew!
I am so happy with my wedding dress refashion. Now I have a special blouse that I can wear out to a nice dinner or just around town. More details about this refashion can be found at my blog, Feeling Kinda Thrifty.”-Trish
*****
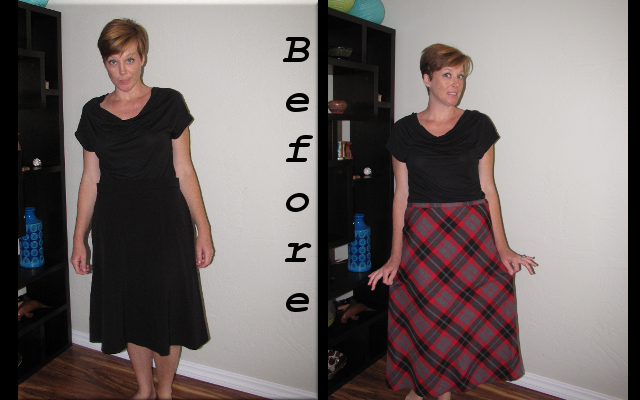
This week, Desarae, from Gladness of Heart really challenged herself:
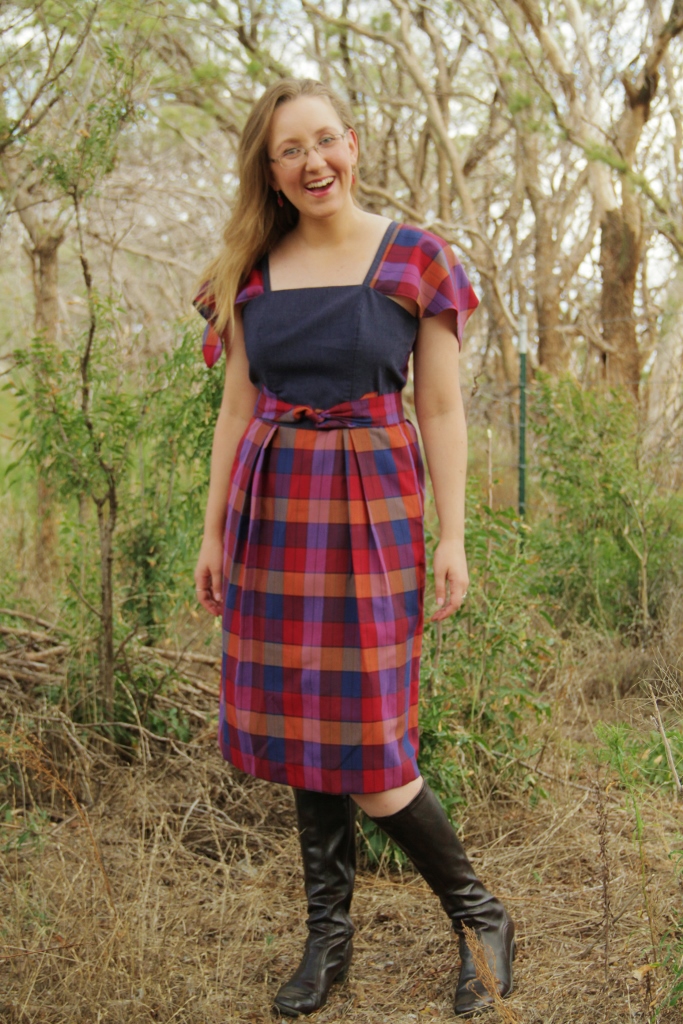
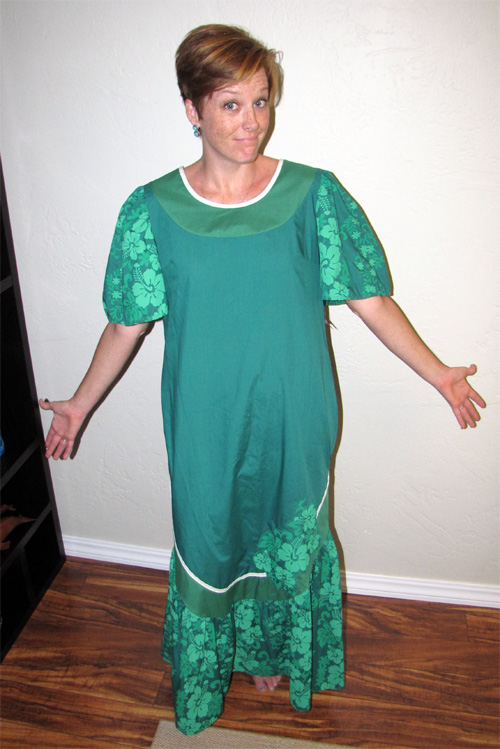
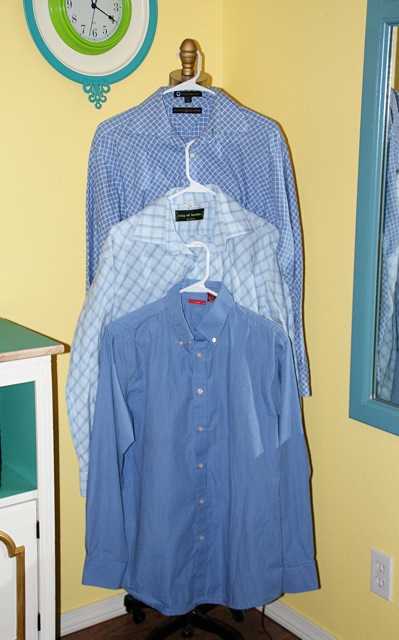
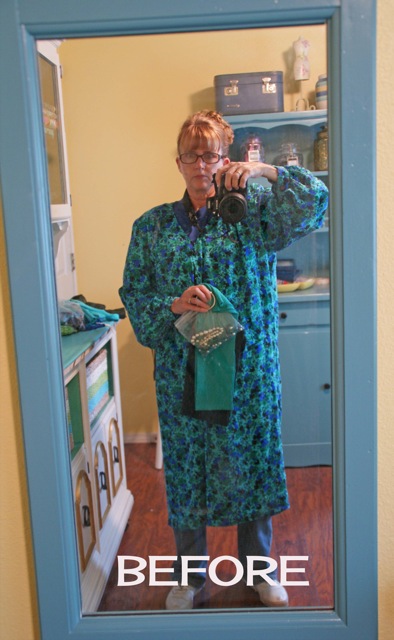
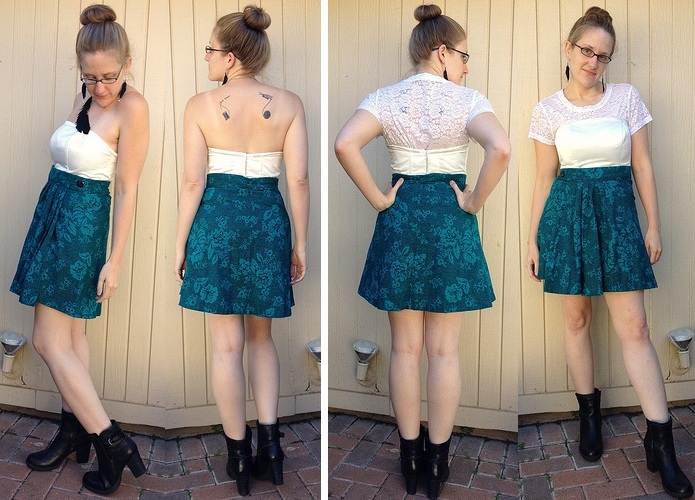
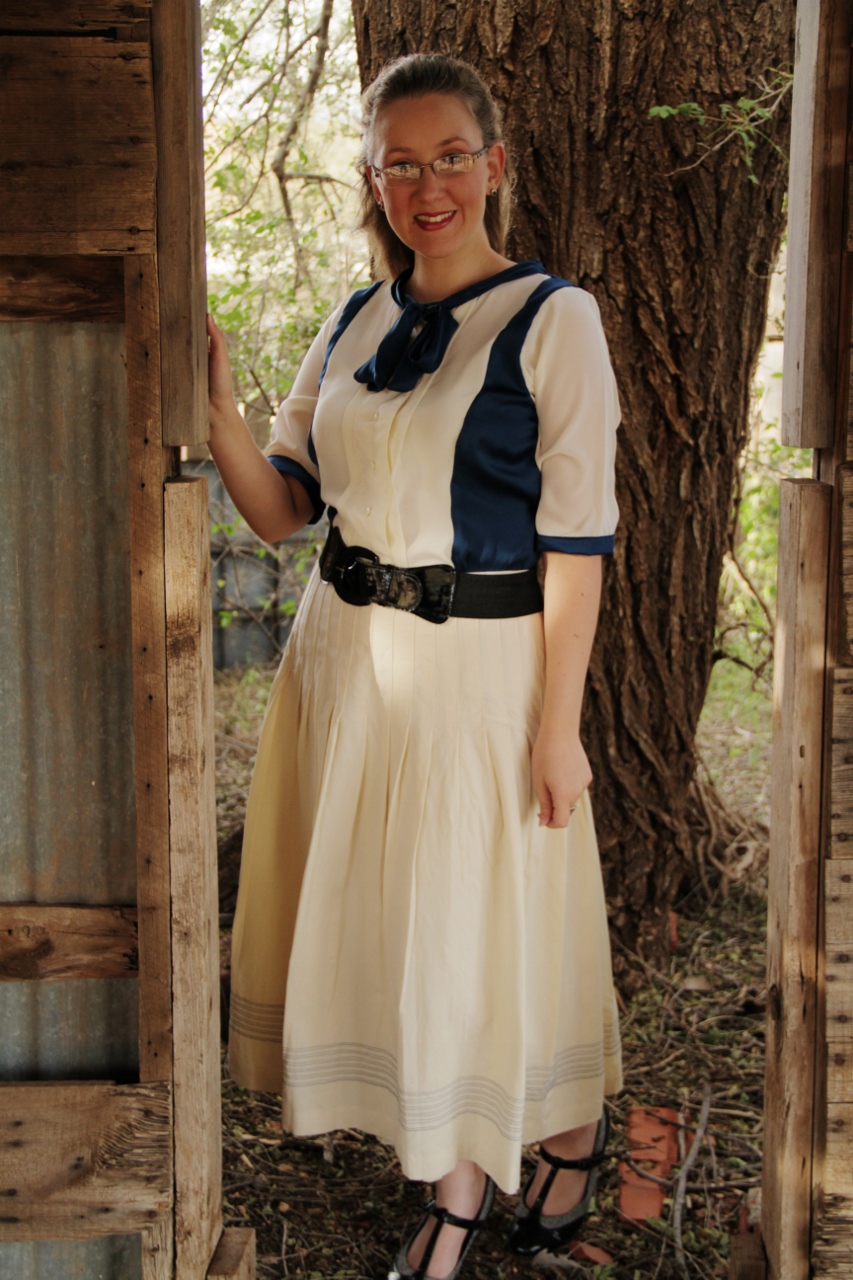
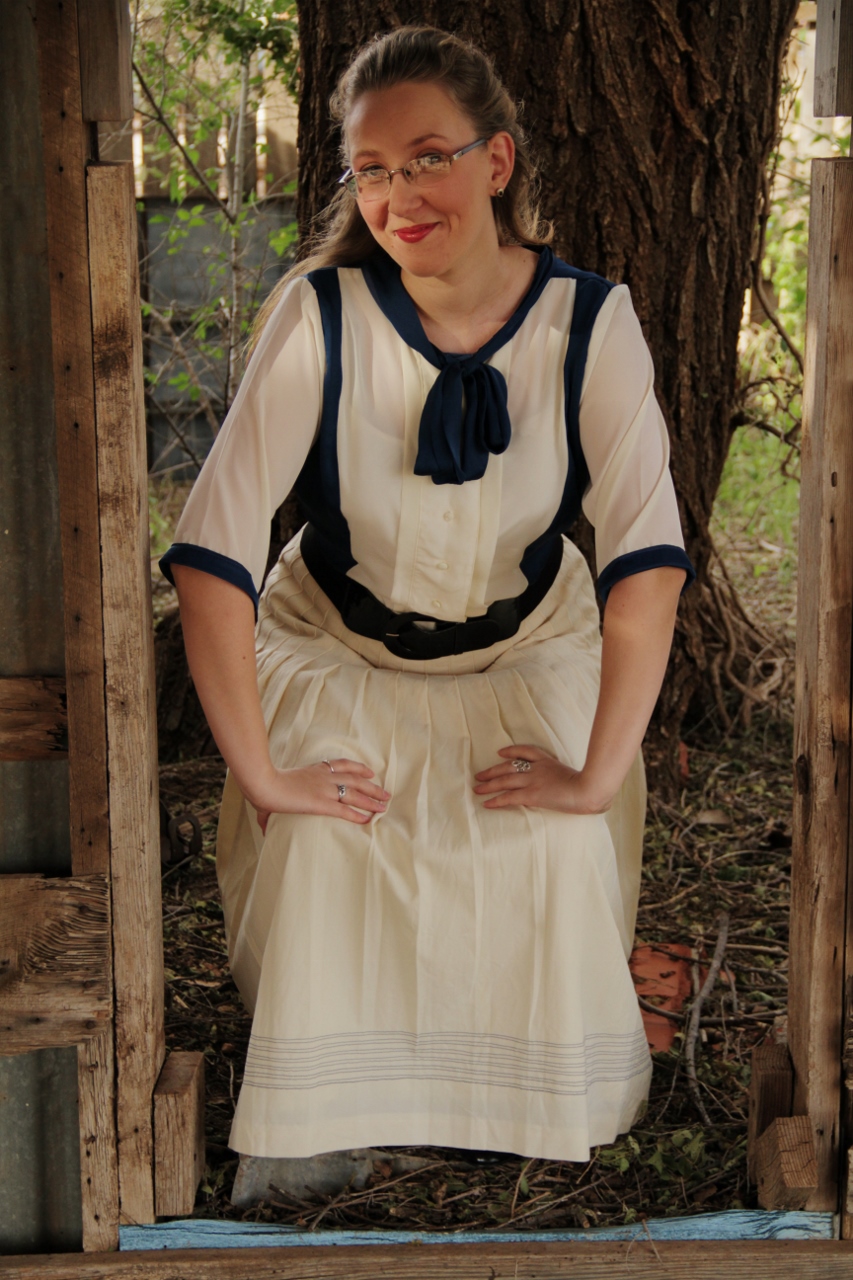
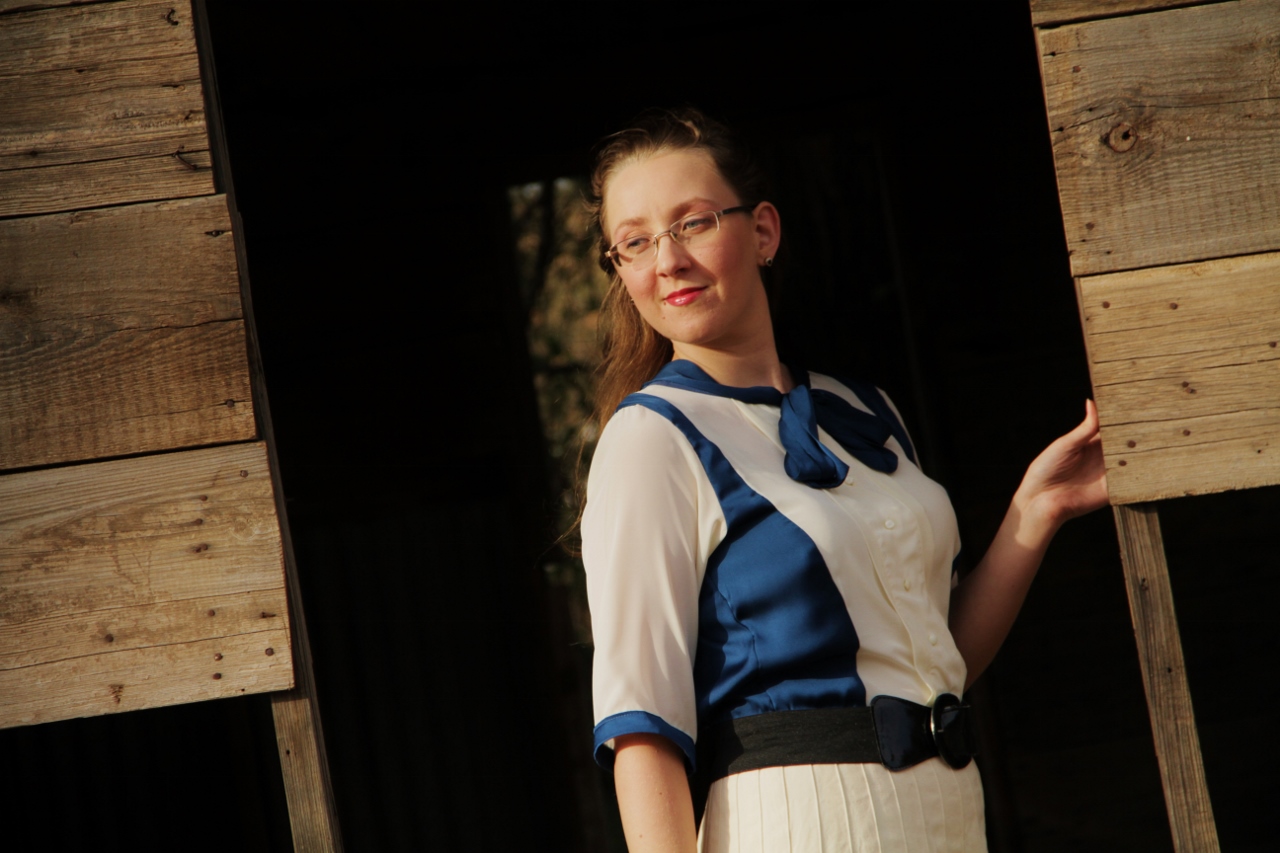
“It is hard to believe this is the last week of Refashion Runway, or as my family has dubbed it, ‘Runaway’, challenge! It is true, during this competition it was easy to let an idea runaway with me! And that was certainly the case with this week’s Winter White project. Let’s just say, I almost bit off more than I could chew and nearly chocked! As a pretty new sewist (sewer…? seamstress…?), I had never worked with silky fabrics before…until this week when I picked up a huge blue top and a lovely cream blouse which was busting buttons at the bosom. I also had a 100% wool pleated skirt which I planned to spice up.
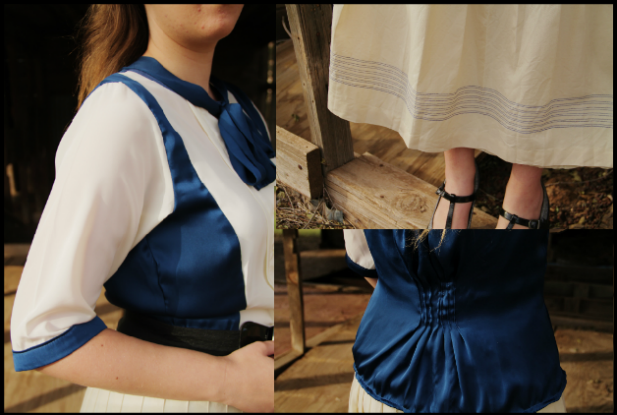
I had a vision for a two toned sort of illusion top, so I set to work tearing off the sleeves and collars of both shirts, as well as the hem of the blue top. I experimented with some designs, but eventually came up with a curvy silhouette that I traced and cut out of the cream top- right out of the middle front so I had the row of buttons and folds.
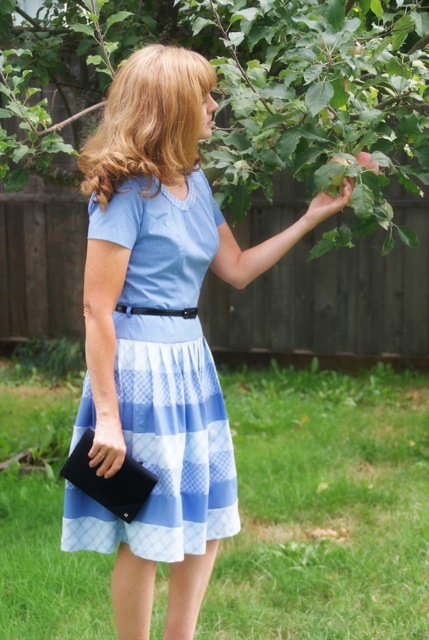
To insert this into the middle of the blue top, I turned it around so the gathered neckline was now in the back and cut down the middle of what used to be the back. Then I spent lots of time pinning and adjusting my cream front just right, which was then sewed to the blue shirt- cutting lots of extra out from it to make it fit right. From there I set to work fitting my top by taking in the sides, shoulders, and adding pleats in the back. I also had to cut down the neckline in the front- this was covered with bias tape to avoid fraying. I reconnected the tie-collar from the blue shirt, and attached the sleeves from the cream blouse. The sleeves I shortened to about 3/4 then finished off with some strips from the bottom hem of the blue shirt. Finally, I hemmed up the bottom raw edge. All of the other joins were done in French Seams.
To spruce up my skirt, I simply straight stitched about a dozen rows around the bottom of the hem in deep blue thread- varying the distance between each to create the appearance of bands. Believe it or not, this outfit took all…stinking…week! I seriously underestimated working with the silky polyester fabric, which had me scurrying frantically to finish up what I thought was going to be a simple project. All in all, I really like the way my outfit turned out, and I’m more than thrilled that I still have my sanity intact!”-Desarae
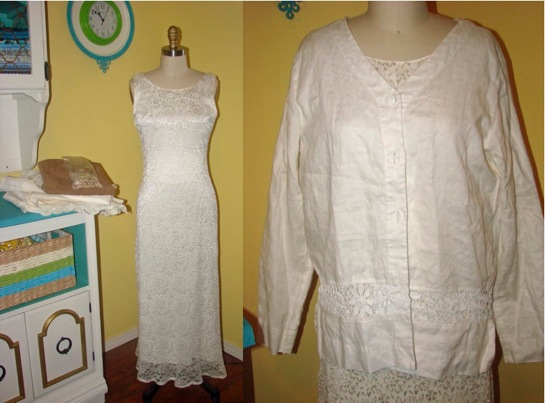
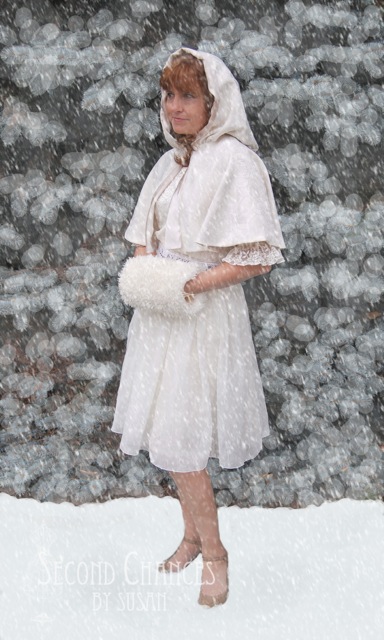
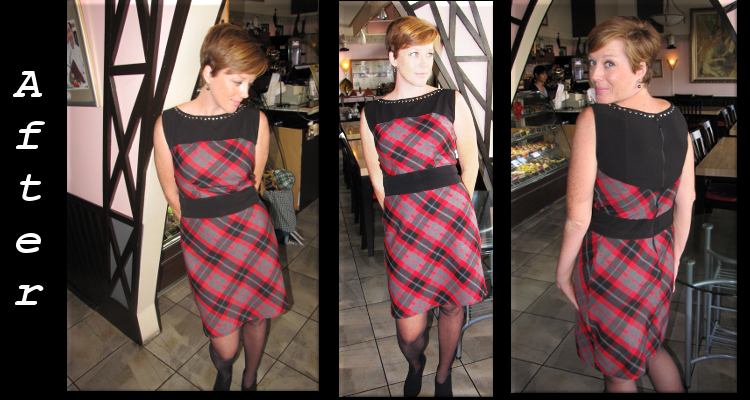
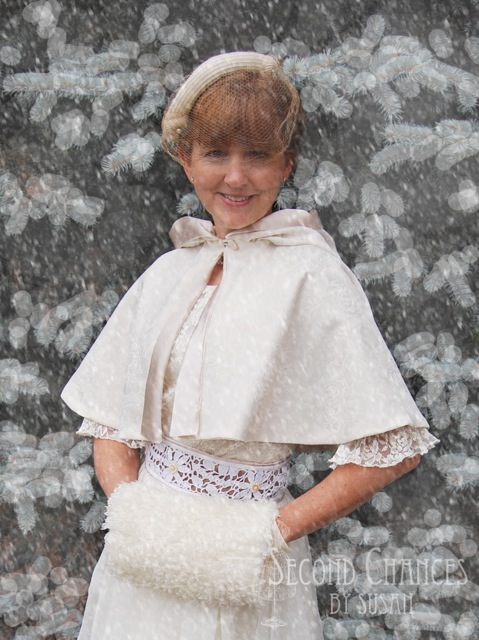
“I know that traditionally when someone refashions something, its usually with the intent of updating an outdated look. Well, this week I went the opposite direction and took a rather current dress and created a retro look that would fit right in with a 1950’s holiday party.
I started with a sleeveless formal dress made from stretch lace, a sheer curtain panel, a drapery panel, a scrap of ultra suede, and a bag of pearls. Part way through the project, I salvaged some crocheted lace from a blouse.
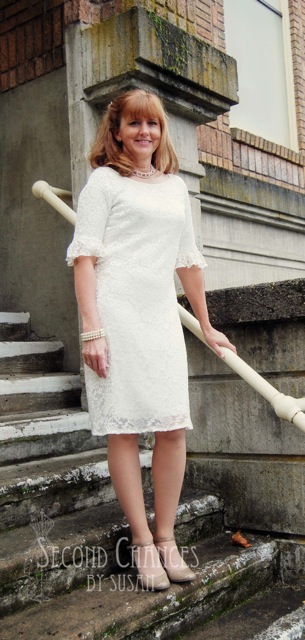
The first thing I did was to chop off the length of the dress and make some sleeves. I decided on 3/4 length sleeves with a ruffle flounce.
The dress would be fine like this, but that’s not much of a refashion if I stopped there.
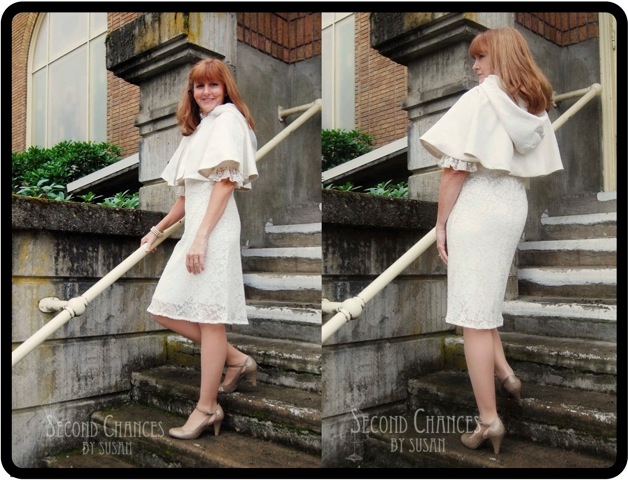
I thought a hooded capelet would be fun. I used the drapery panel and lined it with some satin fabric that I had in my stash.
The dress with the capelet is progressing, but I’m not finished! I wanted a full skirt, but I didn’t want to permanently attach it to the dress for two reasons. One, my dress is made from stretch fabric and I wanted to keep it zipper-free. And, two, I liked the idea of having two different looks from one dress. So I made an overskirt that is attached to a belt.
The overskirt is sheer, but the dress underneath acts like a slip.
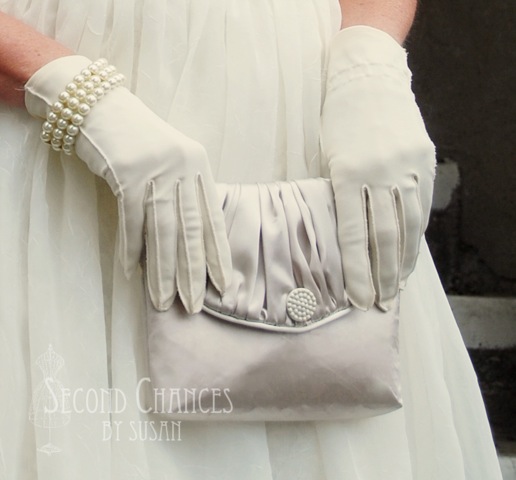
Add in some gloves and a vintage hat and we’re going back in time.
I also made a small clutch to match. I salvaged the satin piping from the original armholes of the dress.
And of course, when its cold outside, a girl needs a muff to keep her warm!
If you would like to see details of how I accomplished this look, you can visit my blog where I’ll be posting a tutorial later this weekend.
I’d also like to say “thanks” to Beth for taking the time to put this whole contest together. I admit it has been a lot of work, but it has also been a lot of fun! Each week really allowed me to think, stretch, and grow. It has been a pleasure to be in the company of such creative women!
Thanks! Susan”
*****
Well, I don’t know about you, but I’m totally ready for some snow, sled rides, warm mittens and holiday parties now. Thanks, Ladies!!!
Here’s your chance to vote for your favorite. The winner of the Winter White challenge will be announced next Saturday, as well as the overall winner of Refashion Runway: Season Two.
Use the poll below to vote for your favorite Winter White Refashion:
*****
Thank you to everyone who has been a part of Refashion Runway: Season Two! From the hard working and talented seamstresses to the prize sponsors to everyone who has left encouraging comments and voted. You all rock!
Could I give you my cute look and ask you all a HUGE favor?
If you haven’t already heard, my blog has been nominated on the Craftsy site for “Best Tutorials in Sewing“. It’s a very close race and I’m up against some pretty big blogs. I was wondering if you’d take a minute and vote for The Renegade Seamstress. The winners will be announced on Tuesday, October 29th.
Here’s the link:
Fingers crossed!
Thank you so very much if you’ve already voted!!
And if you are new to The Renegade Seamstress, here is a link to my tutorials:
“You’ve always had the power my dear, you just had to learn it for yourself.”
Well said, Glinda!
I have to say, the courageous and creative women who have been competing in Refashion Runway this season, have totally embraced what the Good Witch told Dorothy. They have all learned how to use their powers to transform the old and unwanted into something new and beautiful!
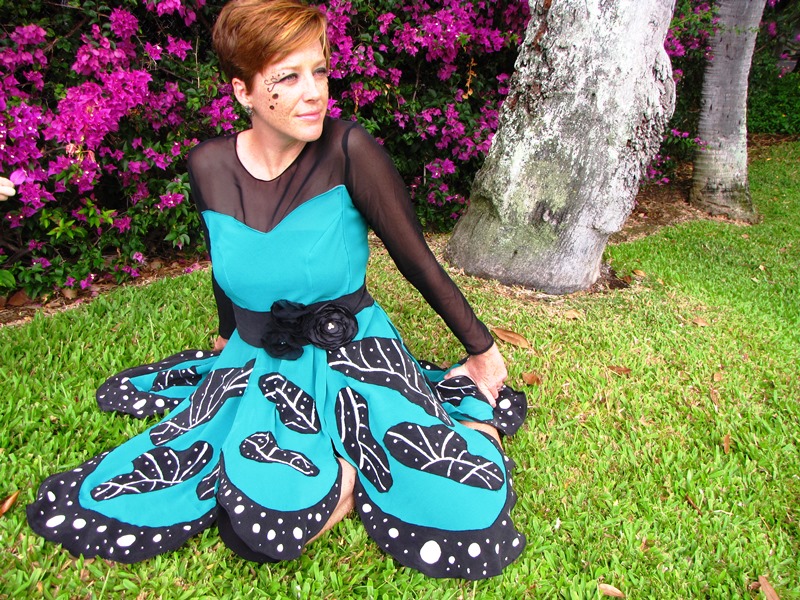
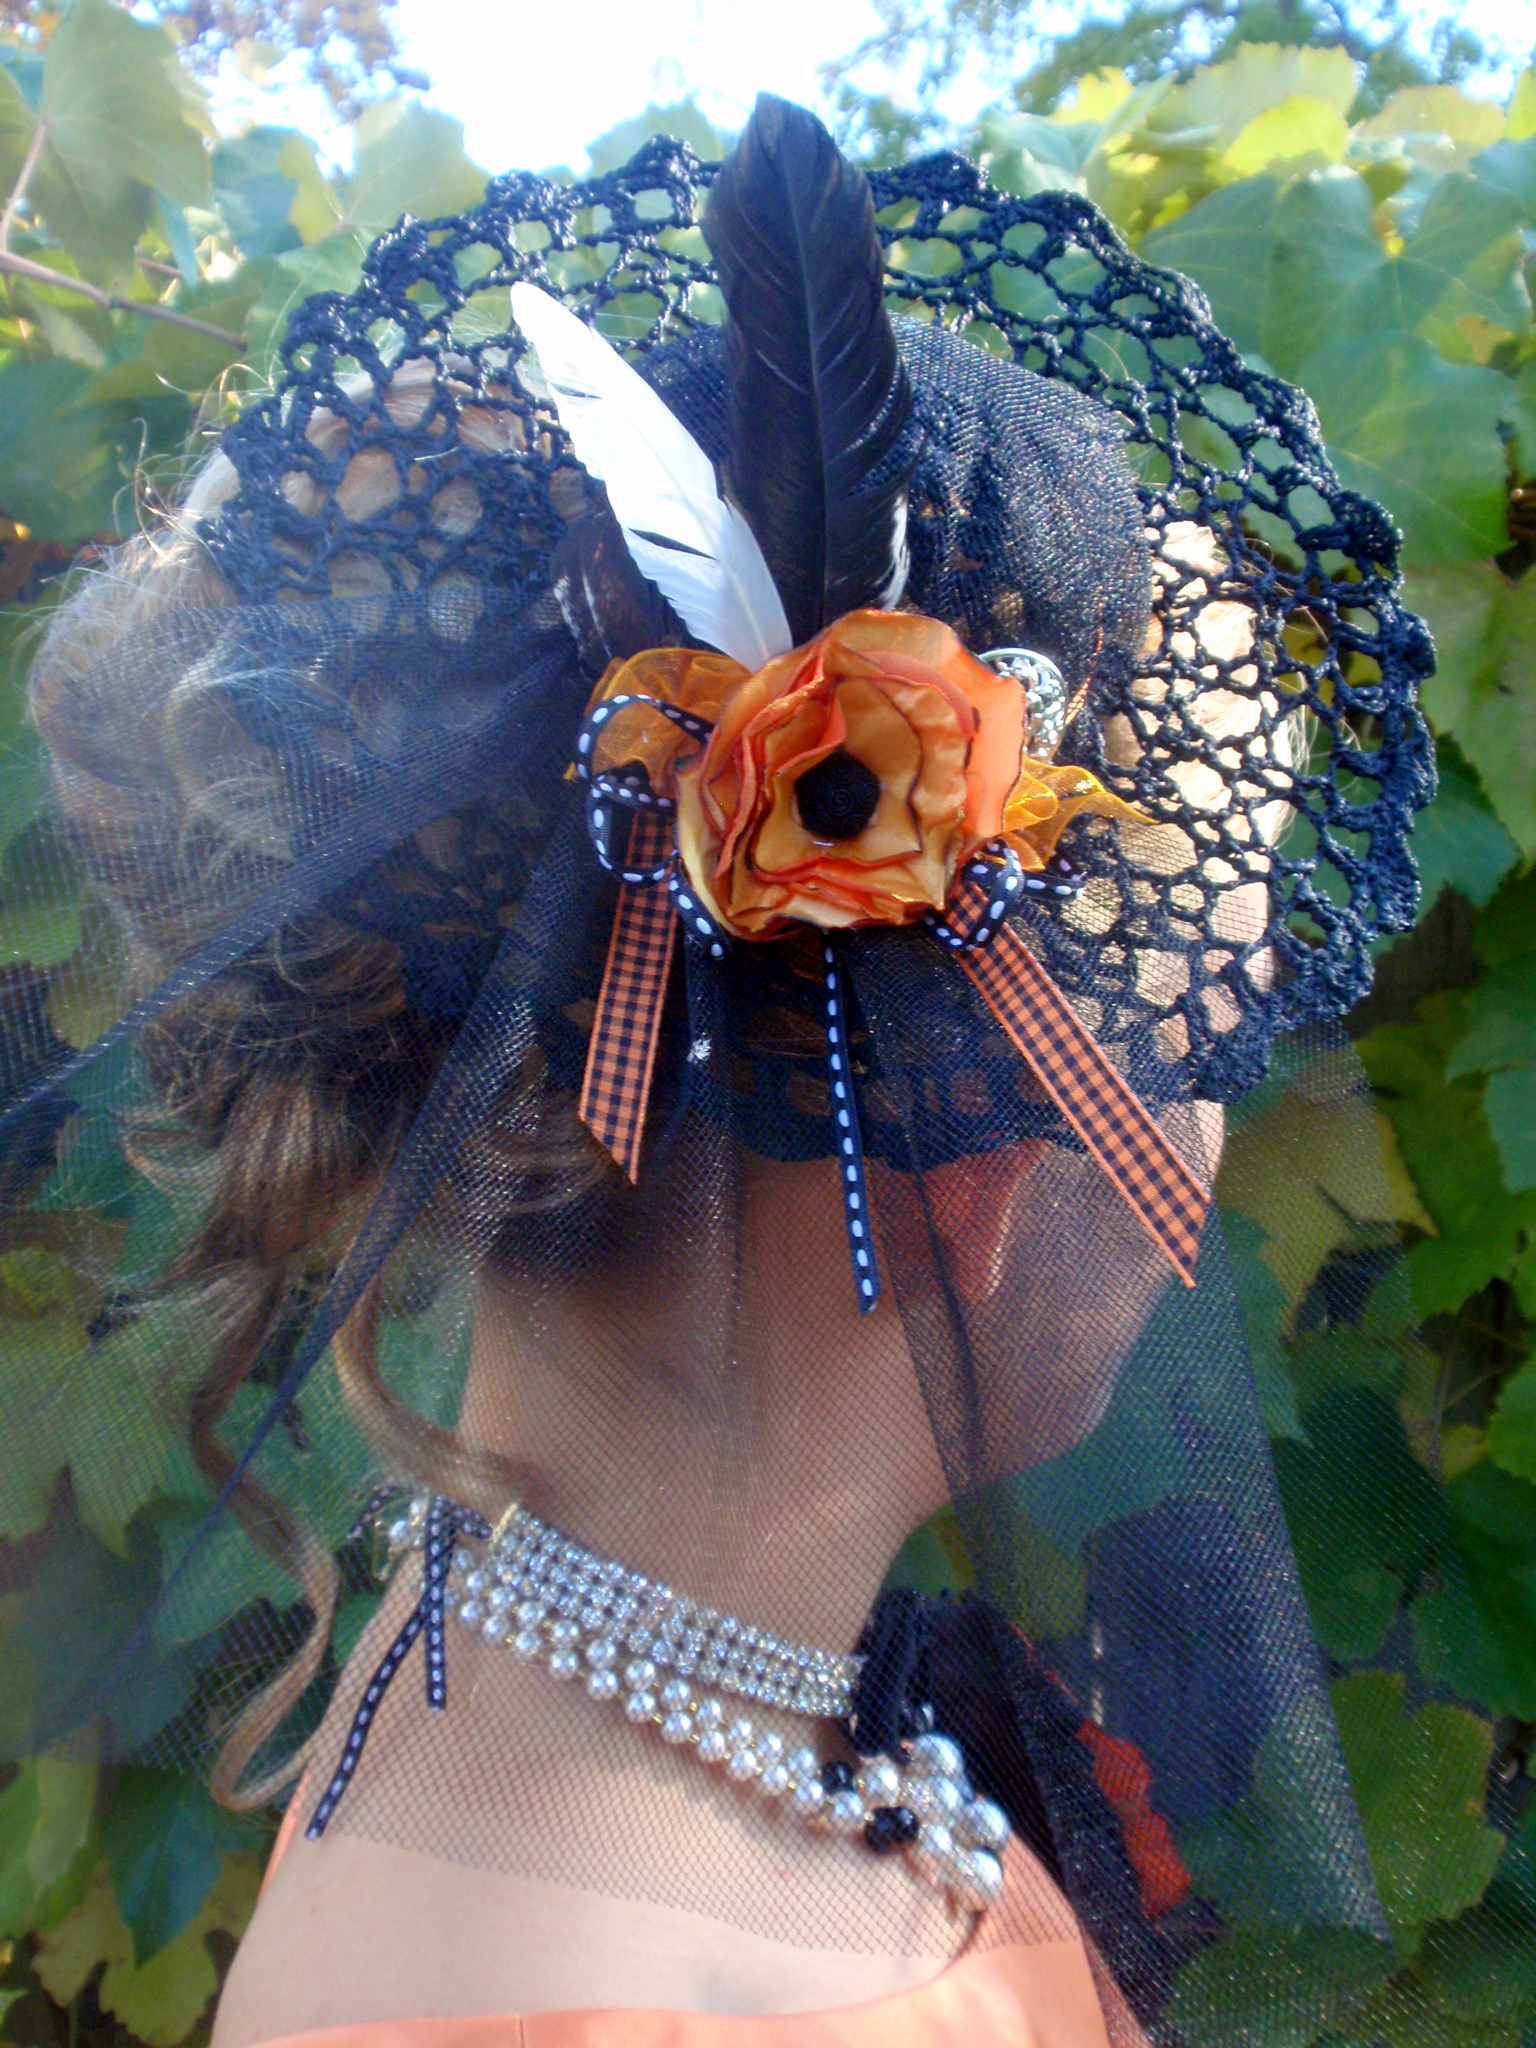
I’m pretty sure Susan, from Second Chances by Susan is a good witch. She used her powers for good this week and won the Halloween Challenge with this stunning refashioned witch costume.
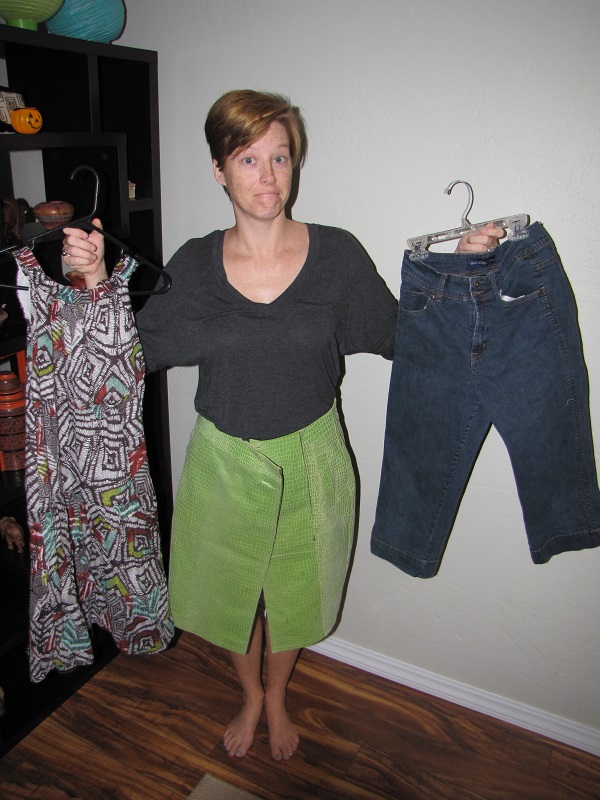
Starting with this menagerie of thrift store clothes,
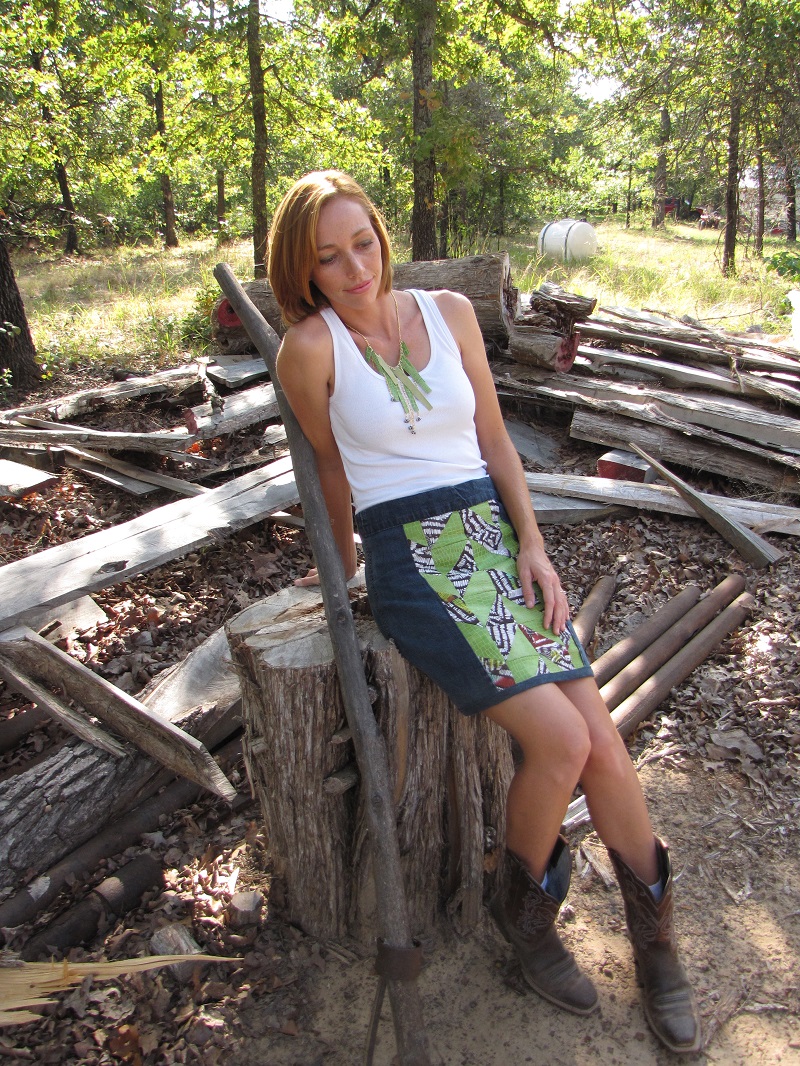
She created this:
Thank you so much, Susan, for sewing into the wee hours of the morning to bring us some incredible inspiration!
And remember:
*****
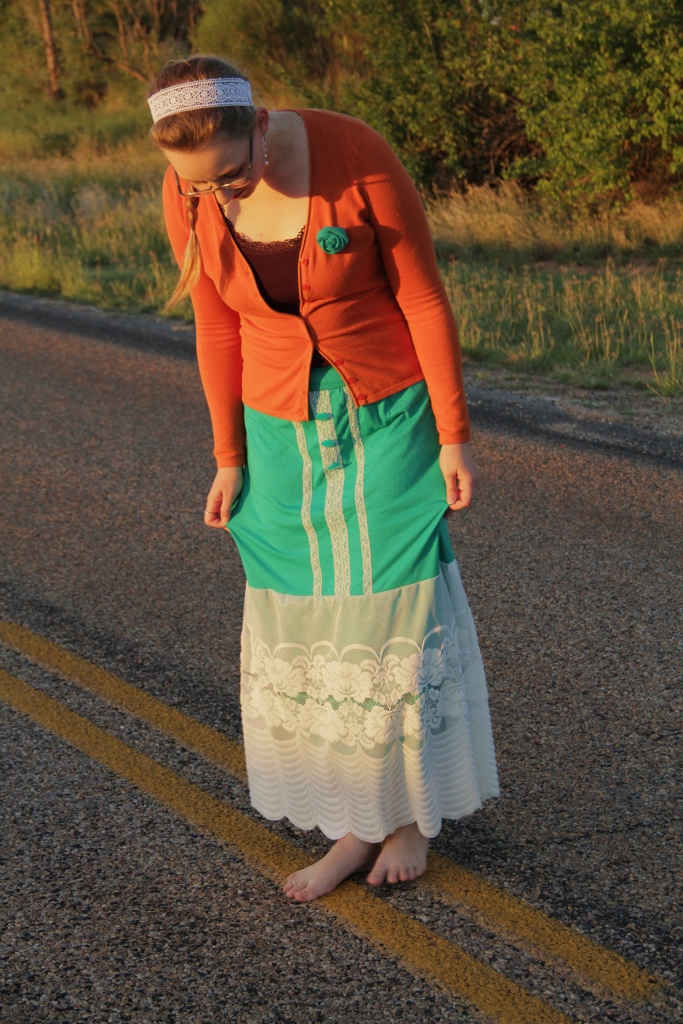
Today, because I want to use MY powers for good, I’m sending all four of these wonderful women on to the next challenge: Winter White.
I think we are all in agreement that Molly needs to start her own blog, so we can keep up with all of her wonderful refashions.
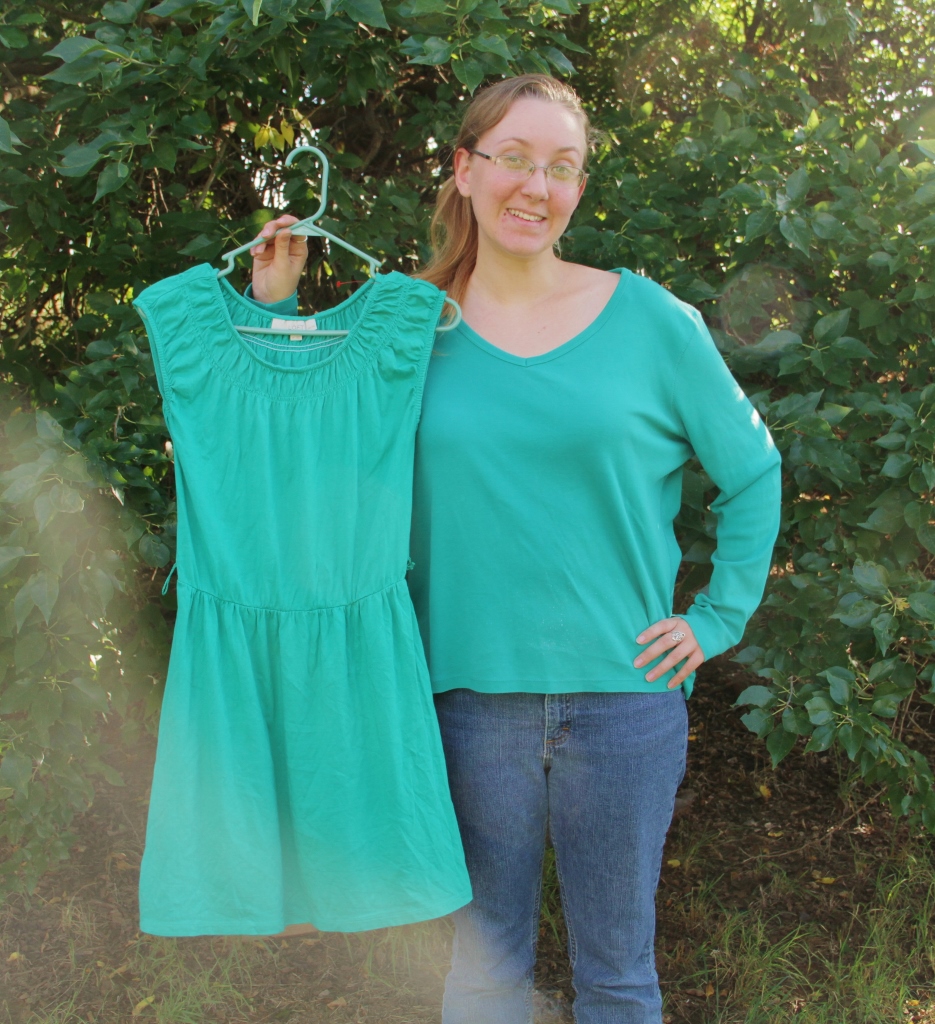
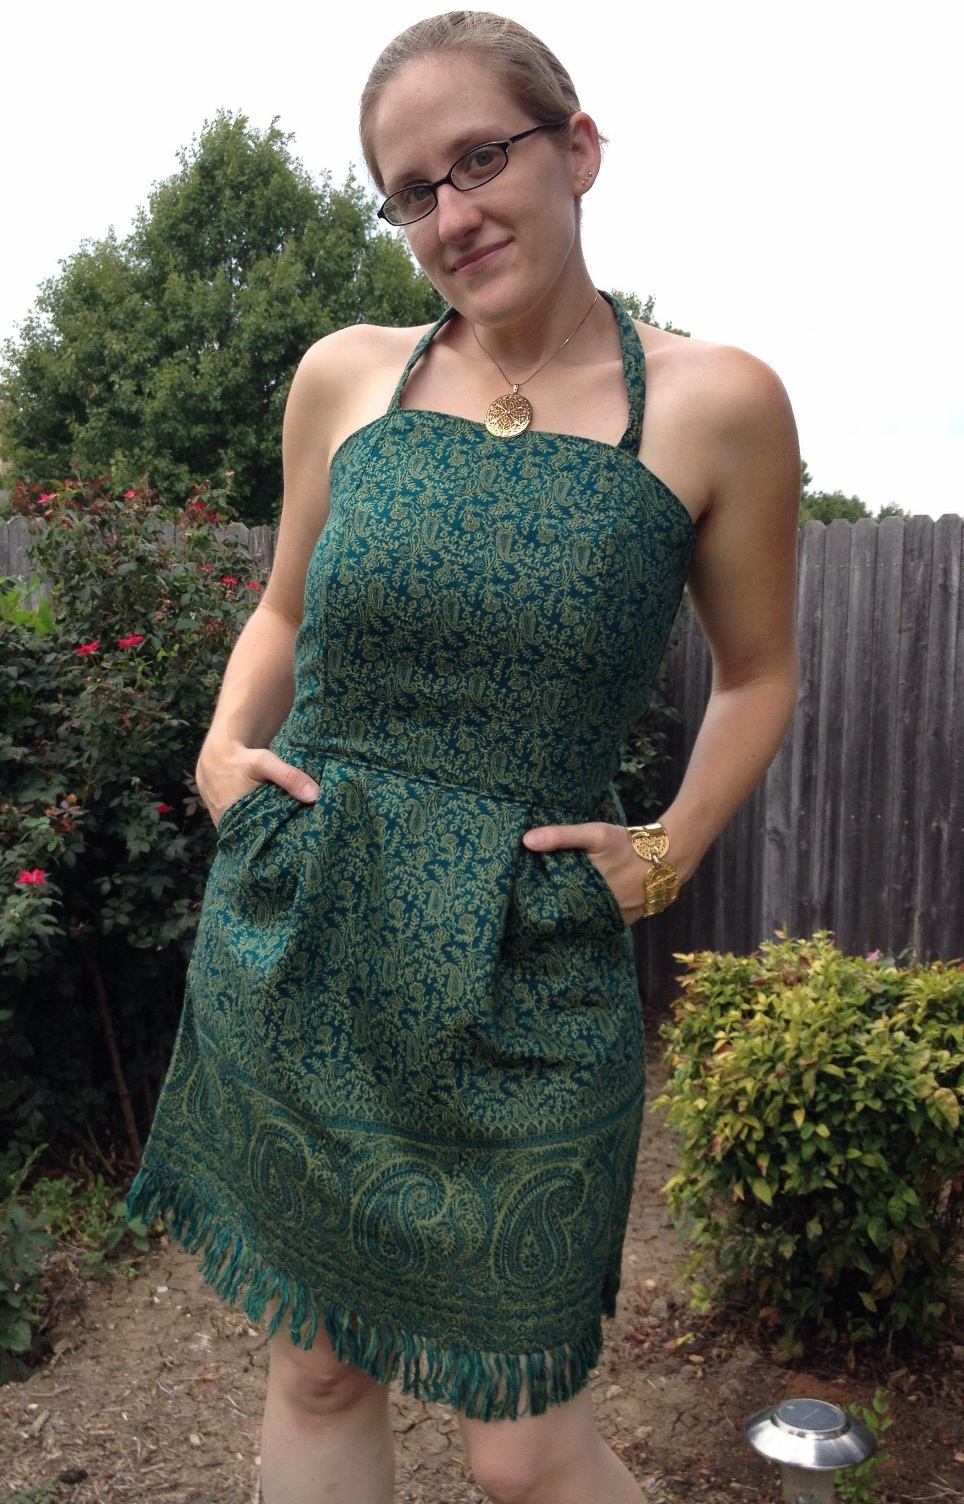
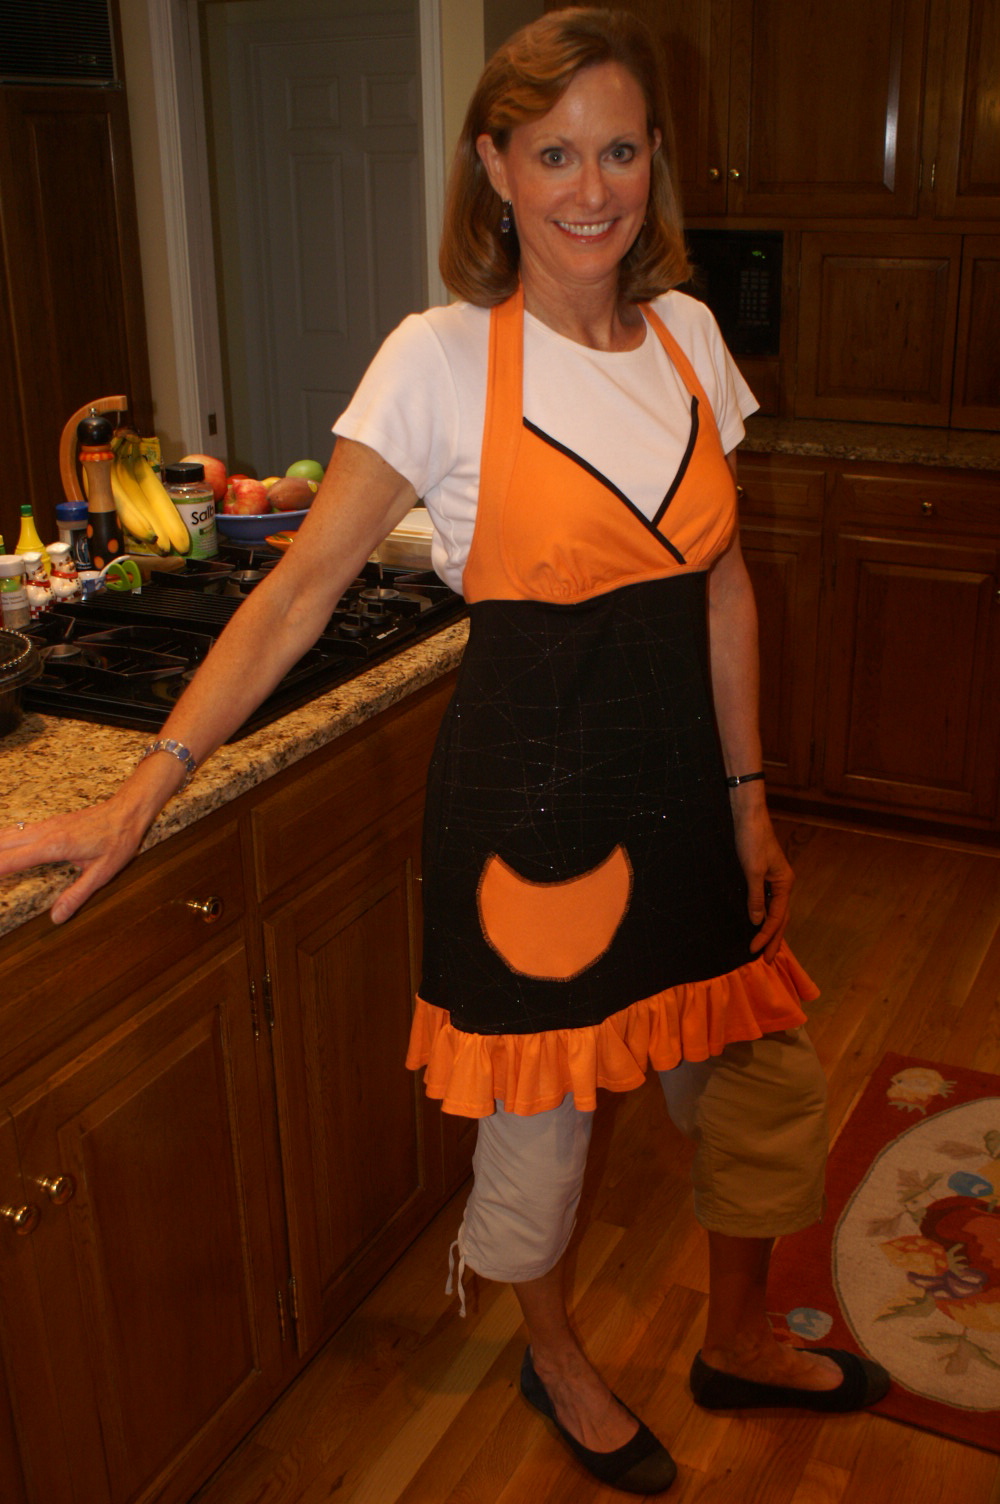
This week, Molly made the perfect apron for her neighborhood Halloween Chili Feed.
“As you can see, I
found an orange knit dress (that had a few holes), as well as a short dress (that
had a shimmery “web-like” look to it).
I took the top off the dress for the bodice
of the apron, and sewed the straps together at the neck to go over my head. I used
the “spider web” fabric for the body, then added a strip of the orange (gathered) at
the bottom. Added the pocket, and orange straps which tie in back.
I will wear this
when making the pot of chili for Halloween night that we share with neighbors as we
greet the “trick or treaters.”-Molly
Sounds like she lives in a fun neighborhood!
Thanks for sewing along with us, Molly!
*****
Jen, from Diary of a MadMama had a little bit of a Halloween dilemma this year, which she solved with a dose of refashioning. Way to go, Jen!
“My daughter has dance class during trick-or-treating time, and so she won’t
be able to go trick-or-treating. She will, however, be able to wear a
costume to dance class (as long as it doesn’t hinder her from dancing. She
wanted to go as a zombie, so I found an old costume I bought her a couple
of years ago (for 49-cents), that she had outgrown, and refashioned it into
a tutu. After a little hair and makeup, voilá, zombie complete!”-Jen
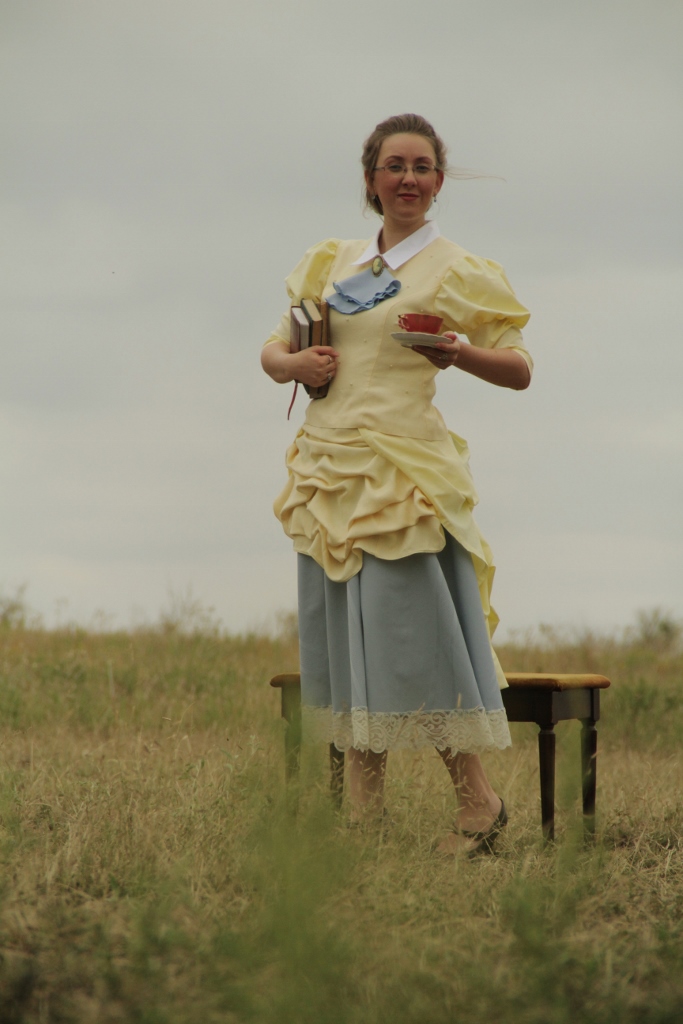
She started with, “a bridemaids’ dress and ended up with….Victorian Steampunk Halloween Fun!”-Deanna
*****
Thanks for sewing along everyone!
If you haven’t had a chance to vote for your favorite Halloween Refashion, you can still vote until midnight tonight. The winner of the Halloween challenge will be announced tomorrow morning.
Thanks for voting everyone!!!
*****
I would also like to say a BIG thank you to everyone who has already voted for The Renegade Seamstress over at Craftsy!!!
The Renegade Seamstress has been nominated for the “Best Tutorials in Sewing” award over at Craftsy.
I would SO LOVE to win this honor. To me, winning this award would be like receiving an Oscar, Emmy or Grammie. My lil’ ol’ blog is up against some pretty big blogs so the competition is fierce. The voting is open until October 28th and I really need your vote. If you haven’t had a chance to vote yet, here is the link:
If this is your first time with The Renegade Seamstress, you can see my tutorials here:
A big thank you to all of you who have already voted for The Renegade Seamstress over at the Craftsy site, but just in case you haven’t had a chance to vote for me yet, here is the information:
The Renegade Seamstress has been nominated for the “Best Tutorials in Sewing” award over at Craftsy.
To me, winning this award would be like receiving an Oscar, Emmy or Grammie. My lil’ ol’ blog is up against some pretty big blogs so the competition is fierce. The voting is open until October 28th and I really need your vote. If you haven’t had a chance to vote yet, here is the link:
Scroll down to The Best Tutorials in Sewing. Click on the vote button under The Renegade Seamstress. Scroll down in that box to enter your email address and click on the submit button.
If you have already voted, thank you from the bottom of my heart!
If you are new to The Renegade Seamstress, you can see my tutorials here: